Arocon Roofing and Construction
  • About Us
    • Our Team
    • Reviews
    • Financing
    • Careers
    • Blog
  • Services
    • Roofing
      • Roof Repair
      • Roof Replacement
      • Roof Tune-Up/Maintenance
      • Roof Inspection
      • Metal Roofing
      • Commercial Roofing
    • Gutters
      • Gutter Installation
      • Gutter Tune-Up/Maintenace
      • Gutter Cleaning
        • Gutter Protection
    • Siding
    • Skylights
    • Windows
    • Roof and Gutter Tune Up
    • Home Confidence Plan
  • Claims
  • Service Area
    • Westminster, MD
      • Roofing
      • Claims
    • Cambridge, MD
      • Roofing
      • Claims
    • Alexandria, VA
      • Roofing
      • Claims
  • 410-861-6767
  • FREE ESTIMATE
  • Menu Menu
Call now Free Estimate
An image depicting the expected lifetime of an asphalt shingle roof

Understanding the Lifetime of Asphalt Shingle Roof: What to Expect

November 21, 2024/in Uncategorized/by Arocon


Asphalt shingle roofs typically last between 25 and 30 years, contributing to the overall lifetime of asphalt shingle roof. In this article, we’ll cover what affects this lifespan, from material quality to maintenance. You’ll get practical tips to maximize your roof’s longevity.

Key Takeaways

  • The average lifespan of asphalt shingle roofs ranges from 25 to 30 years, with factors like material quality, installation, and maintenance affecting longevity.

  • Three types of asphalt shingles—3-tab, architectural, and luxury—offer varying lifespans and durability, with luxury shingles potentially lasting over 30 years.

  • Regular inspections, proper ventilation, and prompt repairs are essential for extending the life of an asphalt shingle roof and preventing costly damage.

Understanding the Lifetime of Asphalt Shingle Roof: What to Expect

An image depicting the expected lifetime of an asphalt shingle roof

Asphalt shingle roofs are a popular choice among homeowners due to their affordability and ease of installation. Generally, the average roof’s lifespan of an asphalt shingle roof ranges from 25 to 30 years, with some lasting even longer with proper care and maintenance. However, several factors can influence how long a roof lasts, including the quality of the roofing materials used, the installation quality, and the local weather conditions.

Imagine the peace of mind knowing your roof will protect your home through decades of storms, sun, and seasons changing. But what should you realistically expect from your asphalt shingle roof? Understanding these expectations helps you plan for maintenance and eventual replacement, ensuring your home remains secure and beautiful for years to come.

Introduction

Homeowners must understand the lifespan of asphalt shingle roofs. This significant investment requires knowledge about the roof’s age, condition, and maintenance needs, especially when buying a home.

Being informed aids in decision-making and ensures the roof’s longevity, thereby protecting the home’s value and safety.

Average Lifespan of Asphalt Shingle Roofs

An image representation of the average lifespan of asphalt shingle roofs

The average lifespan of asphalt shingles is generally between 25 to 30 years, though some can last over half a century with proper installation and maintenance. Asphalt shingles are favored for their economic pricing and ease of installation, but their durability depends significantly on factors such as installation quality and ongoing maintenance. Manufacturers typically provide warranties ranging from 15 to 30 years, but these warranties often require registration to be valid.

Understanding the longevity of asphalt shingles requires looking at the different types: 3-tab shingles, architectural shingles, and luxury shingles. Each offers varying benefits and lifespans.

Lifespan of 3-Tab Shingles

3-tab shingles are known for their affordability and are commonly used in many homes. These shingles generally last between 15 and 20 years, providing a balance of cost and durability. While they are less expensive, their simpler design and thinner profile make them less durable than other types of asphalt shingles.

Lifespan of Architectural Shingles

Architectural shingles, also known as dimensional shingles, have an expected lifespan ranging from 25 to 30 years. They are built thicker than 3-tab shingles, which contributes to their enhanced durability and longer lifespan. This added thickness and design complexity make architectural shingles a preferred choice for homeowners looking for longevity and aesthetic appeal.

Opting for architectural shingles is an investment in your home’s future. Their durability enhances peace of mind and adds to the property’s value and curb appeal.

Lifespan of Luxury Shingles

Luxury shingles, often referred to as premium shingles, can last more than 30 years, with proper care extending their lifespan up to 50 years. These shingles are designed to withstand extreme weather conditions, with wind uplift resistance of around 110 MPH to 130 MPH. Additionally, luxury shingles are crafted to mimic the appearance of more expensive materials like cedar shake or slate, adding significant aesthetic value to high-end homes.

Luxury shingles offer a combination of longevity, resilience, and superior aesthetics, making them ideal for homeowners seeking a durable and visually appealing roof.

Key Factors Affecting Asphalt Shingle Roof Longevity

An image highlighting key factors affecting asphalt shingle roof longevity

The longevity of an asphalt shingle roof depends on several key factors: the quality of materials, proper installation, weather conditions, and regular maintenance. High-quality materials and proper installation significantly extend the roof’s lifespan, while extreme weather and poor maintenance can reduce it.

By understanding these factors, homeowners can take proactive steps to maximize their roof’s life expectancy.

Quality of Roofing Materials

Material quality greatly influences an asphalt shingle roof’s durability and lifespan. High-quality materials enhance longevity, while low-quality ones reduce it. Underlayment adds extra protection and positively impacts the roof’s lifespan.

Consulting a roofing professional ensures you choose the right quality and type of materials, leading to a longer-lasting roof.

Installation Quality

A reputable roofing contractor’s proper installation ensures a durable asphalt shingle roof. Poor installation can cause leaks and shingle loss, reducing the roof’s lifespan. Workmanship warranties, typically lasting 5 to 10 years, offer some quality assurance.

Correct installation by professionals prevents many future problems, ensuring your investment in an asphalt shingle roof pays off long term.

Weather Conditions

Weather conditions significantly impact asphalt shingles’ lifespan. Abrupt temperature changes can damage shingles, while extreme weather events like high winds and heavy storms can cause cracks or tear-offs, accelerating roof degradation.

Proper ventilation mitigates weather-related issues like ice dams, which can cause water damage. Awareness of weather impacts helps in taking preventive measures to protect your roof.

Maintenance and Repairs

Regular maintenance and prompt repairs are crucial for extending an asphalt shingle roof’s lifespan. Maintenance identifies minor issues before they escalate, potentially avoiding a complete roof replacement. For instance, granules in the gutter indicate shingle degradation and should be promptly addressed.

Neglecting roof damage can lead to significant, costly issues. Regular inspections and timely repairs are essential for maintaining the roof’s condition and extending its lifespan.

Signs Your Asphalt Shingle Roof Needs Attention
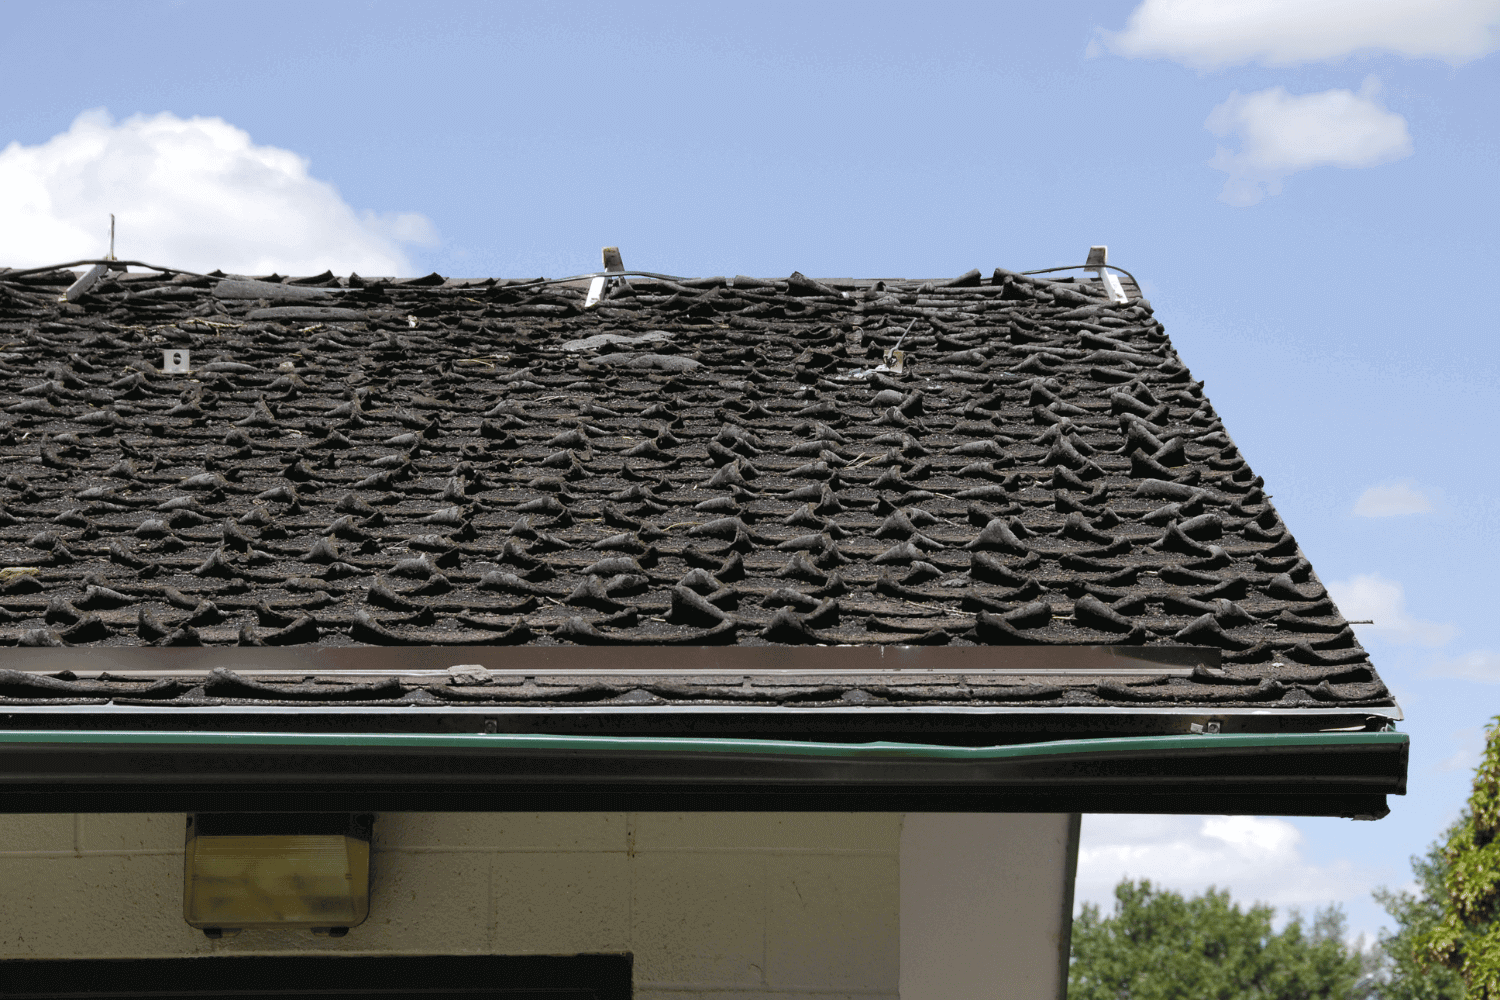
An image showing signs that an asphalt shingle roof needs attention

Recognizing signs that your asphalt shingle roof needs attention is crucial. Common signs include cracked or missing shingles and disarray in the asphalt coating. These indicators suggest the roof may need repair or replacement to prevent further damage.

Ignoring these signs can lead to severe problems like increased energy bills, water damage, mold growth, pest infestations, and decreased property value.

Here are some specific signs that your asphalt shingle roof needs attention.

Cracked or Missing Shingles

Cracked or missing shingles significantly compromise your asphalt shingle roof’s integrity. Hairline fractures can cause leaks and further damage. Shingles are critical for protection, and their damage or absence can compromise the entire roofing system.

Granules in Gutters

Granules in gutters can be an early warning sign of asphalt shingles deteriorating. Shingles lose granules with age due to sun exposure and weather conditions, indicating possible material failure and need for replacement.

Monitoring gutters for granules helps detect potential roofing issues early.

Sagging Roof Deck

A sagging roof deck is a severe issue requiring immediate attention. Lightly push at the spot with a broom; if it feels wet or moves, a new roof is needed immediately.

Damaged flashing can also cause water seepage, further compromising the home’s infrastructure.

How to Extend the Life of Your Asphalt Shingle Roof
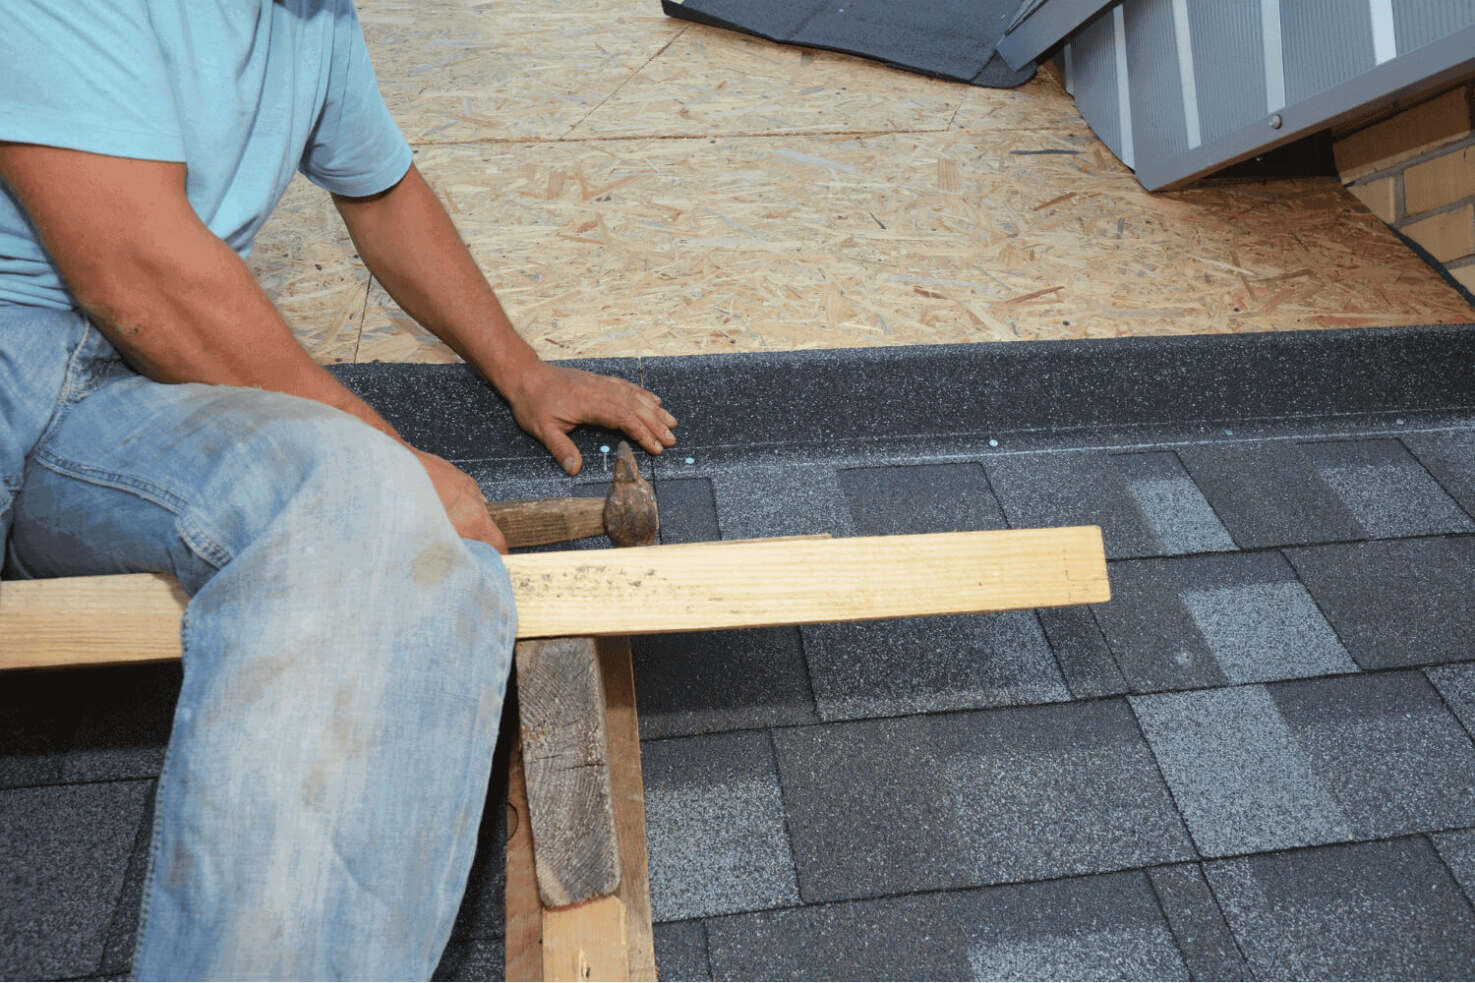
An image demonstrating how to extend the life of your asphalt shingle roof

Extending the life of your asphalt shingle roof involves regular maintenance and taking proactive measures. Regular inspections help identify minor issues early, preventing costly repairs later. Additionally, dark-colored roofs absorb more heat, which can lead to faster deterioration over time. Foot traffic on a roof can also contribute to physical wear, reducing its lifespan.

Arocon Roofing and Construction offers services to maintain and enhance asphalt shingles’ lifespan. Their Roof and Gutter Tune-Up includes inspections and maintenance tasks to prolong roof life.

Here are some specific practices to extend your roof’s life.

Regular Roof Inspections

Annual professional inspections identify potential issues before they become serious problems. Regular roof inspections can significantly increase asphalt shingles’ longevity by addressing minor repairs promptly and preventing extensive damage.

Proper Ventilation and Insulation

Proper ventilation and insulation are critical for maintaining the health and longevity of your asphalt shingle roof. Proper insulation prevents shingle overheating, which can shorten lifespan. Attic insulation regulates temperatures, reducing damage from contraction and expansion due to extreme weather.

Adequate attic ventilation ensures an even temperature year-round, minimizing damage from extreme heat or cold. Inadequate ventilation can cause cracked shingles, adhesive deterioration, swollen trusses, and mold, significantly reducing the roof’s lifespan.

Proper ventilation and insulation are proactive steps in maintaining your roof’s durability.

Prompt Repairs

Promptly addressing minor repairs prevents them from escalating into larger, more expensive issues. Immediate repair or replacement of damaged shingles prevents leaks and further roof damage, protecting the entire roofing system.

Quickly addressing roof repairs not only extends the roof’s life but also saves on potential high repair costs in the future.

Professional Services from Arocon Roofing and Construction

Since 2008, Arocon Roofing and Construction has provided top-notch roofing company services, focusing on quality materials and excellent customer service. They offer various services to maintain and extend the life of your asphalt shingle roof, ensuring your home remains protected and aesthetically pleasing.

Their services include the Roof and Gutter Tune-Up, involving essential maintenance tasks to keep your roof in optimal condition, and complimentary consultations for larger roofing projects to provide homeowners with expert advice tailored to their specific needs.

Roof and Gutter Tune-Up

Arocon’s Roof and Gutter Tune-Up service starts at $199 and includes essential minor maintenance tasks. This service involves repairs such as replacing up to five blown shingles, fixing deteriorated pipe gaskets, and sealing vents and flashings.

Customers receive before and after photos of the roof’s condition, ensuring transparency and peace of mind about the maintenance performed.

Complimentary Consultations

Arocon Roofing offers complimentary consultations for larger roofing projects, ensuring homeowners receive expert advice tailored to their specific needs. These consultations evaluate larger repair and replacement projects for asphalt shingle roofs, providing comprehensive insights and solutions.

Summary

In summary, understanding the lifespan of an asphalt shingle roof and the factors that affect it is crucial for homeowners. The type of shingles, quality of materials, installation quality, weather conditions, and regular maintenance all play significant roles in determining how long a roof lasts. Recognizing signs of wear and addressing them promptly can prevent costly repairs and extend the roof’s life.

By investing in regular inspections, proper ventilation and insulation, and prompt repairs, homeowners can ensure their asphalt shingle roof remains in excellent condition for many years. Professional services from companies like Arocon Roofing and Construction can provide the expertise and support needed to maintain and enhance the durability of your roof. Protect your investment and enjoy the peace of mind that comes with a well-maintained roof.

Frequently Asked Questions

What is the average lifespan of an asphalt shingle roof?

The average lifespan of an asphalt shingle roof is typically between 25 to 30 years. However, with proper installation and maintenance, some roofs can last over 50 years.

What factors affect the lifespan of an asphalt shingle roof?

The lifespan of an asphalt shingle roof is primarily influenced by the quality of materials used, the quality of the installation, prevailing weather conditions, and the frequency of maintenance and repairs. Ensuring high standards in these areas can significantly extend the roof’s longevity.

What are the signs that my asphalt shingle roof needs attention?

Your asphalt shingle roof needs attention if you notice cracked or missing shingles, granules accumulating in your gutters, or a sagging roof deck. Addressing these issues promptly can prevent further damage.

How can I extend the life of my asphalt shingle roof?

To extend the life of your asphalt shingle roof, conduct regular inspections, maintain proper ventilation and insulation, and address repairs promptly. Taking these steps will help ensure your roof remains in good condition for years to come.

What services does Arocon Roofing and Construction offer for roof maintenance?

Arocon Roofing and Construction provides roof maintenance services such as the Roof and Gutter Tune-Up and complimentary consultations for larger roofing projects. These services ensure the longevity and effectiveness of your roofing system.


https://www.aroconllc.com/wp-content/uploads/2024/11/An-image-depicting-the-expected-lifetime-of-an-asphalt-shingle-roof.png 1000 1500 Arocon https://www.aroconllc.com/wp-content/uploads/2024/09/arocon-logo.webp Arocon2024-11-21 08:00:092024-11-21 19:32:59Understanding the Lifetime of Asphalt Shingle Roof: What to Expect
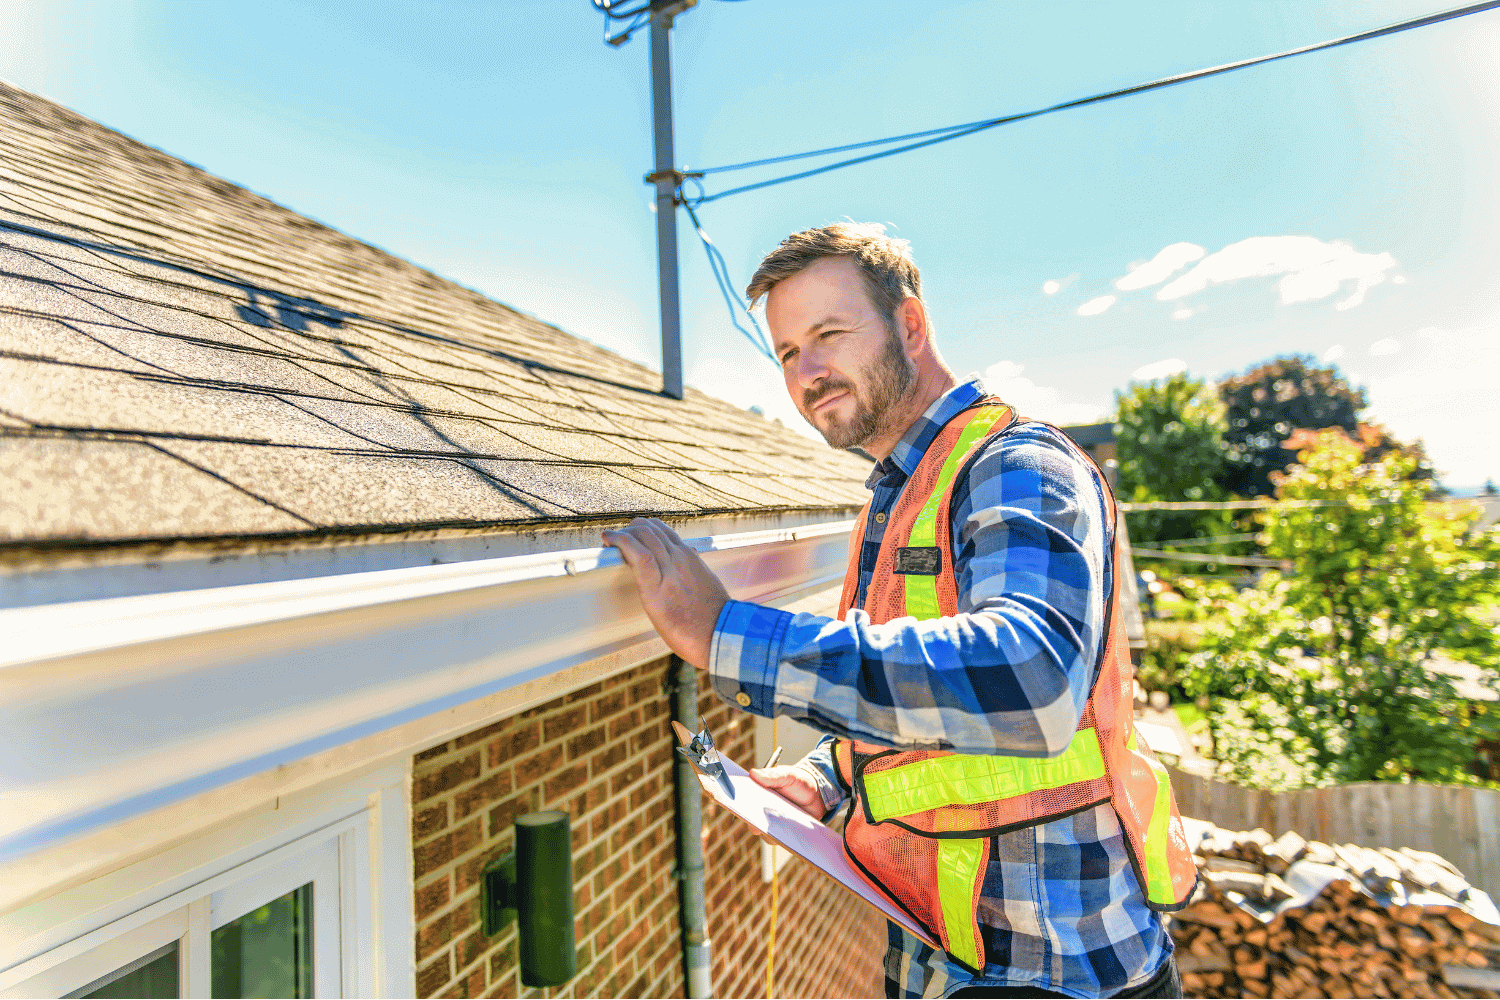
A professional roofer assessing a roof for potential shingle replacement

Best Shingle Removal Techniques for Homeowners

November 19, 2024/in Uncategorized/by Arocon

Looking to remove shingles from your roof? In this guide, you’ll learn when to replace your shingles, what tools you’ll need, and the exact steps to take for a safe and efficient shingle removal.

Key Takeaways

  • Replace roof shingles if you see signs like curling edges, bald spots, or cracks.

  • Gather essential tools like a roofing shovel and safety gear for a smooth removal process.

  • Proper disposal and cleanup of old shingles are crucial for safety and environmental reasons.

When to Replace Your Roof Shingles

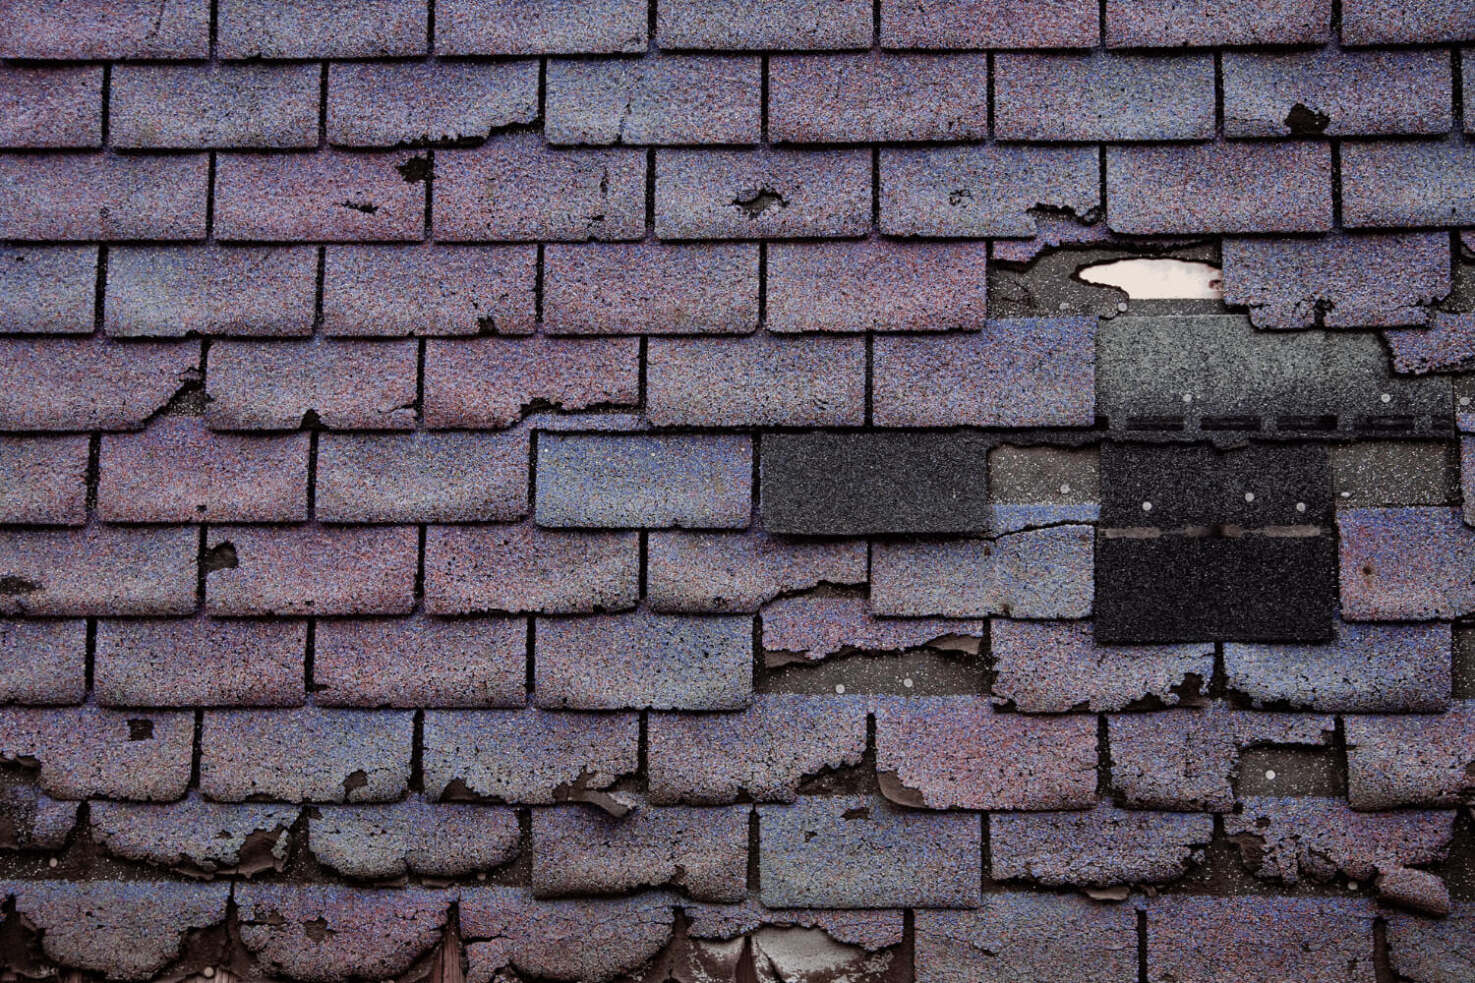
A roof showing signs of wear and old shingles indicating the need for replacement

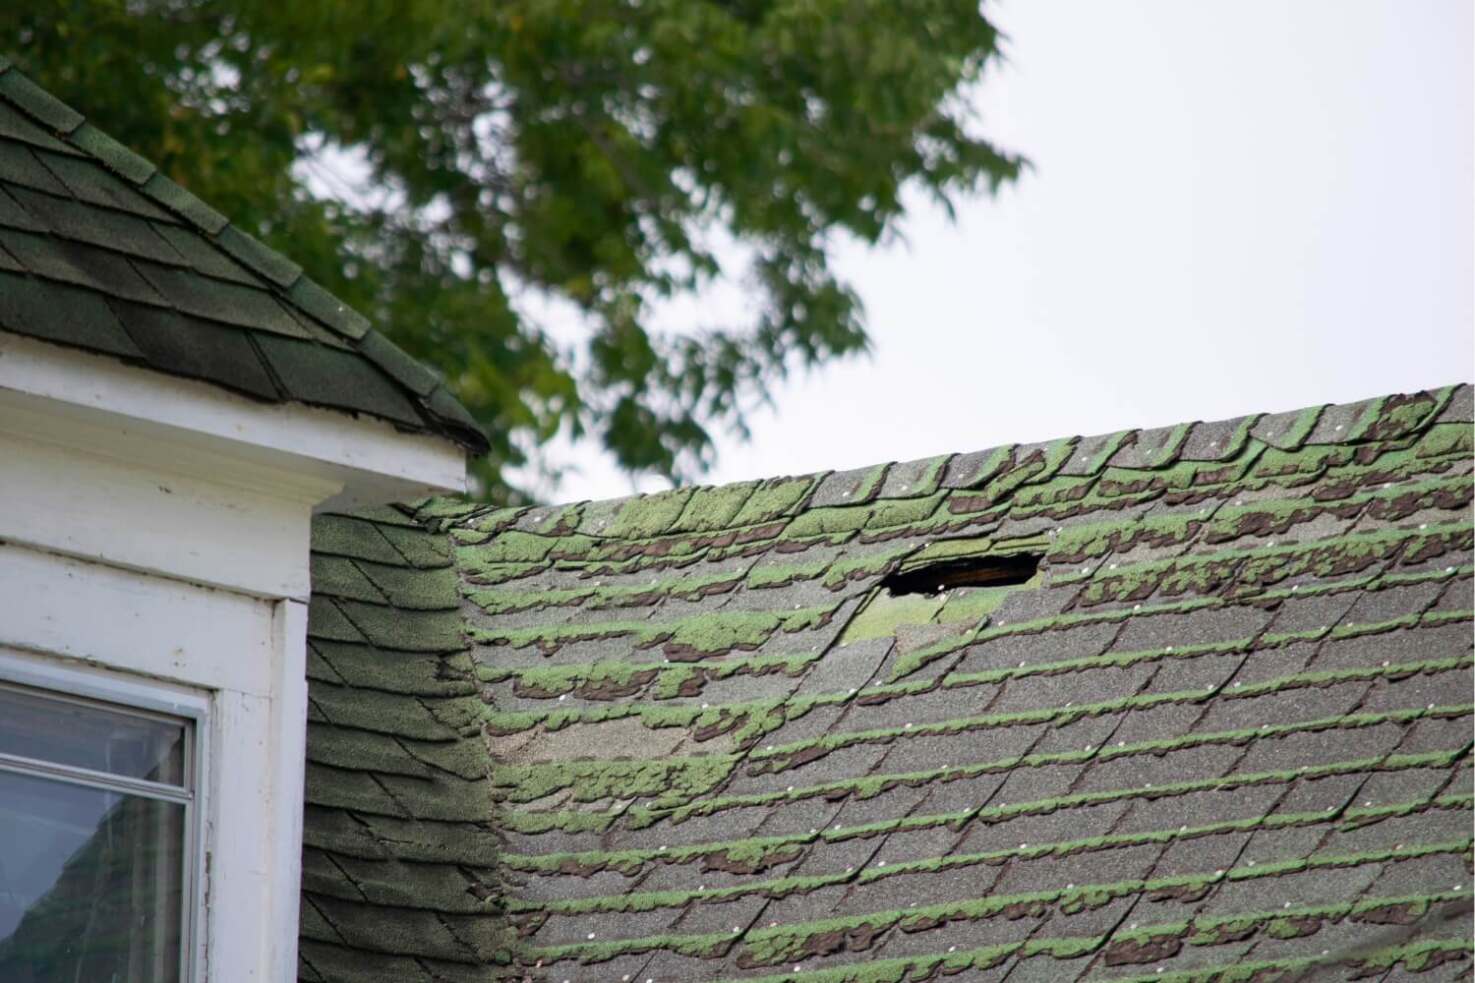
Recognizing the right time to replace your roof shingles is key to keeping your home in good condition. One of the first signs to look out for is curling edges or cupping tabs on your existing shingles. These signs indicate that the shingles are no longer providing adequate protection and need to be replaced. Bald spots caused by missing granules are another telltale sign that your shingles have seen better days and are due for a replacement.

Cracked shingles are also a clear indicator that it’s time to take action. If your roof is at least 20 years old, it might be nearing the end of its lifespan, especially if it appears worn or damaged. Observing neighbors replacing their roofs might indicate that your roof is also due for replacement.

Water damage, missing shingles, and granule loss are serious issues that should not be ignored. Additionally, moss growth, particularly in shady areas, can trap moisture against the shingles underneath, leading to long-term damage. Monitoring these indicators will guide you on when to begin removing your shingles.

Essential Tools and Materials for Shingle Removal

Essential tools for the shingle removal process including a roofing shovel and safety gear

Gathering the proper tools and materials is a must before starting the shingle removal process. Key tools include a roofing shovel, pry bar, and specialized modified shovel-type tools. Power saws with demolition blades and lightweight tear-off spades can also make the job easier and more efficient.

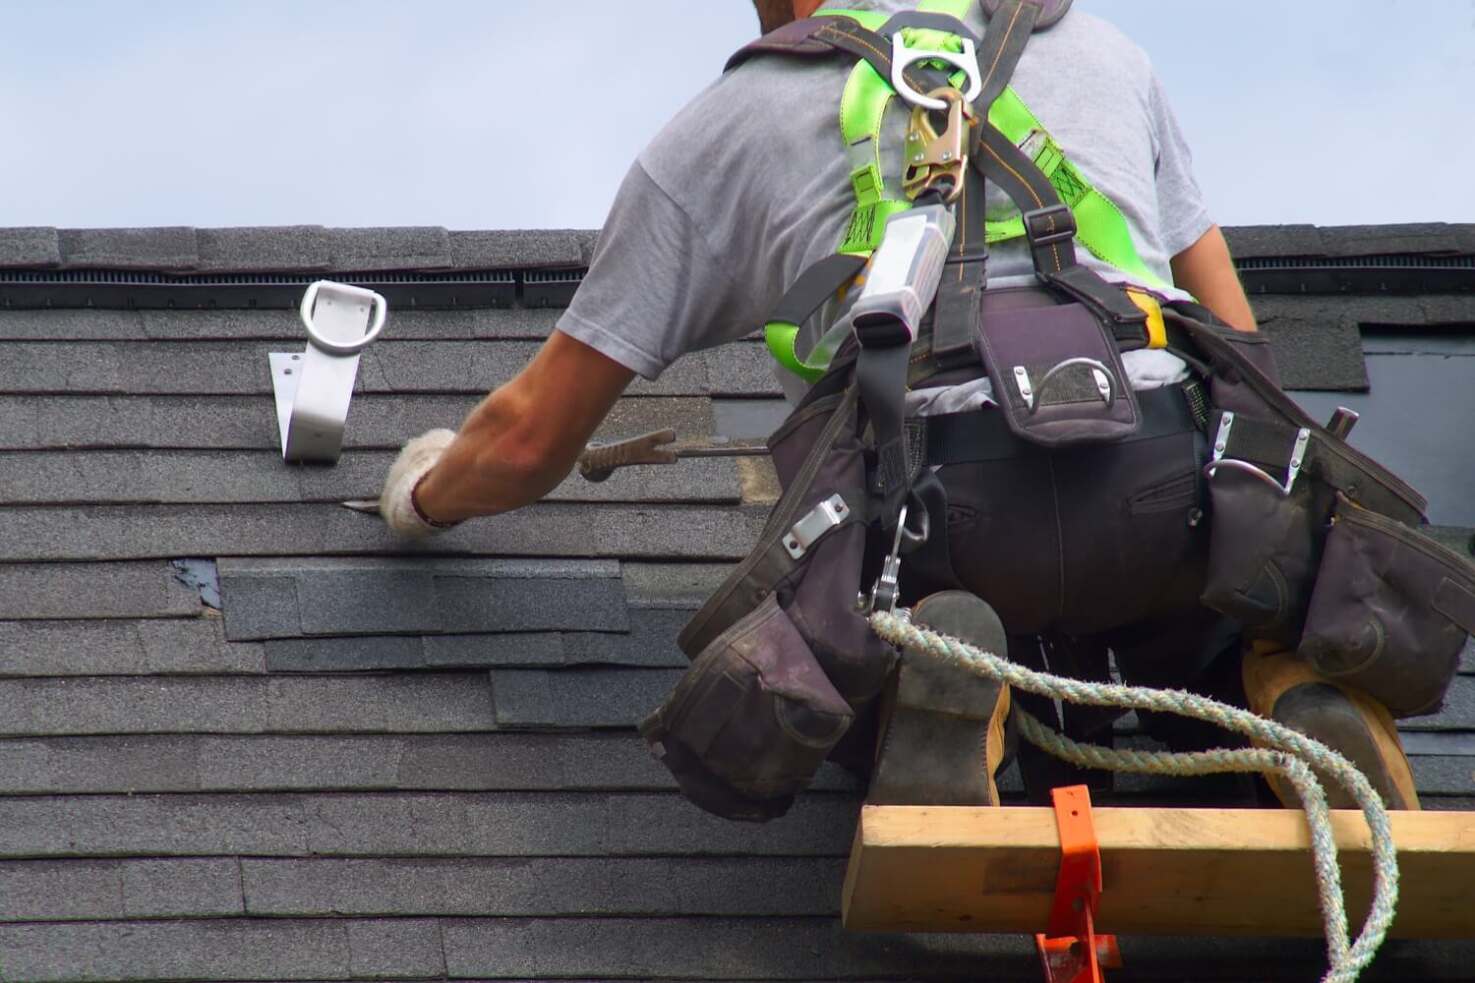
Safety is paramount when working on a roof. Wear thick-soled shoes or boots with good grip, work gloves, and safety goggles for protection during removal. Long pants and a safety harness are also recommended to enhance safety while on the roof.

Additionally, tarps and sheets of plywood can help protect your property from falling debris. Having these shingle removal tools on hand will ensure a smoother and safer project.

Preparing Your Property for Shingle Removal

Preparation is key to a successful shingle removal project. Start by laying tarps over shrubs and other landscaping elements to protect them from falling debris. Removing outdoor furniture and decorations will also prevent any accidental damage during the removal process.

It’s also crucial to check for any overhead power lines that could pose hazards during the project. Securing ladders and tools properly minimizes the risk of accidents.

Using roof jacks can help catch falling shingles and enhance safety. Notify neighbors about your roofing project to reduce disruptions and keep them informed. With these preparations, you’ll be ready to tackle the shingle removal process effectively.

The Step-by-Step Shingle Removal Process

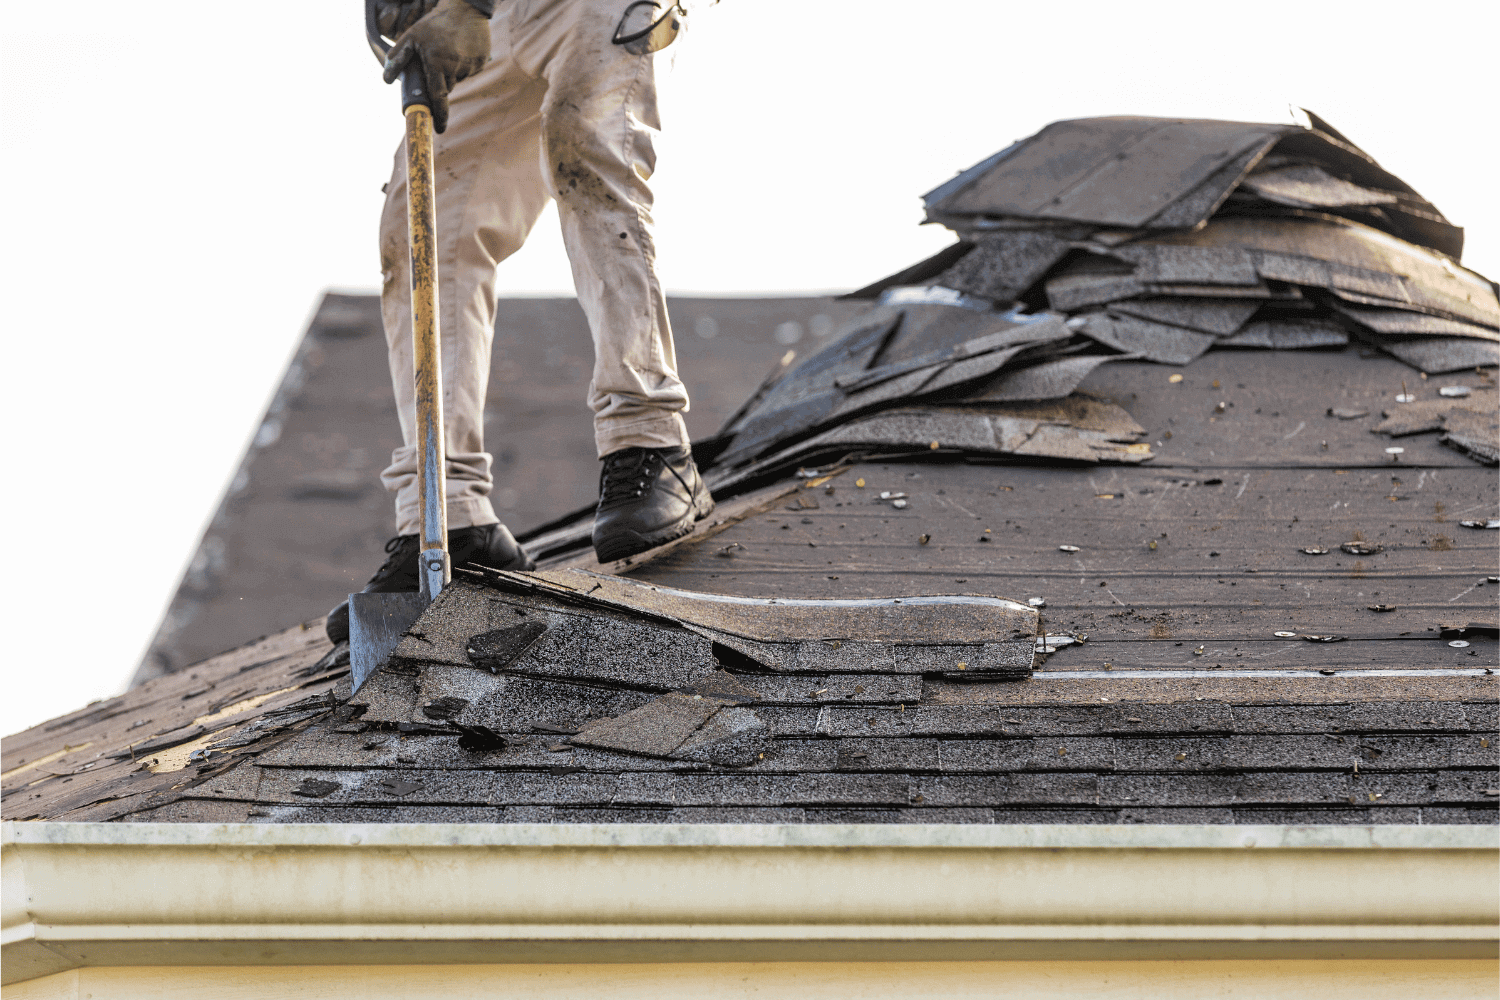
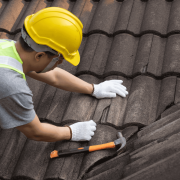
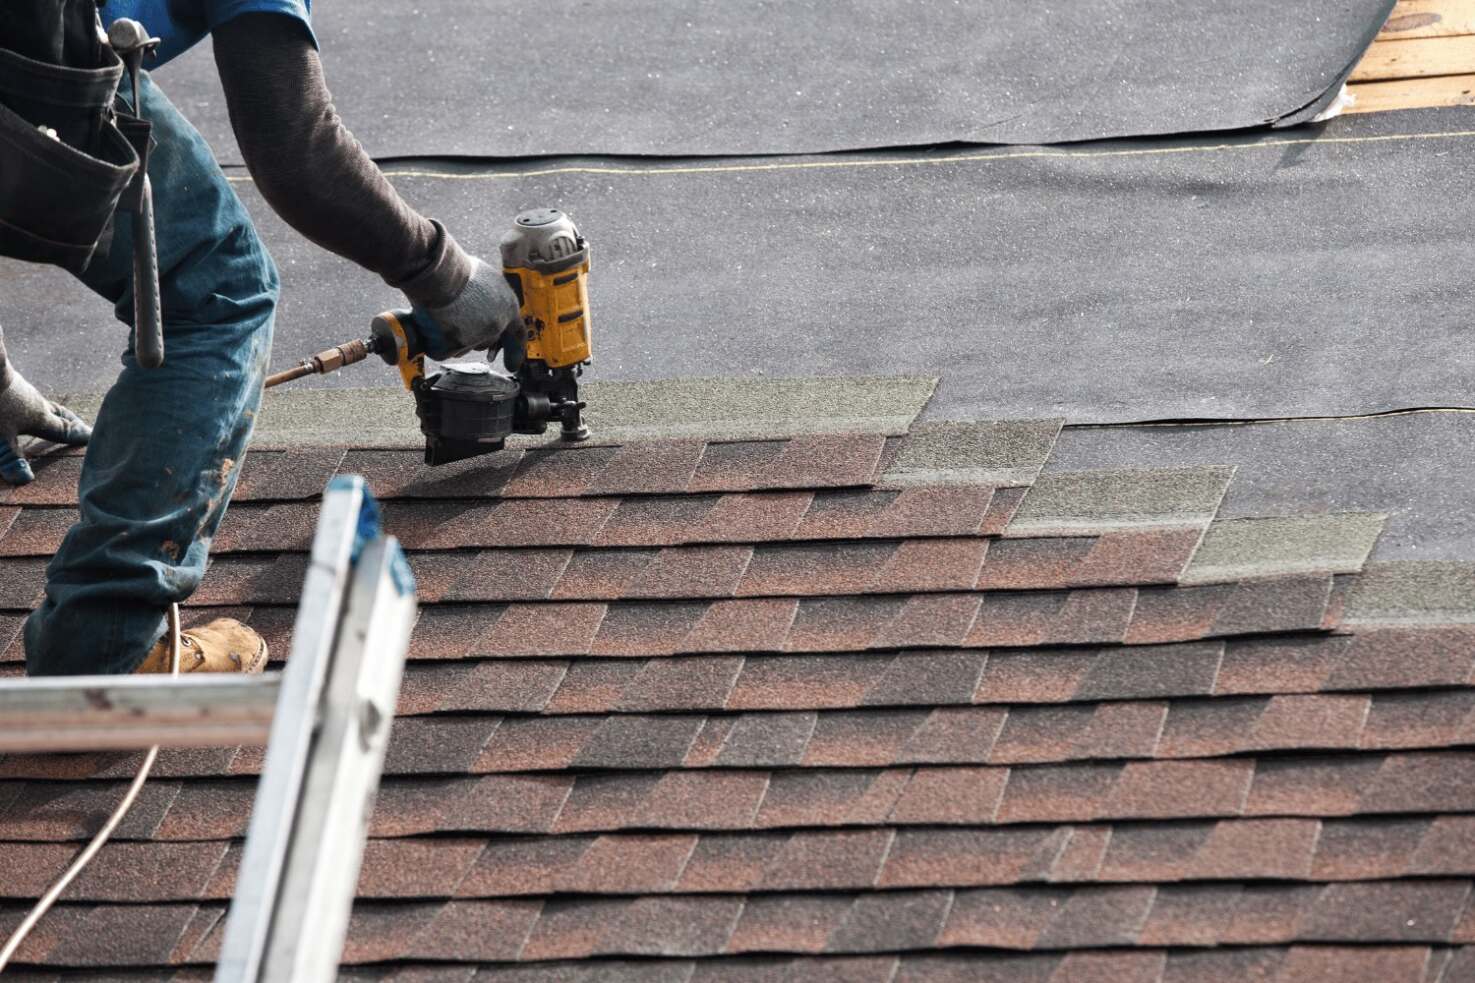
A roofer demonstrating the step-by-step shingle removal process on a sloped roof

Embarking on the shingle removal process can be daunting, but breaking it down into manageable steps makes it more approachable. This section will guide you through starting at the ridge caps, removing shingles in sections, and inspecting and removing flashing.

Adhering to these detailed steps ensures an efficient and safe removal process.

Start at the Ridge Caps

Begin the shingle removal process at the ridge caps to set the stage for a systematic approach. Using a roofing tear-off shovel, begin prying the ridge caps loose. This tool is specifically designed to make the task easier and more efficient.

Once you’ve pried the ridge caps loose, allow them to slide down towards the roof jacks. This method helps manage the shingles and prevents them from causing damage or creating a mess. Starting at the top and working downwards helps you maintain better control.

Remove Shingles in Sections

After dealing with the ridge caps, the next step is to remove shingles in sections. Start with the shingles adjacent to the ridge caps to keep the process organized. Shingles should be removed in manageable 2 to 3-foot sections to maintain safety and order.

Begin at the top of the roof and proceed downwards, removing each shingle with care. Repeat this process until all the shingles are detached. Removing shingles from the area farthest from the garbage bin facilitates easier and more efficient disposal. This method ensures a systematic approach, reducing the risk of accidents and debris buildup.

Inspect and Remove Flashing

Inspecting and removing flashing is a crucial part of the shingle removal process. Check the condition of the roof flashing for any signs of wear, such as rust, cracks, or corrosion. If the flashing is damaged, use a pry bar to remove it carefully.

For valley and vent flashing, start at the top and pry it loose, moving downward. If the flashing is free of cracks and rust, it can be reused with new shingles. However, if it’s heavily corroded, it’s best to replace it to ensure a better seal.

Inspecting and removing flashing correctly prevents future leaks and extends your new roof’s lifespan.

Cleaning Up After Shingle Removal

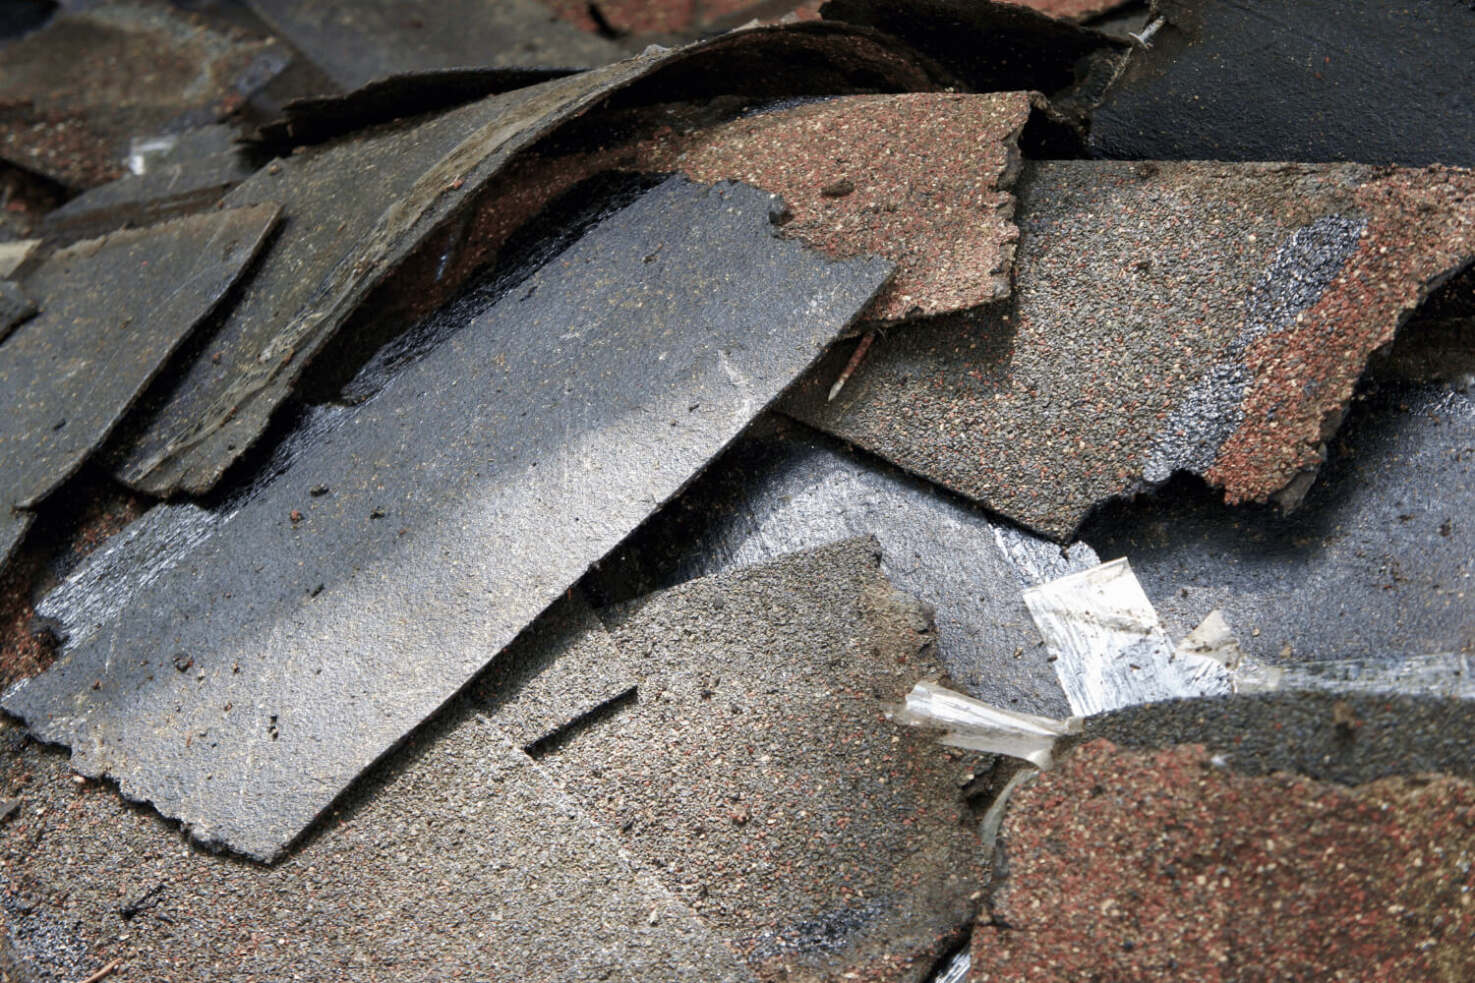
Cleaning up roofing debris after shingle removal, showcasing a clean work area

Post-removal cleanup is just as critical as the shingle removal process itself. Start by sweeping the roof clean with a push broom or blower to clear debris before it rains. This step will prevent any leftover material from causing issues once the new shingles are installed.

Use a magnetic wand or broom to effectively collect stray nails from both the roof and the ground. Cutting the grass shorter before beginning the project can also make it easier to spot fallen nails. Cleaning up all nails and debris ensures your yard remains safe for children and pets.

A thorough cleanup will set the stage for a smooth installation of new roofing materials.

Disposal of Old Shingles

Disposing of old shingles properly is essential for both environmental and safety reasons. Renting a dumpster is a convenient option that provides an organized and efficient disposal process. Alternatively, recycling centers offer an environmentally friendly way to dispose of old asphalt shingles.

It’s also possible to donate usable shingles if they are clean and properly bagged to meet specific organization requirements. Before disposing of old shingles, check for asbestos, especially in older asphalt shingles, to ensure compliance with safety regulations.

Adhering to local regulations and guidelines is essential for proper disposal. Some landfills have designated areas for construction debris like shingles.

Installing Ice and Water Barriers

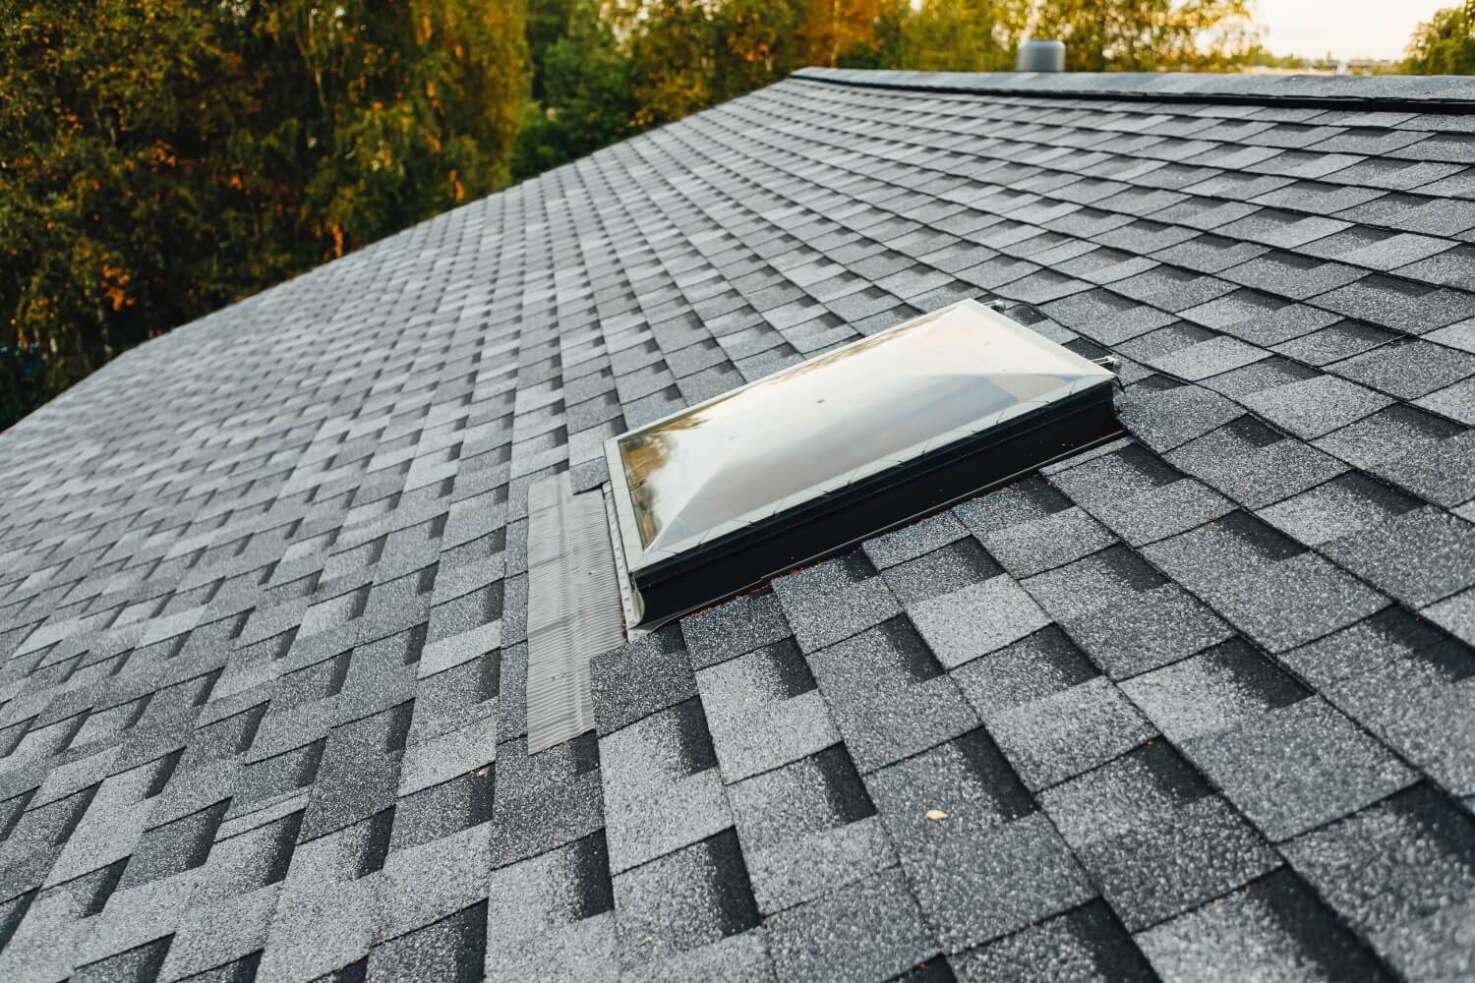
Installing ice and water barriers is vital to protect your roof from leaks and water damage. Barriers should be installed in valleys and around chimneys. They should also be placed near skylights and other protruding roof features. Unroll the barrier in sections, extending it beyond the existing barrier by a few inches to ensure an effective seal.

If removing an old barrier is difficult, a new layer of leak barrier can be installed over the existing one. Inspect flashing for wear during this process, as damaged flashing can lead to leaks if not replaced.

Using compatible materials avoids potential staining and compatibility issues. Proper installation of ice and water barriers will enhance your roof’s durability.

When to Consider Hiring a Professional Roofer

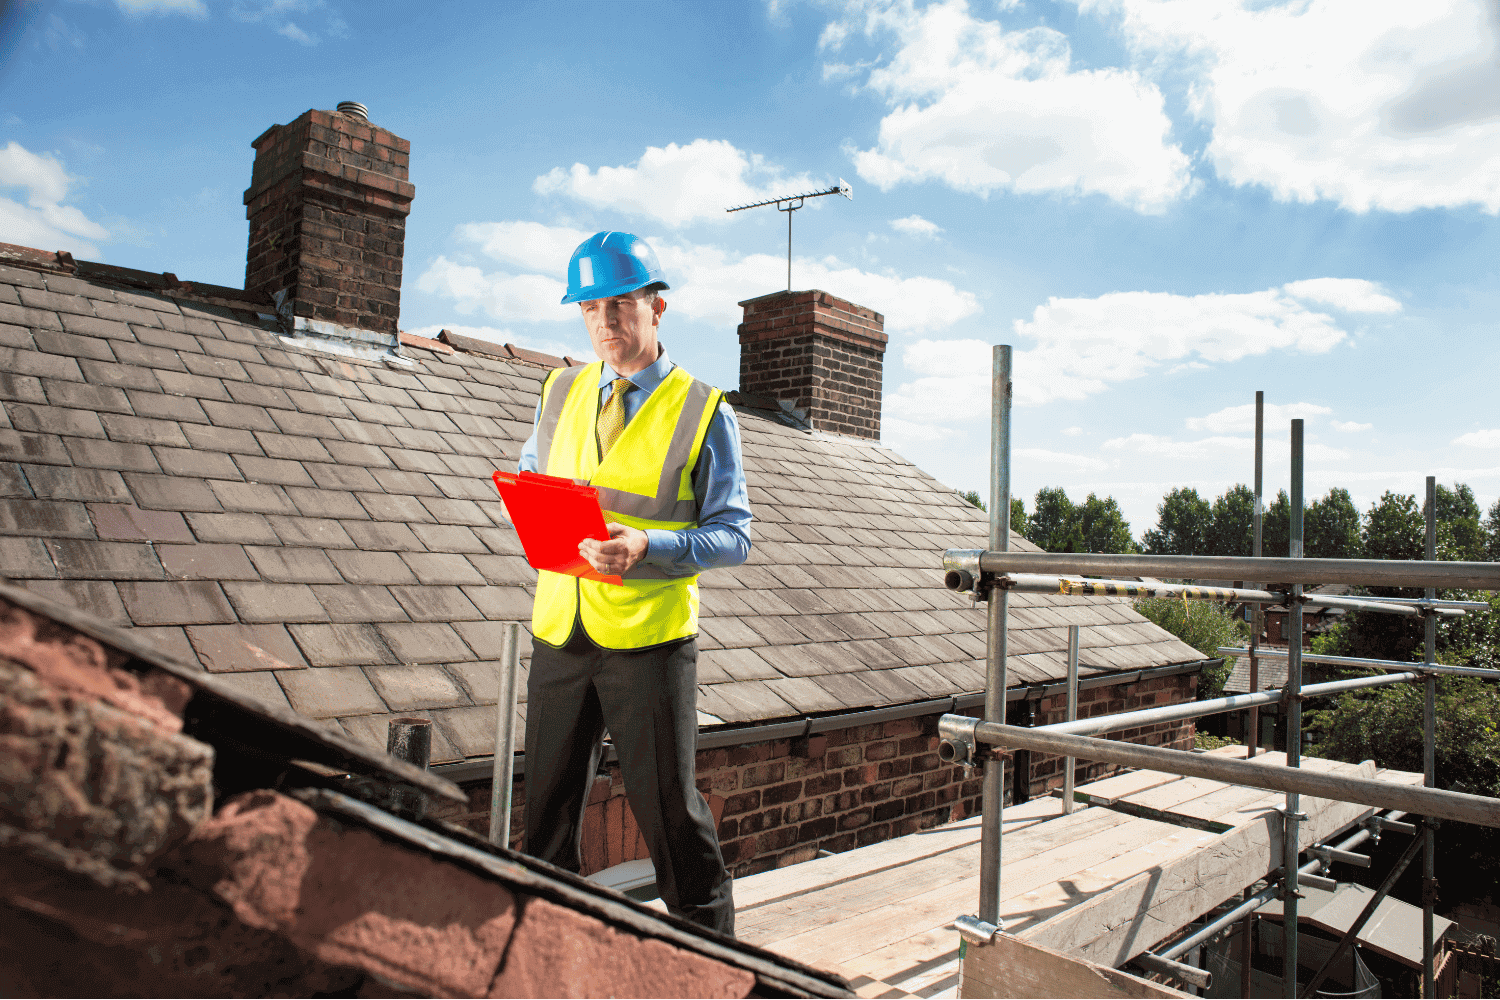
A professional roofer assessing a roof for potential shingle replacement

While removing old roof shingles is a task that many homeowners can handle themselves, there are times when hiring a professional roofer might be the best choice. If you have safety concerns or are not confident about working on your roof, it’s advisable to seek professional help. A professional roofer can ensure the job is done correctly and safely.

Factors that influence the cost of professional shingle removal include the size of the roof, type of shingles, local labor rates, and the roof’s style. By considering these factors, homeowners can make an informed decision about whether to tackle the project themselves or hire a roofing contractor.

Sometimes, professional help is worth the investment for peace of mind and quality work.

Summary

To sum up, knowing the best shingle removal techniques can empower homeowners to take control of their roofing projects. From identifying when to replace your roof shingles to gathering essential tools, preparing your property, and following a step-by-step removal process, each step is crucial for a successful project.

Whether you decide to tackle the project yourself or hire a professional roofer, the knowledge gained from this guide will serve you well. Remember, a well-maintained roof not only protects your home but also enhances its value. Take the first step towards a better roof today!

Frequently Asked Questions

What are the signs that it’s time to replace my roof shingles?

If you see curling edges, bald spots, or cracked shingles, it’s probably time to replace your roof shingles. Also, if your roof is over 20 years old, don’t wait too long, especially if others in your neighborhood are doing the same!

What tools do I need for shingle removal?

You’ll need a roofing shovel, pry bar, power saws with demolition blades, thick-soled shoes, work gloves, safety goggles, and tarps for shingle removal. Make sure you’ve got all these tools handy for a smooth job!

How should I prepare my property for shingle removal?

To get your property ready for shingle removal, lay tarps over shrubs, clear away outdoor furniture, and make sure to board up any windows. Don’t forget to check for overhead power lines and secure all your ladders and tools!

How do I dispose of old shingles?

You can get rid of old shingles by renting a dumpster, recycling them at designated centers, or donating usable ones. Just remember to check for asbestos in older shingles to stay safe!

When should I hire a professional roofer?

You should hire a professional roofer if you’re feeling unsure about the project, have safety concerns, or if it’s just a big job that’s way over your head. It’s better to get the pros in and ensure it’s done right!


https://www.aroconllc.com/wp-content/uploads/2024/11/A-professional-roofer-assessing-a-roof-for-potential-shingle-replacement.png 1000 1500 Arocon https://www.aroconllc.com/wp-content/uploads/2024/09/arocon-logo.webp Arocon2024-11-19 08:00:042024-11-19 08:00:04Best Shingle Removal Techniques for Homeowners
A photo showing various types of buckled shingles on a roof

Shingle Buckling: Causes and Effective Fixes

November 14, 2024/in Uncategorized/by Arocon

Shingle buckling is when your roof shingles deform, often due to moisture or poor installation. This article explains how to spot shingle buckling, understand its causes, and discover effective solutions.

Key Takeaways

  • Shingle buckling can be caused by moisture absorption, poor installation, and inadequate ventilation, leading to structural damage if left unaddressed.

  • Regular inspections and maintenance, including proper ventilation and quality material usage, are essential for preventing shingle buckling and prolonging roof life.

  • Professional roofers are recommended for diagnosing and repairing buckled shingles, ensuring effective solutions that reduce the risk of future issues.

Shingle Buckling: Causes and Effective Fixes

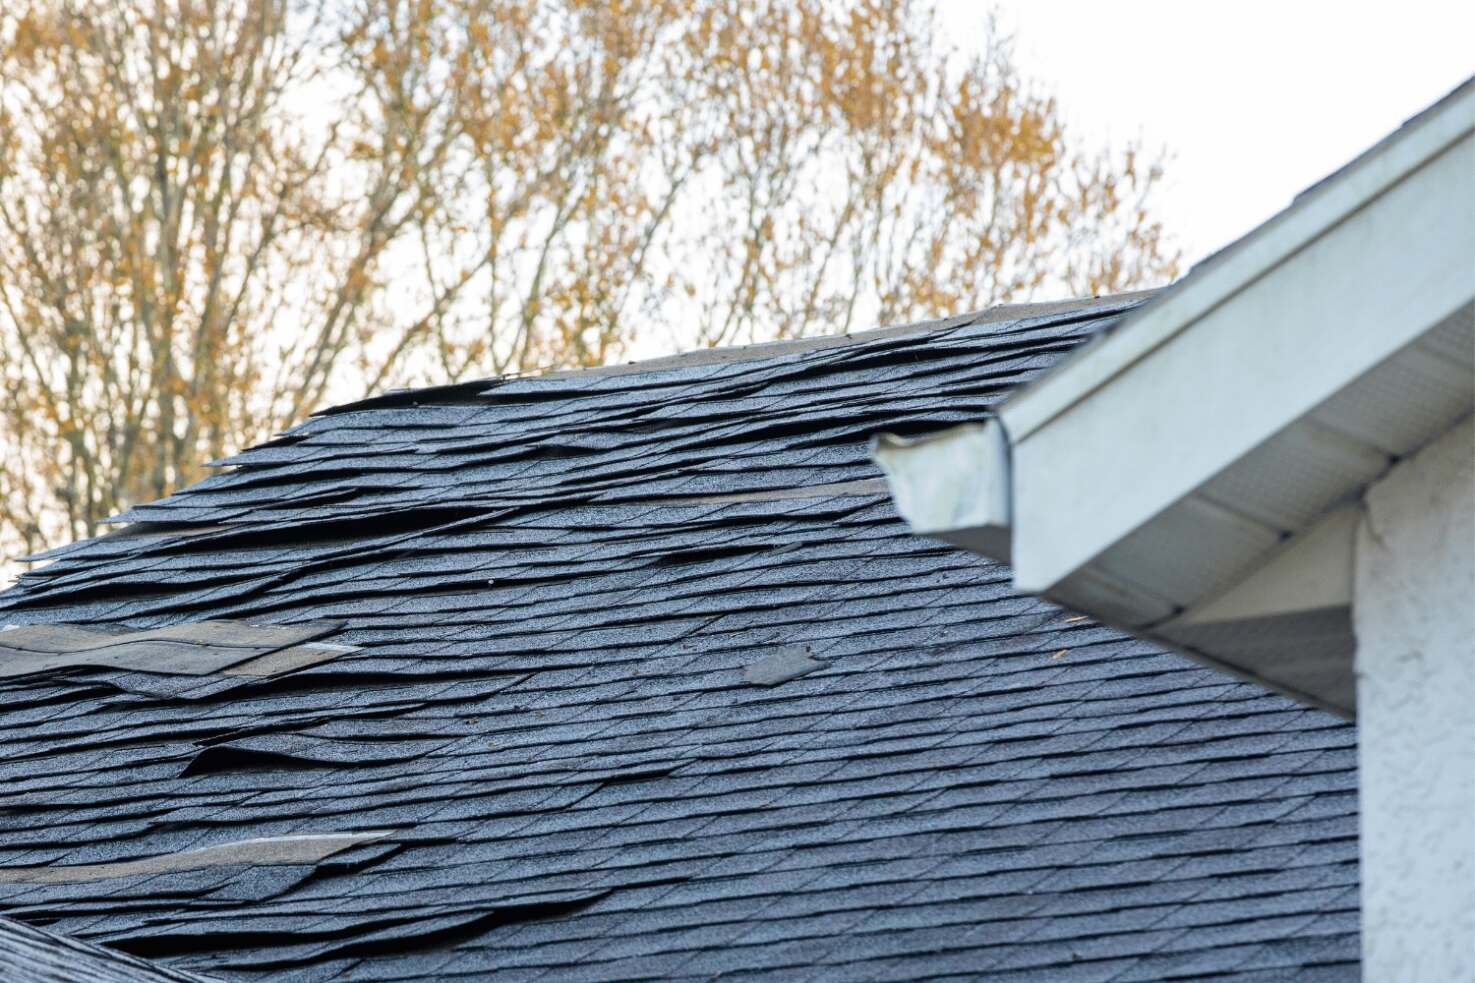
A photo showing various types of buckled shingles on a roof

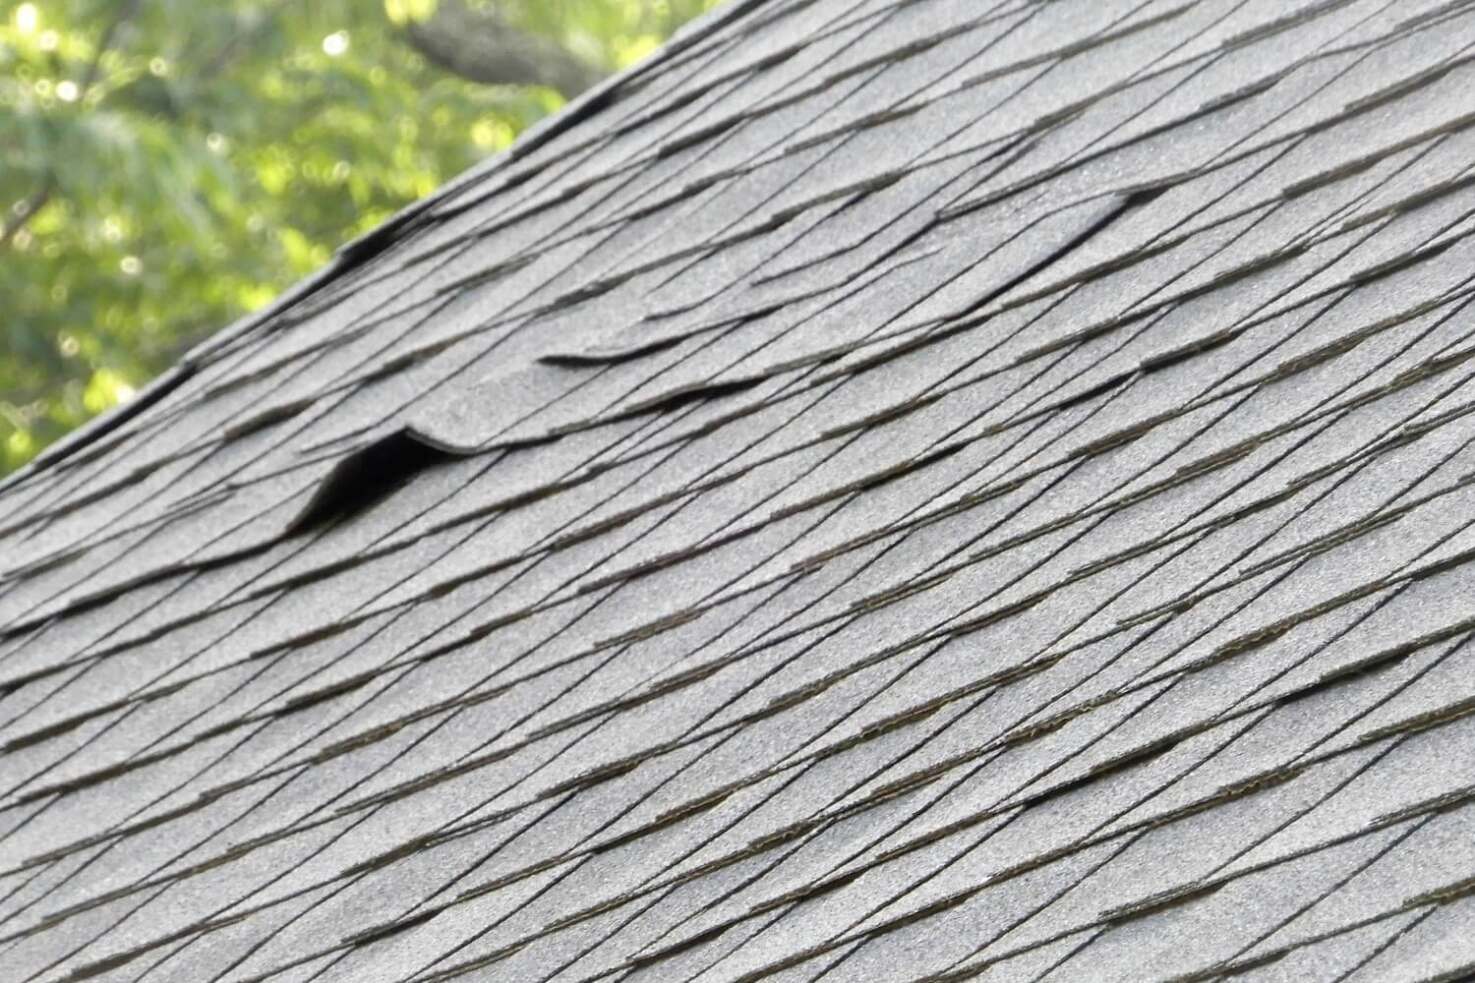
Shingle buckling often occurs due to moisture absorption by the wood deck during construction, causing it to shift and distort the roof shingles. Improper installation, such as uneven decking or failing to follow the shingle manufacturer’s recommendations, can also lead to this issue. Visible signs of buckling include waves or bulges in the shingles, which suggest they are not lying flat.

Ignoring buckled shingles can escalate into more significant roofing problems, potentially leading to leaks and structural damage. Addressing these issues promptly is crucial for maintaining your roof’s longevity and preventing costly repairs down the line.

Introduction

Homeowners must understand buckling shingles to preserve their roof’s integrity and prevent severe damage. Moisture infiltration, poor installation practices, and extreme weather are just a few of the factors that can lead to shingle buckling.

Being aware of these issues can help you take proactive measures to avoid costly repairs and ensure your roof’s longevity. Addressing shingle buckling early prevents leaks and weather-related complications that could compromise your home’s structure.

Understanding Shingle Buckling

A photo illustrating causes of shingle buckling

Buckled shingles often appear as if they are pushed upwards, which may indicate underlying issues like inadequate insulation or poor ventilation. Visible signs of buckling include waves or bulges in the shingles, suggesting they are not lying flat. Moisture absorption by the wood deck during construction can cause it to shift, leading to shingle buckling.

Shingles can also buckle if installed on uneven decking, leading to distortions. Ignoring buckled shingles can significantly impact the integrity of your roof, potentially leading to extensive repairs. Recognizing the common causes of shingle buckling is the first step in addressing and preventing it.

Moisture Issues

Moisture can cause the roof underlayment to warp and wrinkle. This, in turn, pushes the shingles upwards. This often happens when the exposed wood deck absorbs moisture, which can occur when an old roof is removed. High humidity and frequent thunderstorms can impact unconditioned roof deck materials. This can result in shingle buckling because of shifts in moisture equilibrium.

As time goes by, the roofing materials and components degrade. This makes older roofs increasingly prone to shingle buckling. Promptly addressing moisture issues maintains the integrity of your roofing system and prevents further structural problems.

Poor Attic Ventilation

Improper attic ventilation can lead to heat and condensation buildup, contributing to shingle deformation. Adequate attic ventilation balances temperature and humidity, preventing moisture buildup that can damage roof shingles.

Poor ventilation can trap moist air, leading to shingle buckling and other issues like mold growth and ice dam formation. Proper attic ventilation is necessary for a healthy roofing system and to prevent moisture problems.

Improper Installation

Failing to follow manufacturer guidelines during installation, such as nailing techniques, can lead to shingle buckling. Fasteners that are not driven flush can cause visible distortions in the roof shingles. Insufficient spacing of roof deck boards can restrict wood movement, resulting in forced buckling of shingles due to expansion from moisture.

Adhering to proper installation practices prevents shingle buckling and ensures the longevity of your roofing system.
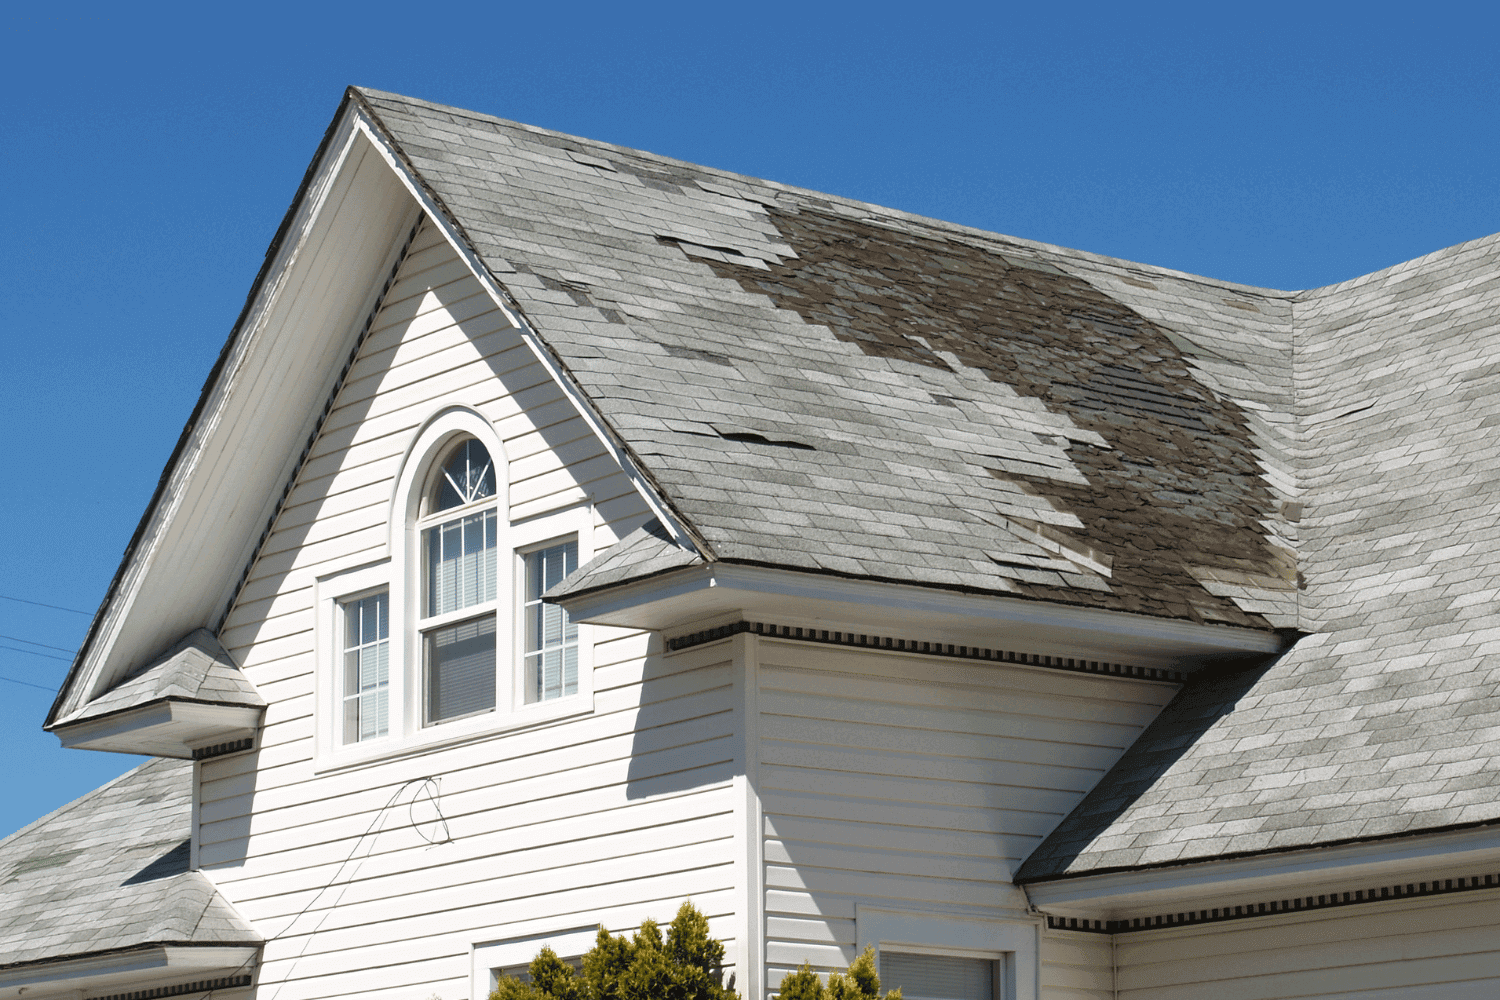
Identifying Buckled Shingles

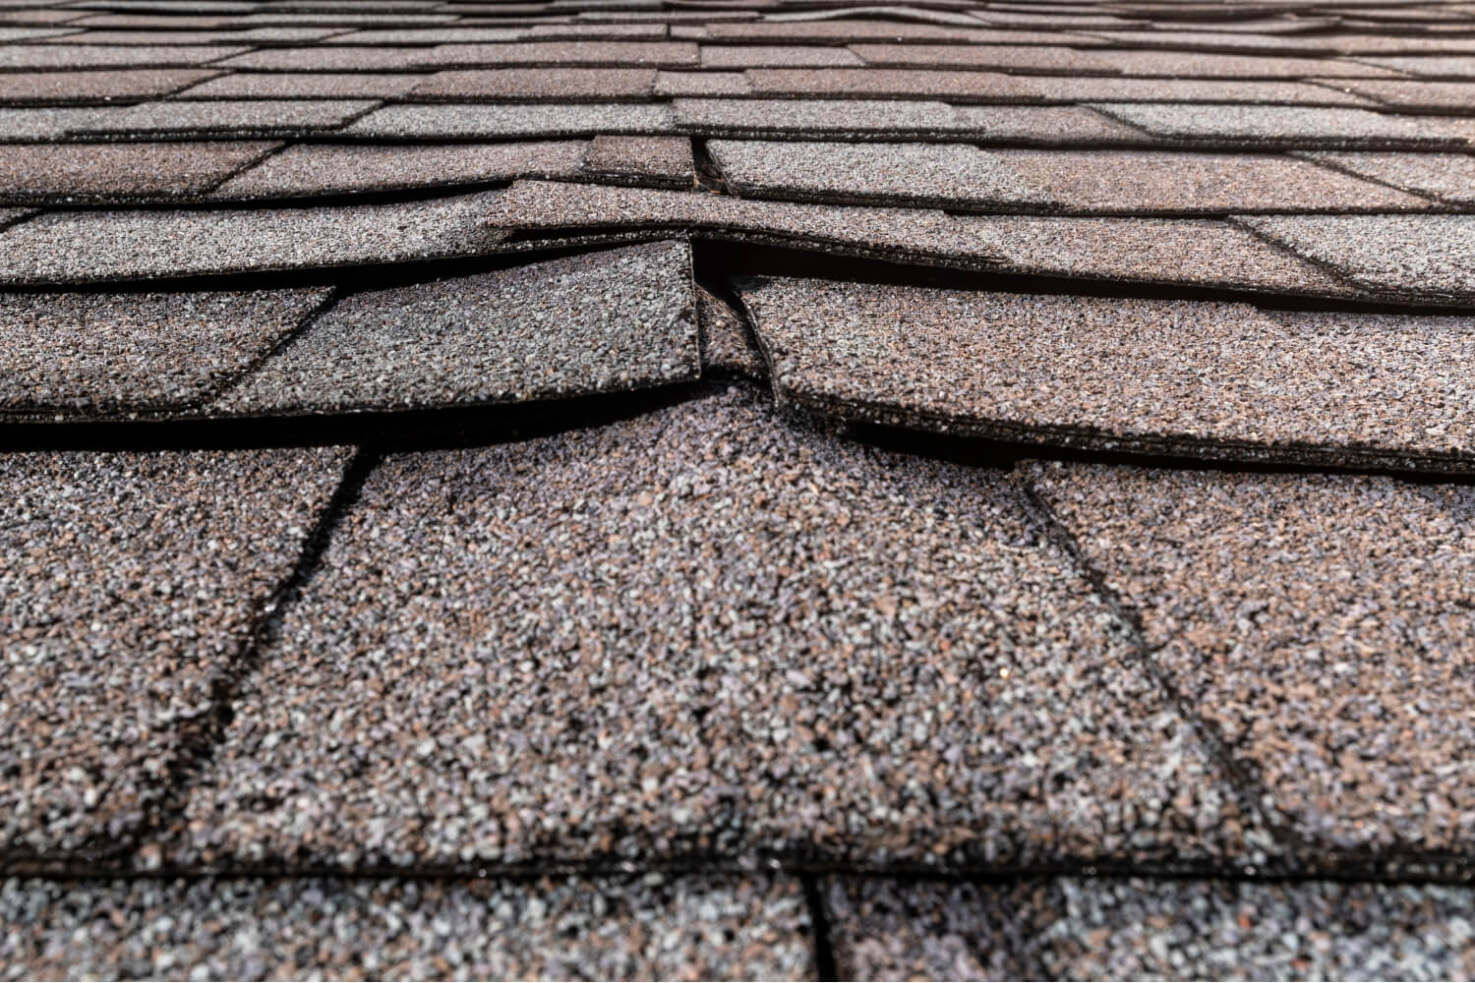
A photo showing a close-up view of buckled shingles on a roof

Buckled shingles disrupt the roof’s surface, potentially leading to leaks and structural damage. Common signs of roof buckling include the appearance of waves or bulges in shingles and potential water damage signs like leaks. Regular inspections can help in identifying early signs of buckling and prevent more extensive damage to the roof.

Identifying buckled shingles involves checking for visible signs such as warped shapes and areas that appear pushed upward. Proactively identifying and addressing buckled shingles early can save significant repair costs and ensure the integrity of your roofing system.
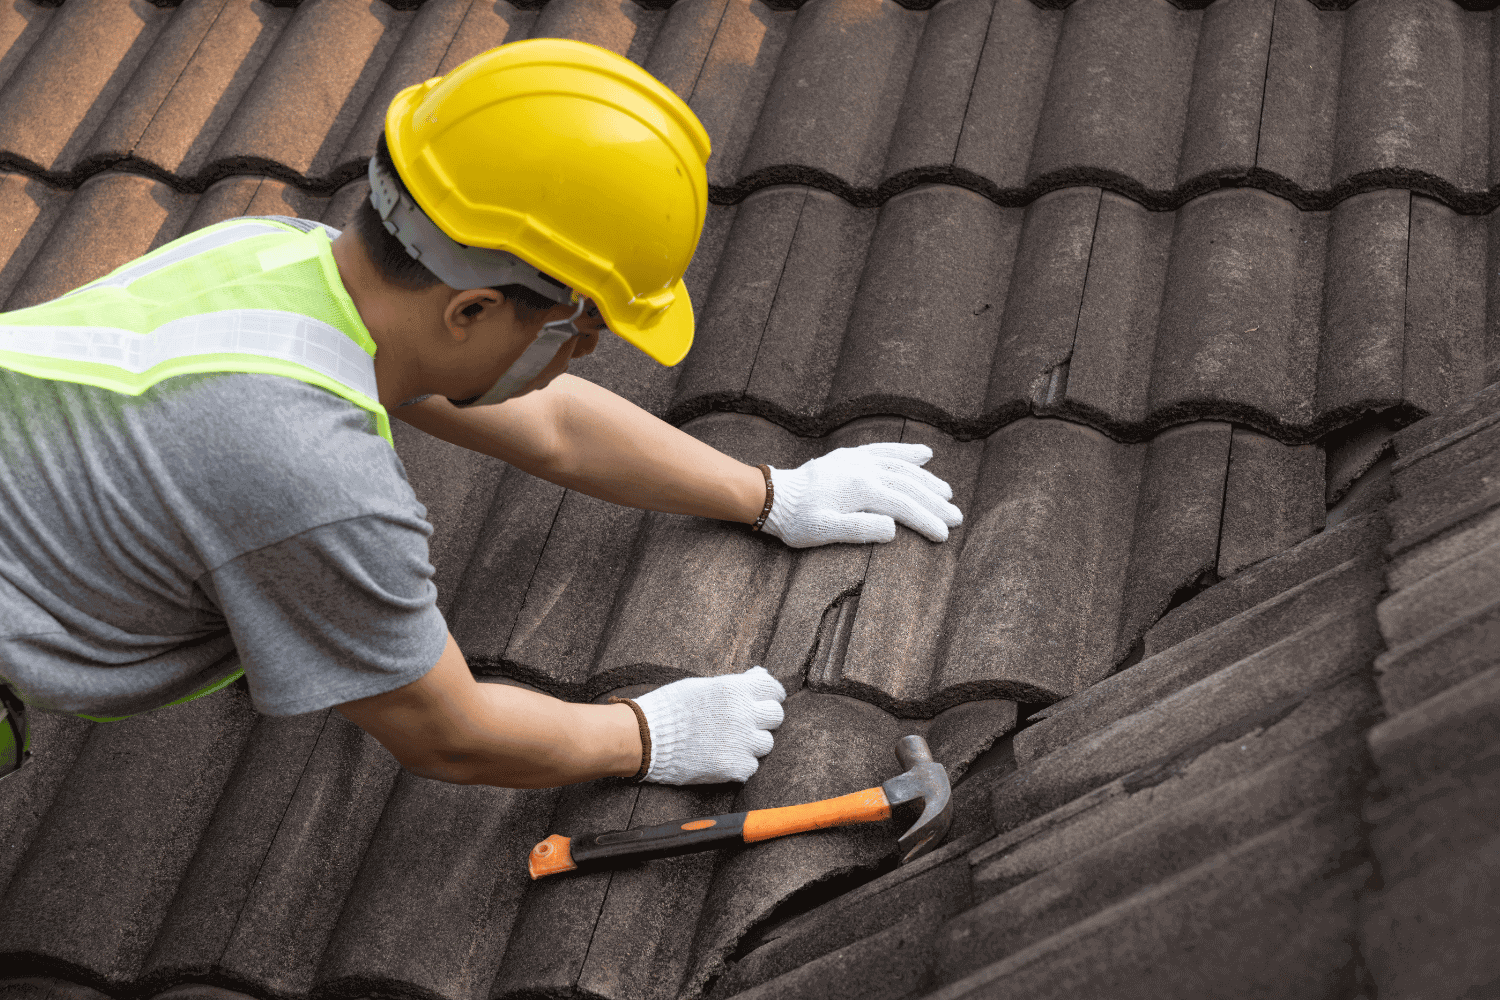
Visual Inspection Tips

During visual inspections, homeowners should look for roof shingles that exhibit a concave shape or have edges that are curling upwards. Inspecting areas where shingles appear pushed upward may signal underlying buckling issues.

Conducting visual inspections proactively helps homeowners catch buckling shingles early. If more than a third of the shingles show signs of curling shingles or buckling, it may be time to consult a professional.

Professional Roof Inspections

Hiring professional roofers can ensure that the underlying causes of shingle buckling are accurately diagnosed and addressed. Professional roofers possess the expertise to identify hidden issues that may not be visible during a basic inspection.

Upon noticing buckled shingles, homeowners should call a professional roofer for a thorough inspection. Professional roof inspections can identify subtle signs of buckling that homeowners might overlook, ensuring a comprehensive evaluation of the roofing system.

Solutions to Fix Shingle Buckling

An photo depicting solutions for fixing buckled shingles

The fix for buckled shingles varies based on the severity of the issue. It also depends on the underlying cause of the problem. For larger project repairs and replacements, Arocon Roofing and Construction offers a complimentary, no-obligation consultation. Regular maintenance, such as cleaning gutters and resealing vents, helps uphold roof integrity and prevent buckling.

If widespread buckling occurs, it may be necessary to consider a complete roof replacement. Arocon Roofing and Construction provides swift and seamless solutions for homeowners dealing with roofing issues, ensuring that the problem is resolved efficiently.

Improving Attic Ventilation

Inadequate airflow beneath the roof deck can exacerbate moisture and temperature management issues, making it essential to absorb moisture effectively. For every 150 square feet of attic space, at least 1 square foot of vent area is recommended to ensure proper ventilation.

Attic ventilation improvements can prevent shingle buckling by balancing temperature and humidity in the attic. Adding vents or upgrading existing systems can help achieve adequate ventilation and prolong the life of your roof.

Correcting Installation Errors

To fix localized shingle buckling, the first step is to remove the affected shingles. If only a few shingles are buckled, you can re-nail or re-adhere the affected shingles.

Fixing wrinkled underlayment involves removing affected shingles, repairing the underlayment, and reinstalling new shingles. Ensuring secure fastening and using spacers between decking boards for expansion can prevent future shingle buckling.

Regular Maintenance

Regular bi-annual roof inspections help in promptly identifying and resolving potential issues. After storms, it is crucial to clean the roof to clear debris and inspect for damage. Homeowners should evaluate whether the damage is superficial or if it indicates deeper structural issues.

Routine tasks like cleaning gutters and resealing vents prevent moisture problems that can lead to roof damage.

Preventative Measures for Shingle Buckling

A photo showing preventative measures for shingle buckling

Preventative measures can significantly reduce the risk of shingle roof buckling. Regular maintenance services can address potential vulnerabilities in roofing and gutter systems, preventing costly repairs from shingle buckling.

Maintaining proper ventilation and choosing quality materials can help prevent buckling. Installing ridge or gable vents is an effective method to improve attic ventilation and extend the longevity of your roof.

Choosing Quality Materials

Selecting materials that match local moisture levels and are manufacturer-approved can significantly reduce the risk of shingle buckling. Using a compatible roofing underlayment creates a stable base for shingles, helping to maintain their integrity.

If roof deck boards are spaced less than 1/8 inch apart, it can cause shingles to buckle due to insufficient ventilation and support. Choosing quality roof deck panels and ensuring proper installation are crucial for preventing shingle buckling.

Maintaining Proper Ventilation

Heat and condensation from inadequate attic ventilation can cause uneven expansion in roof materials, leading to shingle deformation and buckling. Adequate ventilation in the attic is essential to maintain the longevity of the roof by preventing damage. Proper attic ventilation prevents unwanted moisture buildup and maintains the structural integrity of your roofing system.
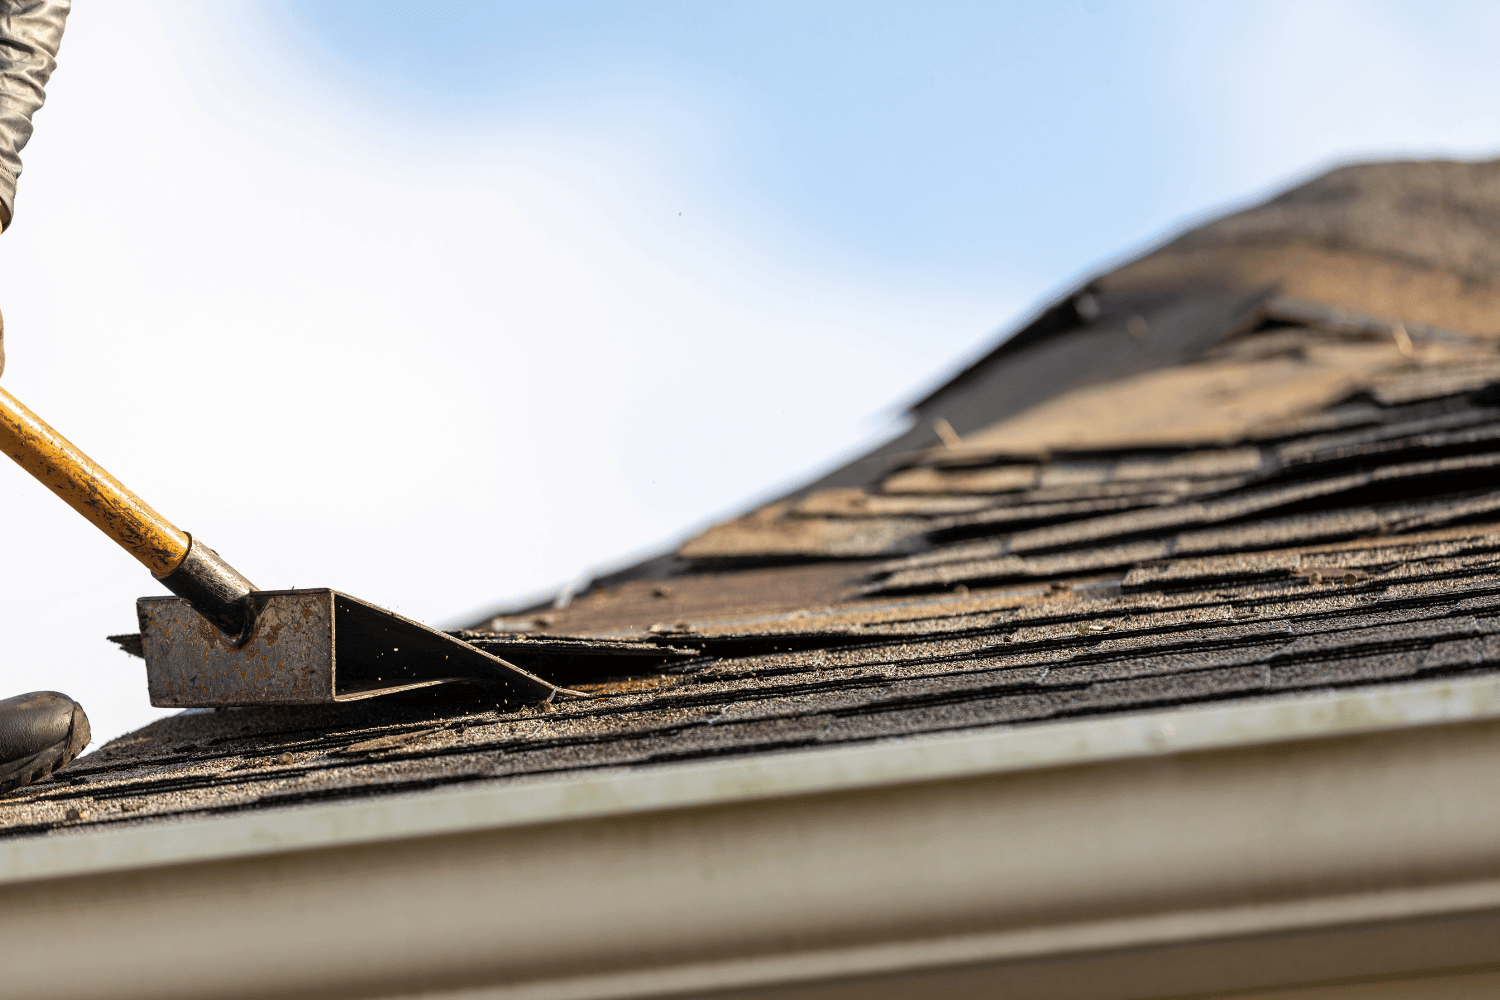
Routine Roof and Gutter Tune Up

Arocon’s Roof and Gutter Tune Up includes gutter cleaning, resealing roof vents and piping, and replacing shingles. The starting price for this service is $199, making it an affordable option for maintaining your roof’s longevity.

Regular tune-ups prevent roof buckling by addressing potential issues early. Keeping your roof and gutters in good condition is essential for preventing water damage and extending the life of your roofing system.
DIY vs. Professional Repairs

DIY repairs can worsen the problem and result in costly mistakes. Professional help may be necessary to address underlying issues like poor ventilation or moisture problems.

When choosing between DIY and professional repairs, consider the extent of damage, personal skills, available resources, and potential risks. Communication with a reputable roofing contractor ensures safe and effective repairs.

Assessing Damage Severity

Determining the severity of damage is critical for choosing the right intervention approach. The extent of damage plays a crucial role in determining whether DIY methods or professional help is necessary.

Conducting a thorough inspection can help you assess whether the damage is superficial or indicates deeper structural issues. This assessment will guide your decision on whether to tackle the repairs yourself or hire a professional roofer.

Benefits of Professional Roofers

Hiring professional roofers ensures that the assessment and repair of shingle buckling are handled by trained experts. Professional roofers possess specialized knowledge and skills that allow them to diagnose the underlying causes of shingle buckling accurately.

Repairs by professional roofers tend to last longer than DIY solutions, reducing the likelihood of recurring issues. Additionally, professional roofers can access high-quality materials and warranties that benefit the overall effectiveness and longevity of the roof.

Cost Considerations for Repairing Buckled Shingles

Repairing buckled shingles can vary significantly in cost depending on the extent of the damage and the materials used. For instance, DIY repairs might initially seem cost-effective but can sometimes lead to greater issues if not executed correctly. In contrast, professional roofers provide warranties on their work, ensuring long-term reliability and peace of mind for homeowners.

Labor costs can significantly impact the total expense for repairing buckled shingles. In some cases, repairing extensive buckling can be more economical with a full roof replacement rather than multiple individual repairs. Understanding these cost factors can help homeowners make informed decisions about their roofing repairs.

Minor Repairs

For minor repairs involving just a few shingles, the typical cost ranges from $150 to $300, covering materials and labor. These repairs usually involve re-nailing or re-adhering the affected shingles and can be completed relatively quickly.

The average cost for labor when performing minor repairs may vary based on location and contractor rates. Assessing whether the damage is minor or indicative of deeper issues is crucial for determining the appropriate repair approach and budget.

Major Repairs and Replacements

If extensive buckling occurs, the cost for major repairs or full roof replacements can reach between $3,000 to $6,000 or more. Major repairs often involve addressing underlying issues such as poor ventilation or improper installation, which can add to the overall cost.

The estimated cost range for repairing moderate damage to shingles is between $1,000 to $3,000. While the initial expense might seem high, comprehensive repairs or replacements ensure the longevity and effectiveness of the roofing system, potentially saving homeowners from future costly repairs.

Summary

In summary, shingle buckling is a common roofing issue that can lead to significant problems if not addressed promptly. Understanding the causes, such as moisture issues, poor attic ventilation, and improper installation, is crucial for effective prevention and repair. Regular inspections and maintenance are essential for catching early signs of buckling and ensuring the roof’s integrity.

Taking proactive measures, such as choosing quality materials and maintaining proper ventilation, can prevent shingle buckling and extend the life of your roof. Whether opting for DIY repairs or hiring professional roofers, it is important to assess the severity of the damage and consider the long-term benefits of professional services. By staying vigilant and maintaining your roof, you can protect your home and avoid costly repairs.

Frequently Asked Questions

What are the common causes of shingle buckling?

Shingle buckling is commonly caused by moisture problems, inadequate attic ventilation, and improper installation techniques. Addressing these issues can help prevent further damage to your roof.

How can I identify buckled shingles on my roof?

To identify buckled shingles on your roof, inspect for visible signs like waves, bulges, or areas where the shingles seem pushed upward. Regular visual checks and professional inspections are essential for early detection.

What are the costs associated with repairing buckled shingles?

Repairing buckled shingles can cost between $150 to $300 for minor repairs, but if a full roof replacement is necessary, expenses can escalate to between $3,000 and $6,000 or more. It’s essential to assess the damage to determine the most accurate estimate.

Is it better to do DIY repairs or hire professional roofers for buckled shingles?

For buckled shingles, hiring professional roofers is generally advisable for extensive damage to ensure quality repairs and prevent further issues. If the damage is minor, DIY repairs could be an option, but be cautious of potential mistakes.

What preventative measures can I take to avoid shingle buckling?

To avoid shingle buckling, prioritize regular maintenance, select quality materials, and ensure proper attic ventilation. Conduct routine inspections and address any potential issues swiftly to maintain the integrity of your roofing.


https://www.aroconllc.com/wp-content/uploads/2024/10/A-photo-showing-various-types-of-buckled-shingles-on-a-roof-scaled-2.jpg 983 1475 Arocon https://www.aroconllc.com/wp-content/uploads/2024/09/arocon-logo.webp Arocon2024-11-14 08:00:182024-11-14 08:00:18Shingle Buckling: Causes and Effective Fixes
A photo of a homeowner preparing for roof replacement with tools and materials

Get It Done Right: How to Replace Your Roof Efficiently

November 12, 2024/in Uncategorized/by Arocon

Need to know how to replace your roof? This guide walks you through assessing your roof, preparing for the replacement, and installing new shingles. You’ll learn when to replace, how to prepare, and the key steps for a successful project.

Key Takeaways

  • Assess your roof’s condition regularly to identify signs of damage like leaks and curling shingles, especially if it’s over 20 years old.

  • Proper preparation is crucial for a roof replacement—secure permits, hire a quality contractor, and protect your property before starting the project.

  • After installation, regular maintenance, including inspections and gutter cleaning, is essential to extend your roof’s lifespan and prevent costly repairs.

Assessing Your Roof’s Condition

A photo showing a damaged roof with signs indicating it needs replacement

Evaluating the current condition of your roof is the first step in the replacement process. This assessment helps determine the extent of the damage and if a full replacement is needed. Such indicators can signal that it’s time for a thorough inspection and potential replacement.

If your roof is around 20 to 30 years old, it may be due for replacement, especially if it shows other signs of deterioration. Understanding these factors will help you make an informed decision and prepare for the next steps in the roof replacement process.

Signs It’s Time for a Roof Replacement

Several telltale signs indicate it’s time for a roof replacement. Curled shingles, for instance, often mean the roof is nearing the end of its lifespan. If you notice several cracked or missing shingles, this could necessitate a full roof replacement. Broken shingles and sagging areas are also red flags that should not be ignored.

Additionally, leaks or sunlight visible through the attic ceiling are indicators of potential water leaks related to roofing. Damaged flashing, which often signifies the need for a roof replacement, should also be inspected thoroughly.

Remember, the typical lifespan of a roof ranges from 20 to 30 years, so roofs over 20 years old may need replacement.

When Is the Best Time to Replace a Roof?

Timing is critical when planning a roof replacement. Scheduling a roof replacement early in the fall can help secure contractor availability and ensure the project is completed before winter. The timing can significantly impact the quality and efficiency of the project, as different seasons present different challenges.

Spring and early summer are also good times for roof replacement, providing favorable weather conditions and longer daylight hours. However, avoid the peak summer heat, which can make the roofing materials more difficult to work with and affect the installation quality.

Preparing for Roof Replacement

A photo of a homeowner preparing for roof replacement with tools and materials

Successful roof replacement hinges on proper preparation, which includes securing permits, gathering materials, and protecting your property. These steps ensure safety for both roofers and homeowners. Roofing projects often involve mess, safety equipment, and noise, making proactive home preparation essential for any roofing project.

Begin by hiring a professional roofing contractor and obtaining at least three quotes. This helps you understand roof replacement costs and select the best option for your project. Focus on quality materials and workmanship for a long-lasting roof.

Securing Permits and Materials

Understanding local regulations for permits is crucial before starting a roof replacement. Understanding the permit process, including time, cost, and inspection requirements, is important. A professional roofing contractor can assist with navigating the local permitting and inspection process.

Review local permit regulations as the first step in roof replacement. Essential roof materials include caulk, drip edge, flashing, roofing adhesive, nails, underlayment, and shingles. Higher-grade materials offer increased durability and better wind resistance.

Protecting Property and Landscaping

Talk to your roofing contractor about covering flowers or shrubbery to prevent damage during replacement. Notify neighbors a few days in advance to prepare them for any noise or inconveniences.

Covering items in the attic is advisable to protect them from dust and debris during the roofing process. Clear the driveway or designate a storage space for materials to ensure smooth access during roof replacement. These steps help protect your property and maintain curb appeal.

Removing the Old Roof

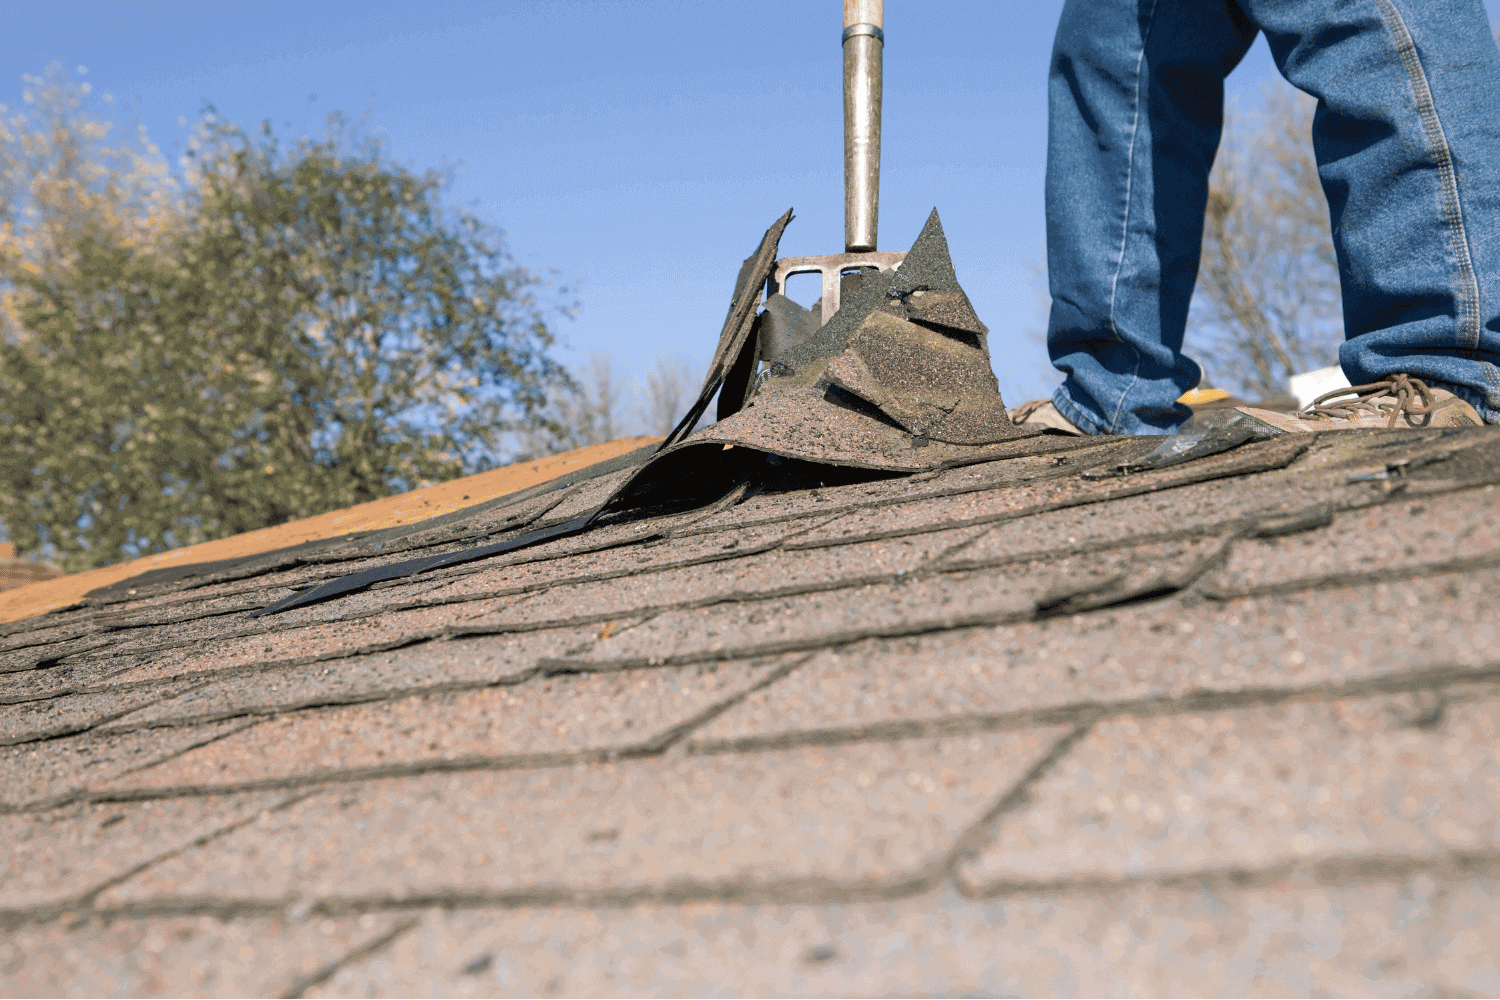
A photo of workers removing old shingles from a roof

Removing the old roof is a critical step. Cover attic items and remove wall decorations to protect your home’s interior. Specialized tools and skills are required for effective replacement.

Use the tear-off method if there are already two layers of roofing material. Remove the entire old roof before installing the new one. A roofing shovel can help with this task, and materials should be disposed of in a dumpster.

Tools Needed for Removal

The right tools are crucial for efficient, safe roof removal. A roofing shovel, often more effective than a garden fork, is essential for shingle removal. Other necessary tools include dumpsters for waste disposal and safety gear.

These tools facilitate a smooth transition from the old roof to new materials, making the process more manageable.

Steps to Remove Old Shingles

Remove shingles from the peak and work downward for effective debris management. This method organizes the removal process and prevents roof deck damage.

After removing old shingles, inspect the roof deck for damage. This vital step ensures a stable base for the new roof. Proper disposal of old shingles and preparation of the roof deck set the stage for the new installation.

Repairing and Inspecting the Roof Deck

Inspect the roof to identify any structural or moisture damage before installing a new one. This step is essential to detect underlying issues.

Replace damaged wood on the roof decking with new plywood or OSB. This step ensures the longevity and stability of the roofing materials.

Identifying Damage

Signs of damage to roof decking include sagging, dark spots, musty odors, and holes. Inspectors look for wear, rot, and water damage to determine the roof’s condition. Conduct roof inspections at least biannually, especially after severe weather.

Granules in gutters often indicate roof deterioration and the potential need for replacement. Early identification of these signs can save on extensive repairs and prolong the roof’s lifespan.

Replacing Damaged Wood

Check for watermarks, rot, and damage on the roof sheathing. Plywood or oriented strand board (OSB) typically replace damaged decking, with plywood being the more durable option.

Properly attach new sheathing to the roof deck to provide a sturdy base for the new roofing materials and prevent future issues.

Installing Protective Layers

A photo showing the installation of protective layers during roof replacement

Protective layers are critical in roof replacement. A drip edge directs water away from the roof deck and into the gutters, reducing water damage risk. Underlayment and leak barriers provide secondary defenses against water infiltration, protecting from ice dams and heavy rains.

These layers ensure the longevity and effectiveness of the new roof.

Drip Edge Installation

Place the drip edge tightly against the fascia boards to direct water away. Common materials include aluminum and PVC. Secure the drip edge with roofing nails every 2 to 3 feet.

This installation prevents water from seeping into the roof deck, ensuring a solid foundation for the new roof.

Underlayment and Leak Barriers

Felt paper and synthetic underlayment, typically made from fiberglass or polyester, are common. Synthetic underlayment is preferred for its durability and ease of installation.

Leak barriers prevent water from entering the roof decking, especially in valleys. These barriers protect the roof from water damage and prolong its lifespan.

Laying New Shingles

After installing protective layers, lay the new shingles. Inspect the roof deck to ensure a solid and stable base. Begin by installing a strip of starter shingles from the roof edge.

Install new roofing material starting at the eaves near the metal drip edge and work upwards. Use a chalk line to ensure straight lines.

Starter Shingles

Starter shingles provide a secure base for the first row. Made from materials like asphalt and fiberglass, they improve water runoff by sitting flat.

They also prevent wind from blowing underneath the first line. Proper installation is essential for the roof’s overall integrity.

Installing Asphalt Shingles

Asphalt shingles rely on gravity to channel water away. A smooth and secure roof deck is essential for successful installation.

Install the drip edge on the eave first to protect the roof deck. Underlayment, either felt or synthetic, adds an extra layer of protection.

Ridge Cap Shingles

Finish the shingle installation with ridge cap shingles to cover the peak where two roof planes meet. These shingles prevent water and debris entry. Overlap each shingle or cap and nail securely when installing ridge caps. Ensure each ridge cap covers the nails of the previous one for proper sealing.

Proper ridge cap installation is crucial for durability and weather resistance, ensuring the roof ridge is protected against water infiltration and wind damage.

Flashing and Ventilation

Flashing and ventilation are essential for a well-installed roof. Flashing directs water away from vulnerable areas, preventing leaks. Step flashing is essential where the roof meets vertical surfaces like chimneys and dormers.

Ventilation regulates temperature and moisture levels in your attic, preventing damage and extending your roof’s lifespan. Ridge cap shingles also aid ventilation by allowing hot air to escape.

Installing Flashing

Inspect flashing around chimneys and vents to prevent water infiltration. Nail flashing to the roof deck, not vertical walls, to allow for expansion and contraction. This flexibility prevents cracking or detachment over time.

Proper flashing installation is essential to direct water away from critical areas, ensuring the roof remains watertight and protected against leaks and damage.

Adding Roof Vents

Install roof vents correctly aligned with the roof decking and attic space. Proper ventilation regulates temperature and moisture levels, preventing damage and extending roof lifespan.

Adding roof vents maintains a healthy attic environment, reduces mold risk, and improves home efficiency.

Finalizing the Roof Replacement

A photo depicting the final inspection of a newly installed roof

Finalize the roof replacement with a thorough inspection to ensure all work meets the homeowner’s expectations. Address any discrepancies during the walkthrough. Regular maintenance can significantly enhance your new roof’s lifespan.

Regular inspections and maintenance catch minor issues early, keeping your roof in optimal condition. This final step ensures your new roof is ready to protect your home for years to come.

Cleanup Process

Cleaning up the job site is the final step in the roof installation process. Ensure the area is tidy once work is complete. The roofing contractor should remove old shingles, nails, and materials used during the installation. Roofing crews typically perform a thorough sweep of the property for debris and loose nails after the installation is completed.

Contractors use a blower and magnets to ensure nothing is left on the roof. If unsatisfied with the cleanup, a homeowner can request a secondary sweep for nails. A dumpster can simplify the cleanup process when removing old shingles.

Scheduling an Inspection

A professional inspection is crucial to ensure the newly installed roof meets all safety and building standards. Compliance with local safety and building standards helps prevent future roofing issues and ensures the roof’s lifespan. Prioritizing a professional inspection can save homeowners from potential structural damages and costly repairs.

Scheduling a final inspection with a building inspector ensures that all aspects of the roof replacement process have been completed correctly and safely. This step provides peace of mind and confirms that your new roof is ready to withstand the elements.

Post-Installation Maintenance

The lifespan of a roof is influenced by material, installation quality, climate, and maintenance. Essential annual maintenance activities for a new roof include regular inspections, gutter maintenance, and protecting the roof. Cleaning gutters is vital for effective water drainage, which protects the roof from damage.

Regular maintenance ensures that your roof remains in good condition and can effectively protect your home from the elements. By staying proactive, you can avoid costly repairs and extend the lifespan of your new roof.

Regular Inspections

Regular roof inspections are essential because they catch minor issues early. The average cost of an annual roof inspection ranges from $125 to $342. During an annual inspection, contractors look for issues such as cracked shingles and mold.

Scheduling regular inspections with a professional roofing contractor ensures that your roof remains in top condition. These inspections can identify potential problems before they become major issues, saving you time and money in the long run. Additionally, working with experienced roofing contractors can provide peace of mind.

Gutter Maintenance

Debris in gutters can lead to water overflow, which might damage the roof and foundation. Gutters should be cleaned at least twice a year, ideally in the fall after most leaves have fallen, and after winter storms to remove any settled debris. If your roof is high or you’re pressed for time for gutter cleaning, it’s advisable to hire a contractor.

Installing gutter guards can help reduce the amount of debris accumulating in gutters. Proper gutter maintenance ensures that water is effectively drained away from your roof and home’s foundation, preventing water damage and prolonging the life of your roof.

Summary

In summary, replacing your roof is a significant investment that requires careful planning and execution. By assessing your roof’s condition, preparing adequately, removing the old roof, installing protective layers, laying new shingles, and ensuring proper flashing and ventilation, you can achieve a successful roof replacement. Regular post-installation maintenance, including inspections and gutter cleaning, will help extend the lifespan of your new roof.

Taking the time to follow these steps meticulously will not only protect your home from the elements but also enhance its curb appeal and value. Remember, a well-maintained roof is the cornerstone of a safe and comfortable home. So, embrace this journey with confidence and ensure your roof replacement is done right.

Frequently Asked Questions

How do I know if my roof needs to be replaced?

Check for curled, cracked, or missing shingles, leaks, and damaged flashing. Plus, if your roof is over 20 years old, it might be time for a replacement.

When is the best time to replace a roof?

The best time to replace a roof is early fall, as the weather tends to be favorable and contractors are more available. Spring and early summer are also good alternatives if you miss that window.

What permits and materials do I need for a roof replacement?

You’ll definitely need to check your local regulations for necessary permits, and gather materials like shingles, underlayment, nails, and flashing for the roof replacement. It’s all about being prepared!

How do I protect my property during a roof replacement?

To protect your property during a roof replacement, talk to your contractor about covering your plants and securing items in your attic to avoid dust and debris. Don’t forget to also inform your neighbors!

What post-installation maintenance is necessary for a new roof?

To keep your new roof in great shape, make sure to inspect it annually and clean your gutters at least twice a year. This simple routine will help extend your roof’s lifespan and prevent costly repairs down the line.


https://www.aroconllc.com/wp-content/uploads/2024/10/An-photo-of-a-homeowner-preparing-for-roof-replacement-with-tools-and-materials.png 1000 1500 Arocon https://www.aroconllc.com/wp-content/uploads/2024/09/arocon-logo.webp Arocon2024-11-12 08:00:502024-11-12 08:00:50Get It Done Right: How to Replace Your Roof Efficiently
An illustration showing different types of fascia boards and their applications

How to Maintain Your Fascia Board for a Lasting Roof

November 7, 2024/in Uncategorized/by Arocon

Fascia boards are crucial components of your roof, supporting the gutter system and protecting your home from moisture and pests. In this article, we discuss their functions, benefits, and materials used, as well as how to identify damage to fascia boards and maintenance tips for your fascia board.

Key Takeaways

  • Fascia boards are essential for both the structural integrity and aesthetic appeal of your home, directing water away and enhancing curb appeal.

  • Regular inspections and maintenance of fascia boards help prevent fascia damage and costly repairs by ensuring a dry and secure environment.

  • Choosing the right material for fascia boards—such as wood, vinyl, or aluminum—can significantly impact their longevity and maintenance requirements.

Understanding Fascia Boards

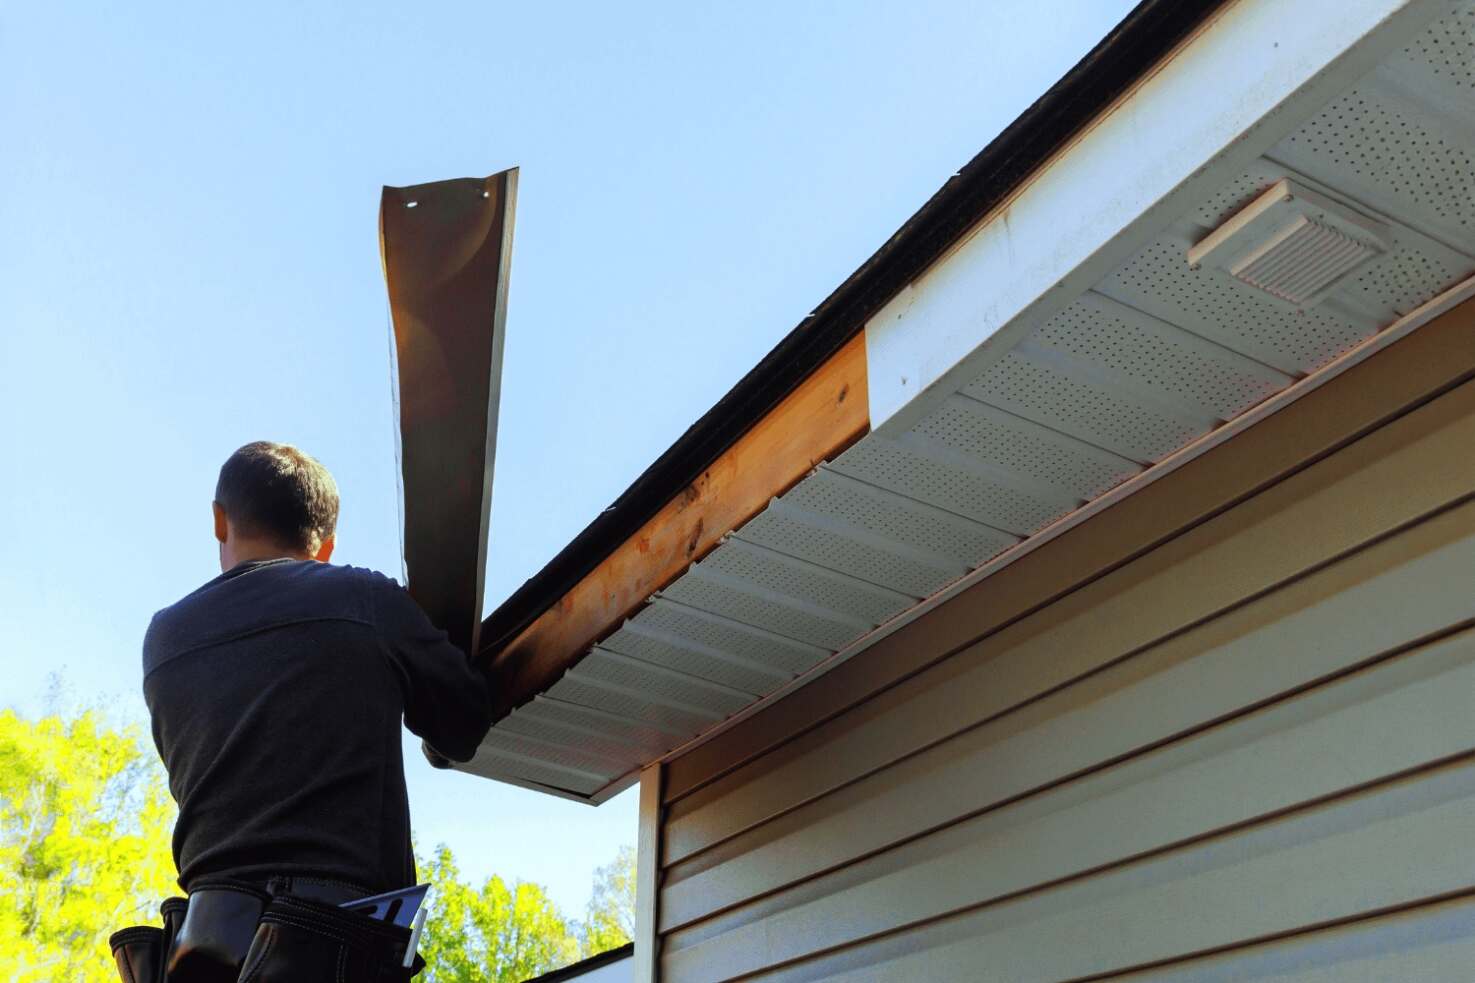
An illustration showing different types of fascia boards and their applications

Fascia boards are a key component of the roofing structure, crucial for maintaining your home’s integrity and function. Positioned behind gutters and running along the length of your house, these boards not only support the gutter system but also connect to the roof rafters, closing off the attic to pests and elements.

Fascia boards primarily support the gutter system, directing water away from your home. Without properly functioning fascia boards, water can infiltrate your roof and attic. Additionally, fascia boards prevent rafters from rotting, thus maintaining the roof’s structure.

Beyond their functional role, fascia boards add a finished look to your roofline, enhancing the curb appeal of your home. They serve both decorative and protective purposes, making them a crucial element in your home’s exterior design. In essence, fascia boards ensure your roof’s longevity and enhance your home’s aesthetic appeal.

Functions and Benefits of Fascia Boards

Fascia boards enhance both the functionality and aesthetics of your home. Covering the soffit and providing a finished look to the roof and eaves, fascia boards contribute significantly to the overall curb appeal of your property. The color and style of your fascia cover can dramatically influence the appearance and potential resale value of your home.

Functionally, fascia boards manage wetness around your roof. They support the gutter system, which handles heavy rain, preventing moisture accumulation and potential damage. A complete fascia system offers adequate space for attachment, preventing shifting and twisting that could lead to moisture damage.

Additionally, fascia boards enhance the structural integrity of your home by supporting the roof’s edge and preventing the rafters from rotting. By doing so, they help maintain a dry, pest-free attic and a sound roofing system.
In summary, fascia boards and fascia supports are vital for both functionality and aesthetics, making them essential to any roofing structure.

Common Materials for Fascia Boards

For fascia boards, various materials are available, each with its advantages and drawbacks. Common materials consist of wood, vinyl, and aluminum. Additionally, composite and fiber cement are also frequently used. Choosing the right material depends on your specific needs and conditions.

Wood fascia boards provide a classic appearance and are typically made from cedar, pine, or redwood, with spruce and fir also being common choices. However, wood can be prone to moisture damage and may require regular maintenance to keep it in good condition.

On the other hand, vinyl fascia boards are lightweight and resistant to moisture and insects, though they can warp from moisture and soften in heat. Aluminum fascia boards are durable and require low maintenance, but they can be more expensive than wood or vinyl and may dent or scratch easily.

Composite fascia boards, which combine wood fibers and plastic, offer eco-friendly durability and aesthetic flexibility. Lastly, fiber cement fascia boards are highly resistant to fire, moisture, and insect damage but are heavier, more costly, and require special tools for installation.

Understanding the pros and cons of each material will help you make an informed decision when choosing fascia boards for your home.

Choosing the Right Fascia Board Material

A photo of selecting the right fascia board material with examples of different materials

Choosing the right fascia board material ensures the durability, functionality, and aesthetic appeal of your home. Environmental conditions, budget, and visual appeal are significant factors in this decision. Consider climate, budget, aesthetics, and maintenance requirements when selecting fascia boards.

Vinyl and aluminum fascia boards are known for their resilience and require minimal upkeep compared to traditional wood. Composite materials, which combine wood fibers and plastic, offer both durability and aesthetic flexibility, making them an excellent choice for many homeowners. Additionally, preservative-treated wood can enhance the longevity of fascia boards by resisting moisture-related issues.

Each material withstands extreme weather differently, so choose one that suits your local climate. Structurally sound fascia boards are crucial due to their weight-bearing role in supporting the gutter system. By considering these factors, you can select the right fascia board material that meets both your functional and aesthetic needs.

How to Identify Damaged Fascia Boards

Identifying damaged fascia boards early can save you from costly repairs. Common signs of damage include cracks, splits, or holes in the fascia boards. If your fascia boards show staining, bowing, or chipping, it’s time to replace them. Ignoring damaged fascia can lead to severe water infiltration and rot, compromising the structural integrity of your roof.

Removing damaged sections promptly can prevent further issues and maintain your roofing system’s health. Regular inspections and maintenance keep fascia boards in good condition, ensuring effective protection for your home.

Steps to Replace Fascia Boards

A photo demonstrating the steps to replace fascia boards on a house

The system must be configured correctly to ensure optimal performance. If the components are not installed properly, it can lead to various issues that affect functionality. Replacing fascia boards can be manageable with a step-by-step approach.

After:

  1. Begin by inspecting the existing fascia to assess the extent of the damage.

  2. If replacement is necessary, remove the old fascia board and any mounted gutters.

  3. Measure and cut the new fascia board for installation.

  4. Mark and remove the fascia board in sections for easier handling.

  5. Identify and mark the rafter locations to ensure proper alignment before securing the new fascia board.

  6. Use nails that are 2 inches long to fasten the fascia board securely to the rafters, ensuring it has two contact points for added strength.

  7. Seal the seams between fascia pieces against water to prevent future damage.

  8. Finally, seal and paint the wood, adding an outdoor primer and paint for protection and aesthetic matching.

Preventative Maintenance for Fascia Boards

Maintaining your fascia boards is essential to keep them in good condition and prevent damage. Regular inspections and maintenance practices can prolong the life of your fascia boards. Applying a body filler putty to the seams helps prevent water damage, while painting the new fascia board with outdoor primer and paint offers protection and aesthetic matching.

Installing a metal drip edge can further protect fascia boards from water damage by directing water away from the roof’s edge. Trimming overhanging branches reduces debris and moisture exposure on fascia boards, helping to prevent wood rot and other issues.

For added protection, consider wrapping the fascia boards in metal, which can save you from frequent maintenance and extend the lifespan of your fascia boards. Sealed and painted fascia boards will require a new coat occasionally to maintain their protection.

Following these practices ensures your fascia boards remain in top condition and continue to protect your home effectively.

Enhancing Your Home’s Exterior with Fascia Trim

A photo showing how fascia trim enhances a home's exterior

Fascia trim can significantly enhance the visual appeal of your home, bringing more attention to the roofline area and accentuating roof peaks. The presence of fascia trim adds a polished and complete look to your home’s exterior, boosting its curb appeal. A textured finish for fascia trim adds dimension and makes the exterior more visually engaging.

Contrasting colors for fascia trim can highlight architectural features and add interest to your home’s exterior. Customize fascia trim in various styles and colors to match the home’s architectural design, ensuring a cohesive and attractive appearance. Decorative fascia trim can create a polished finish that enhances overall curb appeal.

For a modern look, larger fascia trim is often used; Craftsman homes typically prefer narrower options. Incorporating LED lighting into fascia trim enhances visibility and creates dramatic effects at night, adding both beauty and functionality to your home’s exterior elements.

The Role of Fascia in Roof Design

An photo depicting the role of fascia in roof design

Fascia boards frame the roof overhang and enhance the home’s visual appeal. They integrate with soffits and gutters, creating a cohesive and functional roofing system. Serving as a horizontal barrier at the roof’s edge, house fascia boards protect against water infiltration and manage excess moisture, maintaining the roof’s structural integrity.

Fascia boards also contribute to directing rainwater away from the structure of the house, preventing potential water damage. Water leaks in the roof or attic can indicate compromised fascia boards, signaling the need for inspection and possible replacement. Peeling paint or wood rot on siding may result from fascia issues, highlighting their importance in roof maintenance.

In summary, fascia boards are crucial to roof design, contributing to both the aesthetic and functional aspects of your home’s exterior. Properly maintained fascia boards ensure a durable and attractive roofing system.
Professional Fascia Board Services from Arocon

When it comes to fascia board services, Arocon LLC stands out for their expertise and professionalism. Known for their punctuality and attention to detail, the Arocon team handles every fascia board installation and repair project with utmost care. Responsive communication keeps clients informed throughout the process, providing peace of mind.

Arocon’s services include thorough cleanup, leaving the site tidy and ensuring no mess after fascia board projects. As a leading provider of fascia board installation and repair services, Arocon LLC delivers high-quality workmanship and reliable solutions for all your fascia board needs.

Summary

In conclusion, fascia boards are an essential component of your roofing system, providing both functional and aesthetic benefits. Understanding the importance of fascia boards, identifying damage early, and choosing the right materials are crucial steps in maintaining a lasting roof. Regular maintenance and professional services can ensure your fascia boards remain in top condition, protecting your home and enhancing its curb appeal.

By following the guidance provided in this blog post, you can take proactive steps to maintain and enhance your fascia boards, ensuring they contribute to a durable, beautiful roof for years to come. Don’t overlook these unsung heroes of your roofing system—your home will thank you for it.

Frequently Asked Questions

What materials are commonly used for fascia boards?

Fascia boards are commonly made from wood, vinyl, aluminum, composite, and fiber cement, offering various benefits to suit your needs. Choose the right material to enhance your home’s exterior and improve its durability!

How can I identify damaged fascia boards?

To identify damaged fascia boards, look for cracks, splits, holes, staining, bowing, or chipping. Catching these issues early is crucial to preventing further damage and keeping your home safe!

What are the benefits of using composite fascia boards?

Using composite fascia boards provides long-lasting durability and a versatile aesthetic that enhances your home’s appeal while being eco-friendly. Most homeowners embrace this choice for a worry-free, attractive finish!

How often should fascia boards be maintained?

To ensure your fascia boards remain in great condition, conduct regular inspections and maintenance, including sealing and painting. Taking these proactive steps will help prolong their lifespan and keep your home looking sharp!

Why should I consider professional fascia board services from Arocon?

Choosing Arocon for your fascia board needs guarantees high-quality workmanship and excellent communication, making your project stress-free and reliable. Invest in professionals for a smooth, hassle-free experience!


https://www.aroconllc.com/wp-content/uploads/2024/10/An-illustration-showing-different-types-of-fascia-boards-and-their-applications-scaled-1.jpg 983 1475 Arocon https://www.aroconllc.com/wp-content/uploads/2024/09/arocon-logo.webp Arocon2024-11-07 08:00:192024-11-07 08:00:19How to Maintain Your Fascia Board for a Lasting Roof
An illustration showing the importance of regular roof inspections for homeowners.

Roof Change How Often: Essential Tips for Homeowners

November 5, 2024/in Uncategorized/by Arocon

Wondering how often you need to change your roof? The frequency of roof replacement—how often—depends on several factors, including the type of roofing material, climate, and maintenance practices. In this article, we’ll explore these factors and discuss roof change: how often you should assess your roof to help you determine when it’s time for a replacement.

Key Takeaways

  • The lifespan of a roof varies by material, with asphalt shingles lasting about 20 years and metal roofs up to 50 years with proper maintenance.

  • Regular inspections and maintenance are essential to identify early signs of deterioration, such as leaks and shingle damage, to prevent costly repairs.

  • Consulting a professional roofing contractor is crucial for timely evaluations and budgeting for roof replacement around the 20-30 year mark.

Roof Change How Often: Essential Tips for Homeowners

An illustration showing various types of roofing materials that homeowners should consider.

The frequency of roof replacement can vary based on materials and conditions. It’s important to assess your roof regularly for signs of wear. Many homeowners frequently ponder this question. The answer depends on several factors, including the type of roofing material, the age of the roof, visible damage, water leaks, mold growth, and structural issues. 

Budgeting for a roof replacement as your roof nears the end of its lifespan is a prudent step. This foresight helps avoid the financial strain of sudden, unexpected repairs. Regular inspections reveal signs of deterioration, such as moisture in the attic, daylight through roof boards, and evidence of leaks or structural damage after storms.

Understanding these factors and monitoring the condition of your roof can prevent minor issues from escalating into significant problems. Proactive measures ensure your home remains protected, minimizing the stress and expense of emergency repairs.

Introduction

Replacing a roof is not just about addressing wear and tear; it’s an opportunity to enhance your home’s value and aesthetic appeal. However, roofs don’t come with a specific expiration date, making it crucial for homeowners to assess their condition regularly. This guide aims to demystify the process of roof replacement and provide you with the knowledge to make informed decisions about your home’s roofing needs.

At Arocon LLC, we understand the complexities of roofing and the importance of timely replacements. This guide covers essential tips and factors to consider when your roof is approaching the end of its lifespan or showing signs of damage. From understanding the lifespan of popular roofing materials to knowing when to consult a professional, we’ve got you covered.

Key Indicators Your Roof Needs Replacement

An illustration highlighting key indicators that a roof needs replacement, including visible damage and age.

Identifying signs that indicate your roof needs replacement is key to maintaining your home’s integrity. Indicators like the roof’s age, visible shingle damage, water leaks, mold growth, and structural issues can signal the need for a new roof.

Each of these indicators provides valuable insights that can help you determine when to take action.

Age of the Roof

The age of your roof is one of the most reliable indicators of when it needs to be replaced. Generally, roofs should be considered for replacement after 20-30 years, depending on the roofing material. For example, asphalt shingles last about 20 years on average, while metal roofs can last up to 50 years with proper care.

Knowing your roof’s material lifespan helps you plan for replacement before significant issues develop. Regular inspections and maintenance can extend the life of your roof, but eventually, all roofs will need to be replaced based on their age and wear and tear.

Visible Damage to Shingles

Shingle damage, such as curling, cracking, or missing pieces, clearly indicates your roof may need replacement. Curling, cracking, or missing shingles suggest significant wear and tear. Buckled or curled shingles are particularly concerning, as they can no longer effectively protect your home from the elements.

Severe weather can exacerbate shingle damage, causing pieces to break off or creating bald spots. Regularly inspecting your shingles and gutters for debris can help you catch these issues early and take the necessary steps to repair or replace your roof.

Water Leaks and Stains

Water leaks and stains on your ceiling or walls are direct indicators of roof failure. Such signs suggest that your roof’s integrity has been compromised, allowing water to seep through.

Promptly addressing these issues prevents further structural damage and costly repairs.

Mold, Mildew, and Moss Growth

The presence of moss, mold, and mildew on your roof can indicate underlying problems. Moss growth is particularly concerning as it can trap moisture against the roof surface, leading to damage over time.

Regularly clearing moss and inspecting for mold can help maintain your roof’s health and longevity.

Structural Issues

Structural issues such as a sagging or drooping roof are critical indicators of serious underlying problems. A sagging roof often points to extensive damage and potential structural failure, requiring immediate professional evaluation.

Ignoring these signs can lead to significant and costly repairs.

Factors Influencing Roof Lifespan

An illustration depicting roofing longevity through quality installation.

Several factors influence the lifespan of a roof, including the type of roofing material, environmental conditions, quality of installation, and maintenance practices.

Understanding these factors can help you make informed decisions about roof care and replacement, ensuring the longevity and durability of your roof.

Roofing Material

Different roofing materials have varying lifespans, which significantly impact how often a roof needs to be replaced. Asphalt shingles, for instance, typically last 15 to 30 years, while slate roofs can last over 100 years with proper care. Tile roofs are known for their durability but require additional structural support due to their weight.

Choosing the right roofing material for your home involves considering factors such as cost, maintenance, and longevity. High-quality materials like slate and metal may have a higher upfront cost but offer extended lifespans and lower long-term maintenance. The most popular roofing material can also be a viable option depending on your specific needs.

Climate and Environmental Conditions

Climate and environmental conditions play a crucial role in determining how long a roof will last. Extreme weather events, such as heavy storms and rapid temperature changes, can significantly shorten a roof’s lifespan.

Choosing roofing materials suited to your local climate can enhance durability and energy efficiency.

Quality of Installation

The quality of installation is another critical factor in the longevity of your roof. Poor workmanship can lead to leaks, structural damage, and the need for premature replacement. Ensuring that your roof is installed by a reputable roofing contractor can help prevent these issues and extend the life of your roof.

Maintenance Practices

Routine maintenance prolongs your roof’s lifespan. Annual inspections, clearing gutters of debris, and removing moss can help prevent minor issues from becoming major problems. Professional roof inspections should occur at least once a year to catch potential issues early.

Maintenance practices like to trim nearby trees and promptly repair issues significantly extend your roof’s life. Neglecting these tasks is not proper upkeep, making roof issues more expensive to fix in the long run.

Comparing Roofing Materials’ Lifespans

Understanding the lifespan of your roof and different roofing materials is essential for planning repairs and replacements. The average lifespan of a roof can range from 20 to over 100 years, depending on the material used. Knowing these lifespans helps homeowners make informed decisions about the best roofing material for their needs.

Asphalt Shingles

Asphalt shingles are one of the most popular roofing materials due to their affordability and ease of installation. The average lifespan of architectural asphalt shingles is around 22 years, while 3-tab shingles typically last about 25 years. High-quality asphalt shingles can last up to 50 years with proper maintenance, making them a great choice for an asphalt roof.

Regular inspections and maintenance, such as replacing missing shingles and repairing damaged flashing, can help maximize the lifespan of an asphalt shingle roof. Despite their shorter lifespan compared to other materials, asphalt shingles remain a cost-effective and reliable choice for many homeowners.

Metal Roofs

Metal roofs are known for their durability and longevity, often lasting between 30 to 75 years depending on the type and maintenance. Standing seam metal roofs, for example, typically have a lifespan of 30 to 50 years, while zinc and copper roofing can last up to a century.

Proper maintenance, such as clearing overhanging branches and inspecting for damage after high winds, can help extend the life of a metal roof. Although metal roofs have a higher initial cost, their longevity and low maintenance needs make them a valuable investment.

Tile Roofs

Tile roofs, particularly clay tiles, are known for their exceptional durability and longevity, often lasting up to 100 years with proper care. Clay tile roofs can exceed this lifespan when maintained correctly, making them a popular choice for homeowners seeking long-term solutions.

However, tile roofs require regular maintenance to prevent damage from environmental conditions. Proper installation and timely issue resolution can maximize a tile roof’s lifespan.

Slate Roofs

Slate roofs are renowned for their impressive lifespan, ranging from 50 to 100 years. Many slate roofs come with warranties of 50 years to a lifetime, reflecting their long-term investment value. This durability makes slate an excellent choice for homeowners seeking a roof that will last for generations.

While a slate roof requires a higher initial investment, their longevity and minimal maintenance needs make them a cost-effective option in the long run. Choosing slate roofing ensures a durable, aesthetically pleasing roof that withstands the test of time.

Importance of Regular Roof Inspections

An illustration showing the importance of regular roof inspections for homeowners.

Regular roof inspections are crucial for identifying potential issues before they escalate. Annual inspections reveal roof deterioration and extend its lifespan through timely maintenance. Identifying leaks early during inspections can prevent extensive damage and costly repairs.

Hiring a reputable roofing contractor for biannual inspections, particularly before and after harsh weather, maintains your roof’s health. Inspections should thoroughly evaluate both the roof’s exterior and supporting structures for comprehensive maintenance.

Professional Roof Maintenance Services

An illustration of a professional roofing contractor performing maintenance on a roof.

Professional roof maintenance services, like Arocon LLC’s Roof and Gutter Tune-Up, offer a comprehensive approach to roof care. Priced at $199, this service includes minor repairs, such as replacing blown-off shingles and sealing vents, flashings, and nail holes. Technicians also tighten gutters and downspouts and inspect the slope of gutters to ensure proper water flow.

Utilizing professional services ensures that your roof receives expert care, prolonging its lifespan and preventing more significant issues. A photo report showing the roof’s condition before and after the service provides transparency and peace of mind for homeowners.

When to Consult a Roofing Contractor

Consulting a roofing contractor at the right time is vital for maintaining your roof’s health. Homeowners should budget for roof replacement around the 20-30 year mark and seek professional evaluations, especially after severe weather or visible damage. Scheduling roofing services in advance, particularly in spring or early summer, ensures preferred dates and can save costs.

Emergency roofing situations require immediate attention, and homeowners should not hesitate to call a contractor at any time of year. A complimentary, no-obligation consultation is often available for larger project repairs and replacements, providing an opportunity to assess the best course of action for when a roof replaced is necessary.

Summary

In summary, maintaining a robust and reliable roof requires understanding the factors influencing its lifespan, recognizing the signs of deterioration, and conducting regular inspections and maintenance. Choosing the right roofing material and consulting professional services can significantly extend your roof’s life and ensure your home remains protected.

Taking proactive steps in roof care not only prevents costly repairs but also enhances your home’s value and aesthetic appeal. By staying informed and vigilant, you can ensure your roof stands the test of time and weather.

Frequently Asked Questions

How often should a roof be replaced?

A roof should generally be replaced every 20-30 years for asphalt shingles, while metal roofs may last up to 50 years, and slate roofs can exceed 100 years with proper care. Regular maintenance can significantly extend the life of your roofing material.

What are the signs that my roof needs to be replaced?

If you notice visible damage to shingles, water leaks, mold growth, or structural sagging, these are clear signs that your roof needs to be replaced. Additionally, consider the age of the roof, as older roofs are more likely to require replacement.

What factors influence the lifespan of a roof?

The lifespan of a roof is primarily influenced by the type of roofing material, climate conditions, the quality of installation, and the frequency of maintenance. Prioritizing these factors can significantly extend your roof’s longevity.

How can I extend the lifespan of my roof?

To extend the lifespan of your roof, conduct regular inspections and maintenance, including clearing gutters and promptly addressing any repairs. Ensuring proper installation by a reputable contractor also plays a crucial role.

When should I consult a roofing contractor?

Consult a roofing contractor when your roof shows visible damage, after severe weather, or as it approaches the end of its lifespan. Regular inspections and timely consultations, especially in spring or early summer, can help maintain your roof and potentially save on costs.


https://www.aroconllc.com/wp-content/uploads/2024/10/An-illustration-showing-the-importance-of-regular-roof-inspections-for-homeowners-scaled-1.jpg 983 1475 Arocon https://www.aroconllc.com/wp-content/uploads/2024/09/arocon-logo.webp Arocon2024-11-05 08:00:382024-11-05 08:00:38Roof Change How Often: Essential Tips for Homeowners
debris in gutters

Fall Gutter Care: Protecting Your Home from Damage

October 31, 2023/in Uncategorized/by Grant

As the leaves start to change colors and the air becomes crisp, it’s time to start thinking about fall gutter care. While it may not be the most glamorous task, cleaning out your gutters is essential to protect your home from potential damage. Neglecting this chore can lead to a host of problems, including clogged gutters and costly repairs down the line.

One of the main culprits of gutter clogs during the fall season is, unsurprisingly, leaves. As they fall from the trees, they can easily find their way into your gutters, creating a barrier that prevents water from flowing freely. This can lead to water overflowing and pooling around your home’s foundation, potentially causing significant damage. Additionally, clogged gutters can create the perfect breeding ground for pests, such as mosquitoes, who thrive in stagnant water.

Dangers of Clogged Gutters

The dangers of leaving your gutters full of leaves and debris extend beyond just the immediate impact on your home’s foundation. Over time, the weight of the accumulated debris can put stress on your gutter system, causing it to sag or even detach from the roof altogether. This can result in costly repairs or replacement, not to mention the potential danger of falling gutters.

4 Tips for Gutter Care

While cleaning your gutters may sound like a daunting task, it is a necessary one to ensure the longevity and structural integrity of your home. Here are a few tips to help you safely and effectively clean your gutters:

1. Use a sturdy ladder: Make sure your ladder is in good condition and placed on a stable surface. Consider using ladder stabilizers to prevent any wobbling or slipping.

2. Wear protective gear: Gutter cleaning can be messy, so it’s important to wear gloves and safety glasses to protect yourself from debris and potential injuries.

3. Use a scoop or trowel: To remove the debris, use a scoop or trowel to carefully scoop out the leaves and other debris from the gutters. Avoid using your hands directly, as sharp objects or hidden dangers may be lurking in the gutter.

4. Flush with water: After removing the larger debris, use a hose to flush out any remaining smaller particles and ensure that water flows freely through the gutters and downspouts.

I Don’t Like Heights

If you’re not comfortable with heights or the idea of cleaning your gutters yourself, it’s always a good idea to hire a professional gutter cleaning service. They have the necessary equipment and expertise to safely and efficiently clean your gutters, saving you time and potential injuries.

Remember, fall gutter care is not just about maintaining the appearance of your home. It’s about protecting your investment and preventing costly damage. So, take the time to clean out your gutters this fall, and rest easy knowing that you’ve taken the necessary steps to keep your home safe and sound.

https://www.aroconllc.com/wp-content/uploads/2023/09/debris-in-gutters-scaled-2.jpeg 1475 1106 Grant https://www.aroconllc.com/wp-content/uploads/2024/09/arocon-logo.webp Grant2023-10-31 10:12:412024-12-30 18:40:29Fall Gutter Care: Protecting Your Home from Damage

10 Things to Look For in a Contractor

August 16, 2022/in Uncategorized/by Arocon

In honor of our 10 year anniversary this year, we would like to help you find the best contractor for your project! Here is a simple list of the 10 things we advise you to look for when looking for a contractor.

1. License

When looking for a contractor, it is important to find one that is licensed. This means that the contractor has met the state mandated qualifications for contractors. This is also important if you are looking to sell your house in the future, work done by an unlicensed contractor is not usually recognised in real estate transactions. You can find license holders on most state DLLR websites, for instance, you can find Maryland license holders online.

2. General Liability and Workers Comp Insurance

Insurance is a major factor when it comes to choosing a contractor. Your contractor’s insurance policy protects you as the homeowner from incurring responsibility for an injury sustained on your property.

3. Experience

Experience is important when it comes to choosing a contractor because you want to make sure that they are able to provide you with quality workmanship. You can ask your contractor questions like how long the have been in business, how many projects they do in a month, and if they have any references for their work.

4. References and a Positive Reputation

References and a positive online reputation is a good indication that the company has done significant work and that their customers are happy with their services. Beware of a “too perfect” looking reputation though. A 100% satisfaction rate could be a red flag indicating that the reviews posted are not from actual customers.

5. Steady and Trained Staff and Crew

Never be afraid to ask how long a company has been in business or how long an individual has worked for the company. Lengthy tenure can show that the company has a good reputation not only with customers, but within the company as well. Training is also important, you can ask questions like what licenses or special training’s the company or individual has received.

6. Turnaround Time

Once you speak with a company, turnaround time is also a good indicator of what kind of company you are speaking with. If the turnaround time is too short it may indicate that the company is sacrificing quality for speed. If the estimated length of completion is wildly different from other contractors there could be an issue. During busy seasons, turn around time could be between 3-4 weeks for a standard asphalt roof replacement, or even longer if a severe weather event has occurred.

7. Pricing

Pricing is an important to look for, and not for the reason you might be thinking. When searching for a contractor, you do not want a contractor that has the highest or the lowest pricing. Contractors should be competitive with pricing, but if the pricing seems too good to be true, it usually is. You also want to make sure you are comparing “apples to apples” when it comes to pricing. Different manufacturers or types of shingles can raise or lower costs.

8. Material Suppliers

A good way to check in with a contractor would be to check with the material suppliers. If the company has a good reputation with the people they work most closely with and often (suppliers), than it is a good indication that it will be a good company to work with.

9. Communication

From the beginning of contacting your contractor, you want to make sure that they are providing good communication. Did the office get back to you in a timely manner? Did they answer all of your questions? Did they confirm the appointment? Did your consultant answer all of your questions? If the answer is “no” to several of theses questions, it may be a good indicator that the company will not be able to have open communication with you during the process of your job.

10. Contract

Your contract will show a lot about your company. It will include most of the items listed above, it should show you their license number, answer questions about materials used, timelines, and a detailed contract can show you the experience of a company. If you have a vague or hard to understand contract, it might indicate that there are hidden fees or procedures.

When it comes to finding a contractor, no two projects are the same, because no two people are the same. Trust is a major factor when it comes to finding the right contractor, and like dating, it is important to find someone you are comfortable with. Never be afraid to ask as many questions as you might need to. At AROCON Roofing and Construction, our friendly and trained staff is available Monday through Saturday to ask any questions you might have for an upcoming project you might have!
https://www.aroconllc.com/wp-content/uploads/2024/09/arocon-logo.webp 0 0 Arocon https://www.aroconllc.com/wp-content/uploads/2024/09/arocon-logo.webp Arocon2022-08-16 15:34:352022-08-16 15:34:3510 Things to Look For in a Contractor

Beat the Summer Heat with New Windows

June 2, 2022/in Uncategorized/by Arocon

The mercury is rising outside, and the summer sun is blazing down upon us, making this a perfect time to think about having new windows installed. Rather than the tired old models of yesteryear, modern multi-pane vinyl windows have many time and expense-saving features, including insulating gases and hidden hinges for easy cleaning. Here are some of the other benefits of new windows:

Today’s windows are designed to keep extreme temperatures where they belong – outside your home. Whether it’s swelteringly hot or freezing cold out of doors, internal living spaces need to be kept at a constant, comfortable temperature, especially when the elderly, children, or pets are involved. Because of their vastly improved insulation value, having new windows installed will let you enjoy lower heating and cooling costs. Climate control is high on the list of the greatest ongoing costs of homeownership, which means that updated windows usually pay for themselves sooner rather than later.

Increased home value and curb appeal. If you plan to put your home on the market in the near future, having recently updated windows will be a major selling point. A wise investment for both current use and future value, new windows are a surefire way to add value to any home, big or small.

Easier maintenance due to improved design. Tilt-in sashes let the homeowner clean a window’s outside surfaces without hauling a bucket and sponge up a tottering ladder. This safety and convenience-boosting design does away with one of the more dangerous chores of years passed.

Gain peace of mind thanks to improved home and personal safety. If they’re accidentally broken, most newer window panes are designed to break into small chunks that cut less readily than jagged, falling shards. Plus, much like automobile windshields, laminated window-panes resist breaking when they’re struck by either flying debris or a burglar’s hammer. With new windows, sunlight is the only thing getting into your house easily.

Updating your home’s windows will also tighten up its thermal envelope and provide better noise reduction due to improved overall insulation. Heat and cold aren’t the only nuisances new windows will keep out – another benefit of new windows is their ability to attenuate, or reduce the strength of, noise. Whether it’s the neighbor’s barking dog or the sound of vehicles driving by, the insulating power of modern windows is amazing – at least for people used to the single-pane, wooden models of yesteryear.

Windows and doors are the parts of a home that let in (and out) the most amount of heating and cooling energy. If you’re looking to cut your energy costs while improving everything from the amount of sunlight in your home to its aesthetic appeal and inherent value, talk with your local window installation professionals at AROCON.

https://www.aroconllc.com/wp-content/uploads/2024/09/arocon-logo.webp 0 0 Arocon https://www.aroconllc.com/wp-content/uploads/2024/09/arocon-logo.webp Arocon2022-06-02 10:53:062022-06-02 10:53:06Beat the Summer Heat with New Windows

Why Small Roofing Businesses Are Better

April 23, 2022/in Uncategorized/by Arocon

From the ability to help with more specific problems, to ownership that is knowledgeable and ready to help the rest of the staff, small roofing businesses have many benefits that can’t be found at big companies. In addition, the local nature of a small business creates opportunities for discounts and special promotions. At their core, small roofing businesses are customer and employee focused, with the ultimate goal of promoting a community and helping their clients.

At AROCON, we place value on fostering lasting relationships between our clients and employees, and working with satisfied customers is what continues to motivate our business.

https://www.aroconllc.com/wp-content/uploads/2024/09/arocon-logo.webp 0 0 Arocon https://www.aroconllc.com/wp-content/uploads/2024/09/arocon-logo.webp Arocon2022-04-23 10:48:372022-04-23 10:48:37Why Small Roofing Businesses Are Better
Page 4 of 11«‹23456›»

Pages

  • Aberdeen, MD Metal Roofing Services
  • About Us
  • Alexandria, VA Roof Inspection Services
  • Annapolis, MD Metal Roofing Services
  • Bel Air, MD Metal Roofing Services
  • Blog
  • Bowie, MD Metal Roofing Services
  • Brand Gallery template
  • Cambridge, MD Roof Inspection Services
  • Cambridge, MD Slate Roofing Services
  • Careers
  • Cedar Roofing Service
  • Claims
  • Columbia, MD Metal Roofing Services
  • Commercial Roofing Services
  • Commercial Roofing Services Alexandria, VA
  • Commercial Roofing Services In Cambridge, MD
  • Commercial Roofing Services In Westminster, MD
  • Composite Siding Services
  • Composite-tile Roofing Services
  • Contact
  • Door Installation
  • Ellicott City, MD Metal Roofing Services
  • Expert Slate Roofing Services in Alexandria, VA
  • Feedback
  • Financing
  • Flat Roofing Alexandria, VA
  • Flat Roofing Services
  • Flat Roofing Services Cambridge, MD
  • Frederick, MD Metal Roofing Services
  • Gutter Guard Services
  • Gutter Installation Services
  • Gutter Maintenance Services
  • Gutter Services
  • Hampstead, MD Metal Roofing Services
  • Home
  • Home Confidence Plan
  • Home Insulation
  • Laurel, MD Metal Roofing Services
  • Lower Delaware
  • Make a payment
  • Manchester, MD Metal Roofing Services
  • Metal Roofing Alexandria, VA
  • Metal Roofing Services
  • Metal Roofing Services Cambridge, MD
  • Mount Airy, MD Metal Roofing Services
  • Northern Virginia Service area
  • Our Team
  • Potomac, MD Metal Roofing Services
  • Privacy Policy
  • Professional Gutter Cleaning Services
  • Rate Us
  • Review Feedback Form
  • Reviews
  • Rockville, MD Metal Roofing Services
  • ROOF & GUTTER TUNE-UP
  • Roof Inspection
  • Roof Maintenance Services
  • Roof Maintenance Services Cambridge, MD
  • Roof Maintenance Services in Alexandria, VA
  • Roof Maintenance Services in Westminster, MD
  • Roof Repair
  • Roof Repair Cambridge, MD
  • Roof Repair Lower Delaware
  • Roof Repair Services Alexandria, VA
  • Roof Replacement Cambridge, MD
  • Roof Replacement Lower Delaware
  • Roof Replacement Services
  • Roof Replacement Services in Alexandria, VA
  • Roof Replacement Services in Westminster, MD
  • Roofing
  • Roofing Company in Alexandria VA
  • Roofing Company in Cambridge MD
  • Roofing Company in Westminster, MD
  • Roofing Lower Delaware
  • Roofing Services Alexandria, VA
  • Service area
  • Services
  • Shingle Roofing Alexandria, VA
  • Shingle Roofing in Maryland and Virgina
  • Shingle Roofing Services In Cambridge, MD
  • Siding
  • Siding Replacement
  • Silver Spring, MD Metal Roofing Services
  • Skylight Installation
  • Slate Roofing Services
  • Template – Door Brands
  • Template – Gutters Brands
  • Template – Roofing Brands
  • Template – Siding Brands
  • Template – Skylight Brands
  • Template – Window Brands
  • Template_Alexandria_Service_Block
  • Template_Cambridge_Service_Block
  • Template_Certification
  • Template_Finance_Banner
  • Template_Our_Process
  • Template_Our_Work
  • Template_Overall_Service_Block
  • Template_Review_Section
  • Template_Westminster_Service_Block
  • Towson, MD Metal Roofing Services
  • Trusted Roofing Services in Cambridge, MD
  • Westminster, MD Flat Roofing Services
  • Westminster, MD Metal Roofing Services
  • Westminster, MD Roof Inspection Services
  • Westminster, MD Roof Repair Services
  • Westminster, MD Roofing Services
  • Westminster, MD Shingle Roofing Services
  • Westminster, MD Slate Roofing Services
  • Window Installation

Categories

  • Roofing
  • Uncategorized

Archive

  • May 2025
  • April 2025
  • March 2025
  • February 2025
  • January 2025
  • December 2024
  • November 2024
  • October 2023
  • August 2022
  • June 2022
  • April 2022
  • February 2022
  • August 2021
  • June 2021
  • April 2020
  • March 2020
  • January 2020
  • December 2019
  • November 2019
  • November 2018
  • September 2018
  • July 2018
  • June 2018
  • May 2018
  • February 2018
  • December 2017
  • September 2017
  • August 2017
  • October 2016
  • September 2016
  • August 2016
  • August 2015
  • March 2015
  • August 2014
  • October 2013
  • August 2013
  • August 2012
  • August 2011
  • August 2010
  • August 2009
  • August 2008

Send Us A Message

Send Us A Message

By submitting, you authorize Arocon Roofing and Construction to reach out via phone, email, or text for explicit information about project needs. We will never share your personal information with 3rd parties for marketing purposes or spam you. You can opt out at any time. Message/data rates apply. Consent is not a condition of purchase. Terms and conditions | Privacy Policy

arocon logo

Licenses

  • MHIC: 161926
  • VA: 2705193848
  • DC: 170957900
  • PA: 196386
  • NJ: 13VH13509200
  • DE: 2024713003

Services

  • Roofing
  • Maintenance Plans
  • Gutters
  • Siding
  • Windows
  • Skylights

Company

  • Team
  • Reviews
  • Financing
  • Blog
  • Careers
  • Contact
Make A Payment

101 R John Street
Westminster, MD 21157
(410) 861-6767

109 Brohawn Ave, #111
Cambridge, MD 21613
(443) 487-6455

950 N Washington St
Alexandria, VA 22314
(571) 349-9111

AROCON Roofing & Construction LLC © 2025 All Rights Reserved. Proudly serving the Mid Atlantic Region | Privacy Policy

  • Link to Facebook
  • Link to Instagram
  • Link to Youtube

© Copyright - Arocon Roofing and Construction - Enfold WordPress Theme by Kriesi
Scroll to top