Arocon Roofing and Construction
  • About Us
    • Our Team
    • Reviews
    • Financing
    • Careers
    • Blog
    • FAQS
  • Services
    • Roofing
      • Roof Repair
      • Roof Replacement
      • Roof Inspection
      • Metal Roofing
      • Commercial Roofing
    • Gutters
      • Gutter Installation
      • Gutter Cleaning
      • Gutter Protection
    • Siding
    • Skylights
    • Windows
    • Roof and Gutter Tune Up
    • Home Confidence Plan
    • Storm Damage
  • Claims
  • Service Area
    • Westminster, MD
      • Roofing
      • Claims
    • Cambridge, MD
      • Roofing
      • Claims
    • Alexandria, VA
      • Roofing
      • Claims
    • Rehoboth Beach, DE
      • Roofing
      • Claims
  • 410-861-6767
  • FREE ESTIMATE
  • Menu Menu
Call now Free Estimate
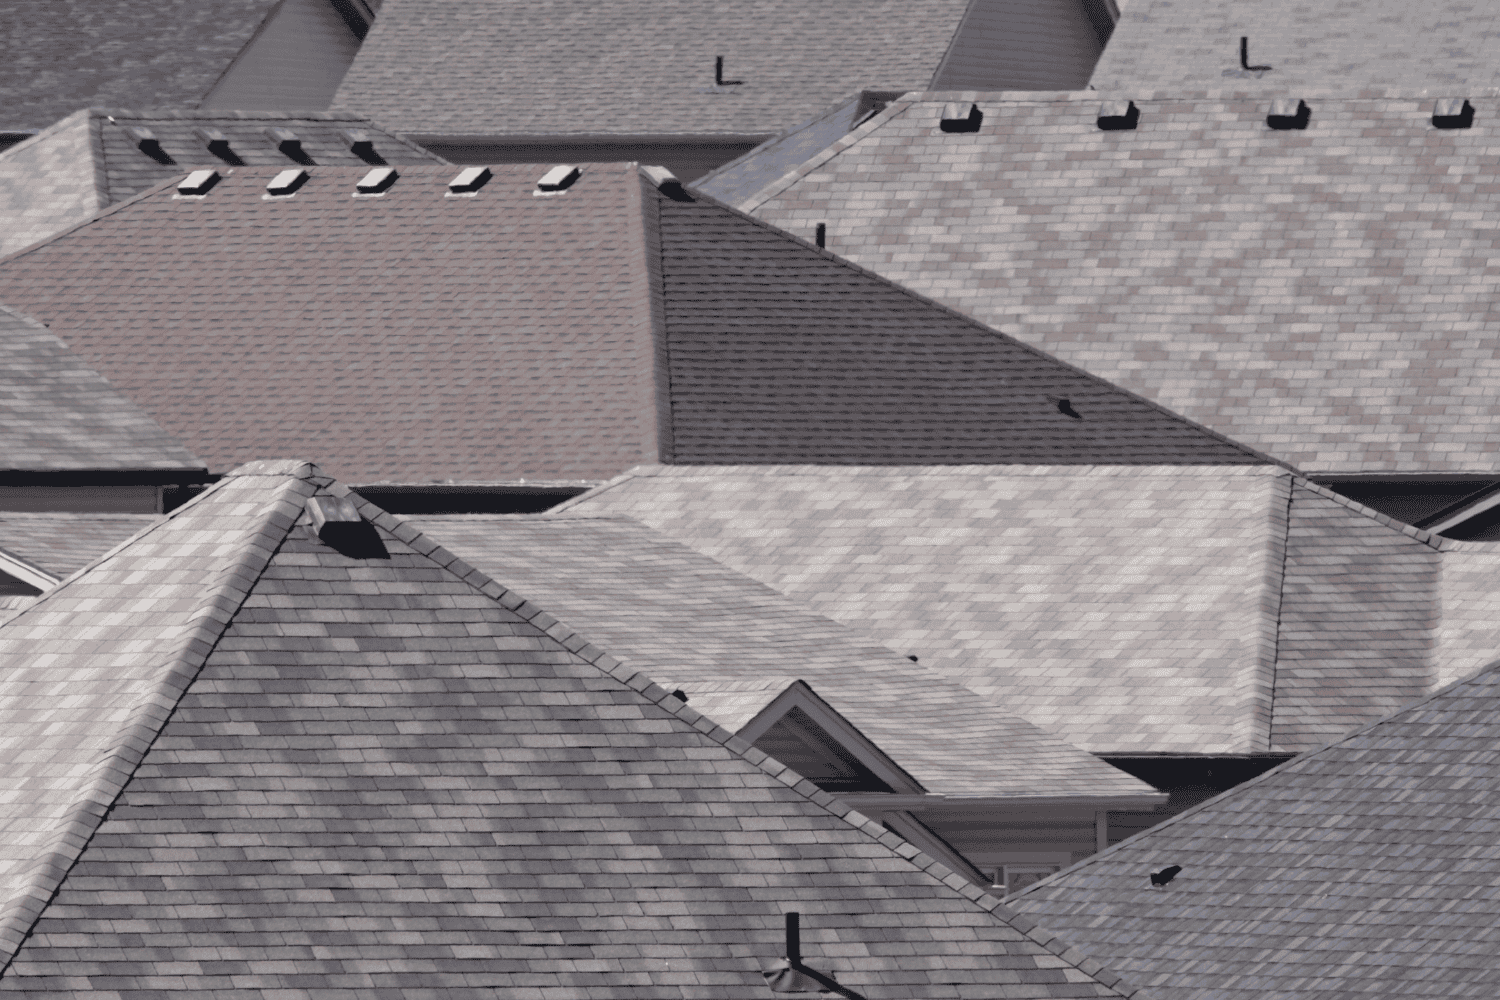
The importance of asphalt roof shingle thickness for durability and performance.

Understanding Asphalt Roof Shingle Thickness: What Homeowners Need to Know

Asphalt roof shingle thickness directly affects your roof’s durability and weather resistance. Thicker shingles can offer better protection and a longer lifespan. In this article, we discuss how thickness impacts your roof’s performance and what you need to consider.

Key Takeaways

  • Thicker asphalt shingles offer enhanced durability and better protection against harsh weather, significantly extending the lifespan of roofs.

  • Choosing the right shingle thickness involves balancing budget, climate, and aesthetic preferences, with thicker shingles typically resulting in better long-term value.

  • Different types of asphalt shingles, such as 3-tab, architectural, and luxury, vary in thickness and performance, impacting installation requirements and overall roof effectiveness.

Understanding Asphalt Roof Shingle Thickness: What Homeowners Need to Know

An overview of asphalt roof shingle thickness for homeowners.

The thickness of asphalt shingles is more than just a number; it plays a vital role in the durability and overall protection of your roof. Thicker shingles are designed to withstand harsh weather conditions better, providing enhanced durability and longevity for your roofing system. They are particularly effective in offering resistance to extreme weather, such as strong winds and heavy rains, which can significantly impact the lifespan of your roof.

Shingle thickness varies widely depending on the type and composition of the shingle. Standard asphalt shingles come in varying thicknesses, directly influencing their strength and lifespan. Understanding these differences can help homeowners choose the right roofing materials that balance durability, cost, and aesthetic appeal.

Opting for thicker shingles means investing in a more durable roofing system, providing enhanced protection and peace of mind.

Introduction

Asphalt shingles have been a staple in residential roofing for many years, thanks to their affordability and effectiveness in various environmental conditions. A critical aspect homeowners should be aware of is the thickness of these shingles, measured in inches or centimeters. The thickness of the shingles you choose can significantly impact the installation process, overall performance, and longevity of your roof.

Understanding the basics of asphalt roofing shingles is important before discussing options with a roofing contractor. This knowledge will empower you to make informed decisions and ensure that your roofing investment meets your needs and expectations.

Whether you are considering a roof replacement or a new installation, being well-informed about shingle thickness will help you choose the best roofing materials for your home.

The Importance of Shingle Thickness

The importance of asphalt roof shingle thickness for durability and performance.

Shingle thickness is a critical factor that can significantly impact the performance and longevity of your roof. Thicker asphalt shingles often provide better protection against moisture intrusion, which is essential in preventing mold growth and structural issues within your home. This enhanced moisture resistance is particularly beneficial in areas prone to heavy rainfall or humidity.

The durability of roofing shingles is directly influenced by their thickness. Thicker shingles are more effective at withstanding harsh weather conditions, such as strong winds and heavy rains, providing better durability and longevity. This means that investing in thicker shingles can lead to fewer repairs and replacements over the lifespan of your roof, ultimately saving you money and hassle in the long run.

The chemical composition of asphalt shingles also plays a role in their performance and longevity. The proportion of volatiles and additives in the asphalt mixture can affect the thickness and durability of the shingles.

By understanding these factors, homeowners can make more informed choices when selecting roofing materials that will provide long-term protection and value for their homes.

Types of Asphalt Roofing Shingles

Different types of asphalt roofing shingles including architectural and luxury options.

Asphalt shingles come in various types, each with its unique characteristics and benefits. The main categories of asphalt roofing shingles include 3-tab shingles, architectural shingles, and luxury shingles. These types differ not only in their appearance and cost but also in their thickness and performance.

The thickness of asphalt shingles varies depending on the type and material composition, directly impacting their durability and lifespan. For instance, 20-year shingles are typically thinner than 50-year shingles, indicating a significant variation in thickness among different types.

Understanding these differences can help homeowners choose the right type of shingle for their specific needs and budget.

3-Tab Shingles

Three-tab asphalt shingles are an affordable option for homeowners on a budget. Their ease of installation also makes them a popular choice. Characterized by their single-layer construction and flat appearance, these shingles are typically about 1/8 inch thick. While they offer a cost-effective roofing solution, their thinner design means they may not provide the same level of durability and weather resistance as thicker shingles.

Despite their limitations, 3-tab shingles can still be a viable option for many homeowners. They have a typical lifespan of 20 to 25 years, which is adequate for many residential applications.

However, they are generally considered less visually appealing compared to architectural shingles, which may be a consideration for those looking to enhance the curb appeal of their home.

Architectural Shingles

Architectural shingles, also known as laminated or dimensional shingles, offer a significant upgrade in both durability and aesthetic appeal compared to 3-tab shingles. These architectural roofing shingles are constructed with multiple layers of asphalt and fiberglass, providing added thickness and strength. Typically, architectural shingles are between 3/10 to 1/2 inch thick, making them about 50% heavier and thicker than 3-tab shingles.

The increased thickness of architectural shingles translates to enhanced durability and weather resistance, allowing them to withstand harsh environmental impacts better. This makes them a long-term investment, with a lifespan that can extend for decades longer than 3-tab shingles.

Additionally, architectural shingles often incorporate design features like shadow bands, which enhance their visual appeal and can mimic the appearance of more expensive roofing materials.

Another advantage of architectural shingles is their ability to enhance the curb appeal of a home. Their design can complement various architectural styles and provide a more substantial look to the roof. This not only improves the overall aesthetic but can also increase the market value of the home.

Luxury Shingles

Luxury shingles, also known as laminated or designer shingles, represent the pinnacle of asphalt roofing options. These shingles are crafted to replicate the look of premium roofing materials like slate and wood shingles. They also offer the extra thickness and durability that come with asphalt.

Typically, luxury shingles range from 1/2 inch to 3/4 inch in thickness, making them the thickest and most robust option available.

The premium thickness of luxury shingles offers superior durability and performance benefits, making them an excellent choice for homeowners seeking long-lasting protection and aesthetic appeal. While they come with a higher initial cost, the investment in luxury shingles can pay off in terms of enhanced curb appeal, increased property value, and reduced maintenance over time.

How Shingle Thickness Affects Roof Performance

How shingle thickness affects roof performance and durability.

The thickness of asphalt shingles is a crucial factor in determining the overall performance of a roofing system. Thicker shingles provide better protection against harsh weather conditions, improved insulation, and superior resistance to wind and water damage.

In the following sections, we will explore in detail how shingle thickness affects key aspects of roof performance, including durability and longevity, insulation and energy efficiency, and wind and water resistance.

Durability and Longevity

One of the most significant advantages of thicker asphalt shingles is their enhanced durability and longevity. Thicker shingles are heavier and have better waterproofing properties, which contribute to their extended service life.

For example, architectural shingles, which are thicker than 3-tab shingles, can last between 30 to 50 years, making them a worthwhile long-term investment despite their higher initial costs.

The increased thickness of these shingles also means they can withstand harsh weather conditions more effectively, providing superior protection against wind, rain, and other environmental impacts. This enhanced durability reduces the need for frequent repairs or replacements, saving homeowners both time and money in the long run.

Additionally, the superior protection and longevity offered by thicker shingles make them a reliable choice for homeowners seeking a durable and low-maintenance roofing solution.

Proper maintenance is also essential to maximize the lifespan of thicker shingles. Regular inspections and timely repairs can help maintain the integrity of the roof and prevent minor issues from escalating into major problems.

By investing in thicker shingles and maintaining them properly, homeowners can enjoy a roof that not only lasts longer but also enhances the overall aesthetic appeal of their home.

Insulation and Energy Efficiency

Thicker shingles offer improved insulation properties, which can significantly enhance the energy efficiency of a home. The added thickness provides better thermal protection, helping to maintain stable indoor temperatures regardless of the weather outside. This means that homes with thicker shingles require less energy for heating and cooling, leading to lower utility bills and reduced energy consumption.

The improved insulation provided by thicker shingles can also contribute to a more comfortable living environment. By reducing the reliance on heating and cooling systems, homeowners can achieve a more consistent indoor climate while also benefiting from the cost savings associated with lower energy usage.

In this way, investing in thicker shingles not only provides durable roofing but also offers a cost-effective roofing solution in the long run.

Wind and Water Resistance

Thicker asphalt shingles are more effective at withstanding harsh weather conditions, providing better wind and water resistance compared to thinner shingles. This superior resistance is particularly important in regions prone to heavy winds and rains, where the risk of moisture damage and structural issues is higher. Laminated shingles, for example, utilize ceramic-coated minerals as an additional layer to enhance water resistance.

Reduced water penetration is a significant benefit of thicker shingles, as it helps prevent rot, mold, and other structural issues that can compromise the integrity of the roof. Thicker shingles also offer better wind resistance, making them a reliable choice for areas with frequent heavy winds.

Investing in thicker shingles ensures better protection against the elements, enhancing the longevity of your roof.

Choosing the Right Shingle Thickness for Your Home

Choosing the right shingle thickness for your home.

Selecting the right shingle thickness for your home involves considering several factors, including budget, climate, and structural considerations. Thicker shingles tend to be more expensive upfront, but they offer long-term benefits such as increased durability, better insulation, and enhanced aesthetic appeal.

Homeowners should weigh these benefits against their budget constraints to find a suitable balance.

Climate plays a crucial role in determining the best type of asphalt shingles for your home. In regions with harsh weather conditions, such as heavy snowfall or frequent rain, thicker shingles can provide better protection and longevity.

Additionally, local building regulations may set requirements that affect the choice of shingle thickness, ensuring compliance with safety and performance standards.

Aesthetic appeal is another important consideration. Thicker shingles, such as architectural types, can enhance the overall look of the roof and complement various architectural designs. This can potentially increase the market value of your home, making it a worthwhile investment.

By considering these factors, homeowners can make informed decisions and choose the right shingle thickness that meets their needs and preferences.

Installation Considerations for Thicker Shingles

Installing thicker shingles requires careful consideration of the roof’s structural integrity and load-bearing capacity. The added weight of thicker shingles can impact the structural strength of the roof, necessitating an assessment before installation.

Consulting with a professional roofing contractor is recommended to determine if your roof can handle the additional weight and to identify any necessary structural reinforcements.

The condition of the roof deck and the slope of the roof can also dictate shingle thickness requirements. Certain roofing materials and designs may necessitate specific slopes for proper installation.

Additionally, the installation cost for thicker shingles, such as architectural shingles, can range from $1.00 to $1.50 per square foot, which may be higher compared to thinner shingles. Collaborating with an experienced roofing contractor ensures your roof is properly prepared and installed for thicker shingles.

Cost vs. Value of Thicker Shingles

When considering the cost of thicker asphalt shingles, it’s essential to look beyond the initial price tag. Thicker shingles typically cost more upfront compared to their thinner counterparts. However, this initial investment often translates into greater long-term value. Thicker shingles provide enhanced durability and weather resistance, reducing the need for frequent repairs and replacements. This can save homeowners money in maintenance costs over the life of the roof.

Moreover, the superior insulation properties of thicker shingles can lead to significant energy savings. By improving the energy efficiency of your home, thicker shingles can help lower utility bills. Additionally, the increased curb appeal and potential property value enhancement offered by thicker shingles can provide a return on investment, making them a cost-effective roofing solution in the long run.

Ultimately, investing in thicker shingles is a strategic choice that balances initial costs against significant long-term savings and benefits. Homeowners should consider not only the immediate financial impact but also the durability, energy efficiency, and aesthetic enhancements that thicker shingles offer. This comprehensive approach ensures that the roofing investment provides maximum value and protection for years to come.

Arocon’s Expertise in Roofing Solutions

At Arocon, we pride ourselves on providing comprehensive roofing solutions tailored to meet the unique needs of our clients. Our expertise in installing various types of asphalt roofing shingles ensures that homeowners receive the best possible protection and aesthetic appeal for their roofs. From 3-tab shingles to luxury shingles, our team of experienced professionals is equipped to handle any roofing project, big or small.

In addition to our roofing services, Arocon offers a full range of home improvement solutions, including gutters, siding, windows, and doors. Our Roof and Gutter Tune Up service, which includes gutter cleaning, resealing roof vents and piping, and replacing shingles after a storm, is designed to keep your roofing system in top condition.

For larger project repairs and replacements, we provide complimentary, no-obligation consultations to help homeowners make informed decisions. Trust Arocon to deliver quality, reliability, and exceptional customer service for all your roofing needs.
Summary

Understanding the importance of asphalt shingle thickness is key to making informed decisions about your roofing system. Thicker shingles provide enhanced durability, better insulation, and superior resistance to wind and water damage.

By choosing the right shingle type and thickness, homeowners can ensure their roofs offer long-lasting protection and aesthetic appeal.

As you consider your options, remember that investing in thicker shingles may involve higher upfront costs but can result in significant long-term savings and added value to your property.

Whether you’re planning a roof replacement or a new installation, consulting with a professional roofing contractor like Arocon can help you make the best choice for your home. With our expertise and comprehensive range of services, we are committed to providing you with roofing solutions that meet your needs and exceed your expectations.
Frequently Asked Questions

Why is shingle thickness important for my roof?

Shingle thickness is crucial as it directly impacts the durability and weather resistance of your roof, ensuring better protection and increased longevity. Choosing appropriate thickness can ultimately enhance the overall performance of your roofing system.

What are the different types of asphalt shingles available?

The three main types of asphalt shingles are 3-tab shingles, architectural shingles, and luxury shingles, each providing varying thicknesses and benefits to meet your roofing needs.

How does shingle thickness impact energy efficiency?

Thicker shingles significantly enhance energy efficiency by providing better insulation, which helps maintain stable indoor temperatures and reduces energy consumption. This results in lower utility bills for homeowners.

What should I consider when choosing the right shingle thickness?

When choosing the right shingle thickness, you should consider your budget, local climate, structural requirements, and personal aesthetic preferences. This balance will help you make an informed decision that meets your roofing needs effectively.

Why should I choose Arocon for my roofing needs?

Choosing Arocon for your roofing needs is beneficial due to their extensive experience with asphalt roofing shingles and the comprehensive services they offer, including free consultations for larger projects. This ensures you receive professional guidance and a high-quality installation.


https://www.aroconllc.com/wp-content/uploads/2024/12/a52b4d4c-b2d2-4a0a-abe0-99397169aa24.png 1000 1500 Arocon https://www.aroconllc.com/wp-content/uploads/2024/09/arocon-logo.webp Arocon2024-12-26 08:00:052025-09-01 11:08:37Understanding Asphalt Roof Shingle Thickness: What Homeowners Need to Know
A visual comparison of durability between asphalt shingles and architectural shingles.

Asphalt Shingles vs. Architectural: Which is Best for Your Roof?

Choosing between Asphalt Shingles vs Architectural shingles can be challenging. This article directly compares their durability, cost, and visual appeal, providing essential insights to help you make the best decision for your roof.

Key Takeaways

  • Asphalt shingles are cost-effective and versatile, with different types available to suit various homeowner preferences, though they have a shorter lifespan and lower wind resistance compared to architectural shingles.

  • Architectural shingles offer enhanced aesthetics and durability, with a longer lifespan and better weather resistance, making them ideal for homeowners seeking both appearance and functionality, despite their higher initial cost.

  • Choosing between asphalt and architectural shingles should be based on factors such as durability, aesthetics, climate, and budget, with the potential for long-term savings and reduced maintenance costs influencing the decision.

Understanding Asphalt Shingles

A comparison of asphalt shingles vs architectural shingles, showcasing their different styles.

Asphalt shingles have long been a staple in residential roofing, known for their practicality and cost-effectiveness. These shingles consist of a fiberglass mat for support, an asphalt layer for waterproofing, and mineral granules for UV protection and aesthetics. The manufacturing process includes strict quality control measures to ensure durability and performance, making them a reliable choice for many homeowners.

There are several types of asphalt shingles, each catering to different needs and preferences. The main categories include laminate shingles, composition shingles, 3-tab shingles, and premium shingles. Understanding the composition and characteristics of these shingles can help you make an informed decision about whether they are the right roofing material for your project.

Composition and Characteristics

Asphalt shingles are composed of three main components:

  • A fiberglass mat, which provides significant reinforcement, improving the shingles’ durability and reducing the risk of tearing.

  • An asphalt coating, which protects the shingles from weather elements.

  • Mineral granules, which add color and protect the shingles from UV rays.

The fiberglass mat is crucial for the overall strength of the shingle, ensuring it can withstand various environmental stresses.

The asphalt coating enhances the weather resistance of the shingles, allowing them to endure heavy rain and UV exposure. Additionally, mineral granules not only add color but also protect against UV damage and resist algae growth, contributing to the shingles’ longevity and aesthetic appeal.

This high-quality composition is what makes asphalt shingles a popular choice among homeowners for their durability and effectiveness in protecting an asphalt roof.

Advantages of Asphalt Shingles

One of the most significant advantages of asphalt shingles is their affordability, making them a popular choice among budget-conscious homeowners. Their cost-effectiveness doesn’t come at the expense of versatility and ease of installation, which are also key benefits. This makes asphalt shingles an excellent option for those looking for a quick and economical roofing solution.

The versatility of asphalt shingles allows homeowners to choose from a wide array of designs that complement their home’s style. Whether you prefer the classic look of 3-tab shingles or the more textured appearance of laminate shingles, there is a design to match every aesthetic preference. This flexibility in design makes asphalt shingles a go-to choice for many roofing projects.

Drawbacks of Asphalt Shingles

Despite their many benefits, asphalt shingles do have some drawbacks. One of the primary concerns is their shorter lifespan compared to other roofing materials. This shorter lifespan often results in the need for more frequent replacements, which can be both costly and inconvenient in the long run.

Additionally, the environmental impact of asphalt shingles is a growing concern. The disposal challenges associated with their shorter lifespan raise questions about sustainability.

Moreover, asphalt shingles generally exhibit lower wind resistance compared to other roofing materials, making them less ideal for regions prone to high winds and severe weather.

Exploring Architectural Shingles

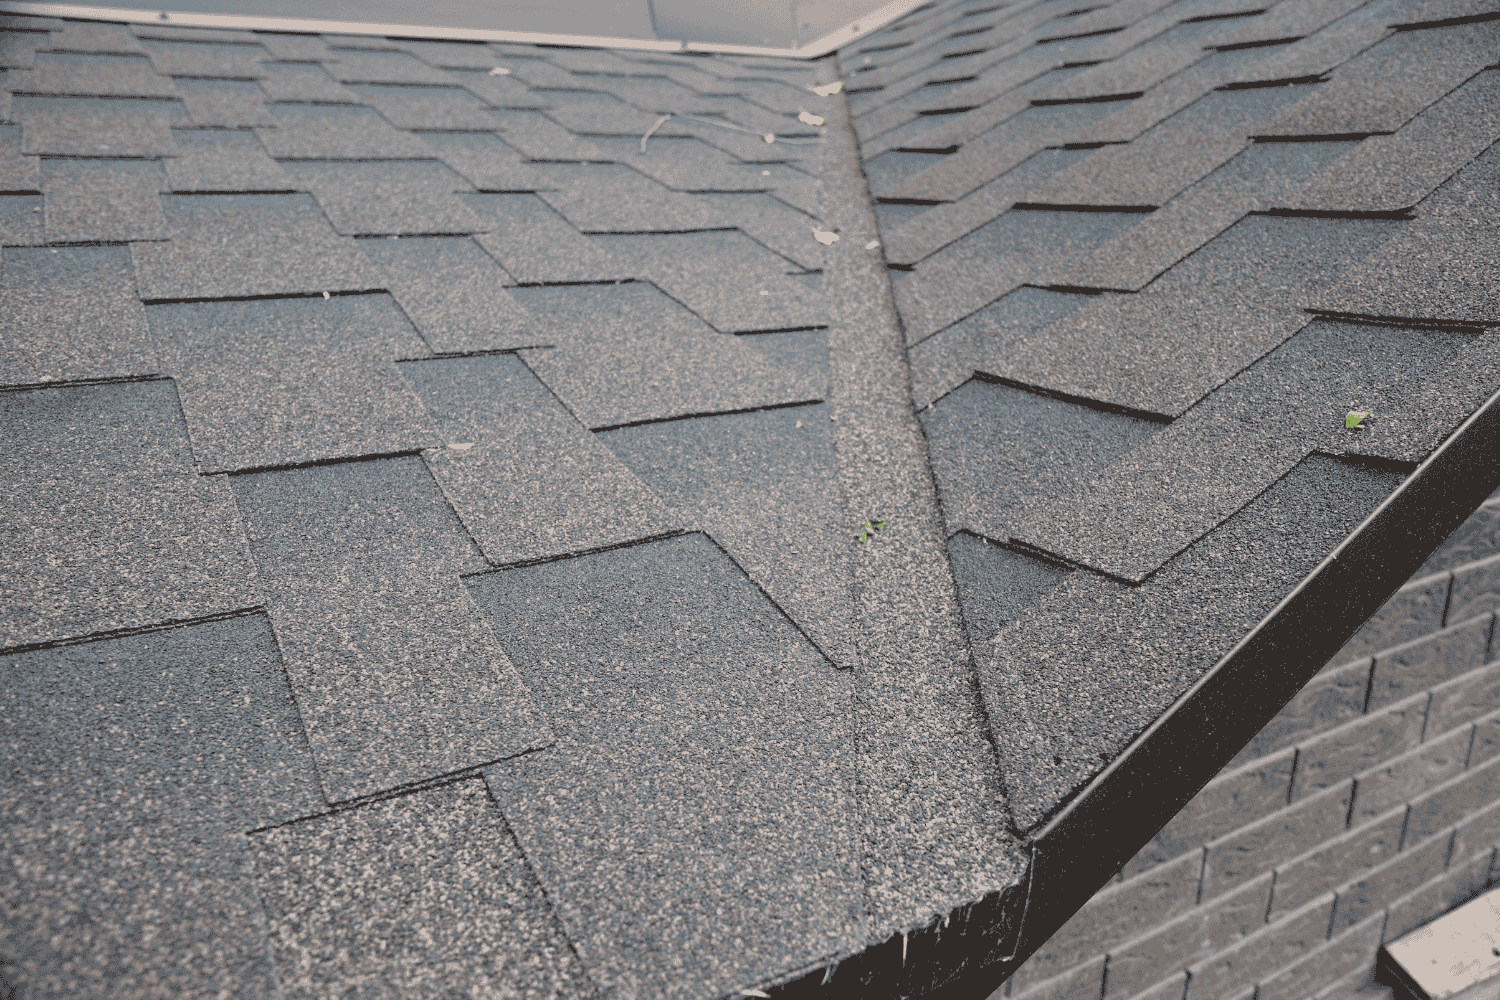
A close-up view of architectural shingles, illustrating their layered structure.

Architectural shingles, also known as laminated shingles or dimensional shingles, are a type of asphalt shingle that has gained popularity for their enhanced aesthetics and durability. These shingles are the most widely used type in residential roofing in the United States, thanks to their quality and affordability. They are designed to mimic the appearance of more premium roofing materials, providing a luxurious look without the hefty price tag.

Architectural shingles are commonly available and offer a range of styles that can significantly enhance the visual appeal of any home. Their layered design and high-quality construction make them a preferred choice for homeowners looking to combine beauty and functionality in their roofing project.

Composition and Characteristics

Architectural shingles are made with two layers of asphalt and fiberglass, contributing to their thicker construction. This layered structure not only provides enhanced durability but also adds a dimensional appearance to the shingles, making them more visually appealing. The high-quality composition of these shingles ensures they can withstand various weather conditions while maintaining their aesthetic appeal.

The layered design of architectural shingles enhances their weather resistance, making them a more robust option for homes in areas prone to harsh weather conditions. Their attractive look and superior performance make architectural shingles a popular choice for homeowners seeking a long-lasting and visually pleasing roofing solution.

Advantages of Architectural Shingles

Architectural shingles offer numerous benefits that make them a preferred choice for many homeowners. One of the most notable advantages is their more dimensional appearance, which significantly enhances the overall look of a home compared to traditional asphalt shingles. The variety of colors and textures available allows homeowners to achieve the desired aesthetic effect, whether they’re aiming for a classic or contemporary look.

In addition to their aesthetic appeal, architectural shingles provide a longer lifespan and better value over time. They mimic the appearance of premium materials such as cedar shakes and slate tiles, offering a luxurious effect without the high cost. Their enhanced water resistance and durability make them an excellent choice for homes in areas with severe weather conditions.

Drawbacks of Architectural Shingles

While architectural shingles have many benefits, they also come with some drawbacks. One of the primary disadvantages is their higher cost compared to standard asphalt shingles. This increased cost can be a significant factor for homeowners on a tight budget, making it essential to weigh the long-term benefits against the initial expense.
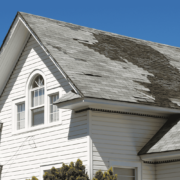
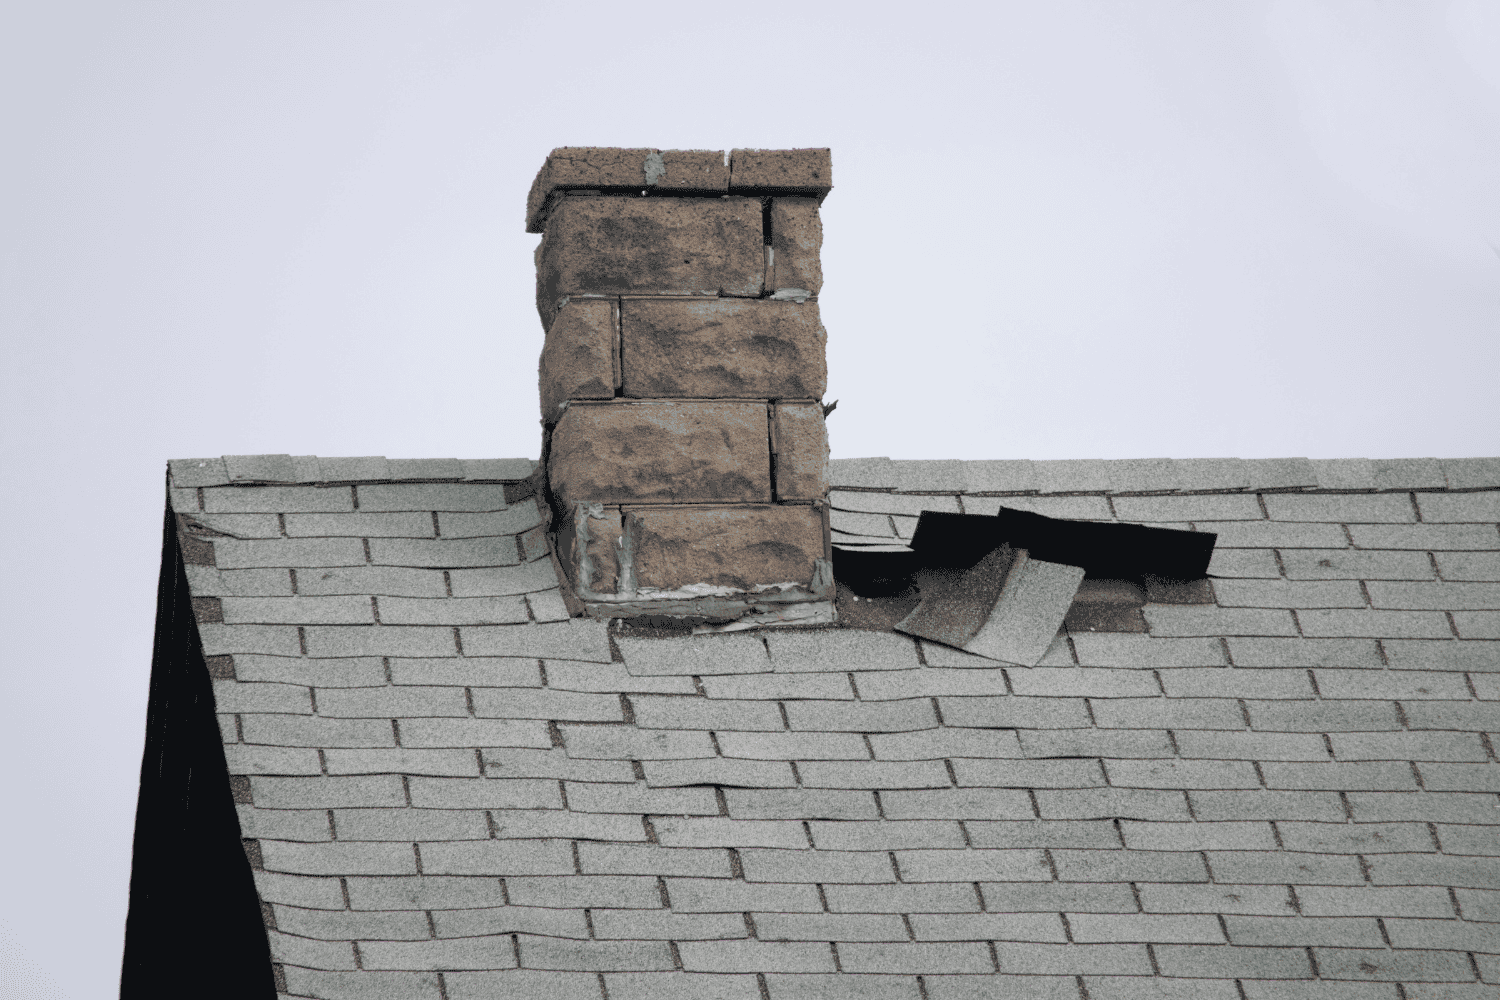
Another consideration is the added weight of architectural shingles, which may necessitate stronger support structures in the roof. This can increase the overall cost and complexity of the roofing project, particularly for older homes that may require additional reinforcement.

Comparing Asphalt Shingles and Architectural Shingles

A visual comparison of durability between asphalt shingles and architectural shingles.

When deciding between asphalt shingles and architectural shingles, it’s crucial to compare several key factors:

  1. Durability

  2. Aesthetics

  3. Cost

  4. Long-term value

Understanding the strengths and weaknesses of each shingle type can help homeowners make an informed decision that aligns with their specific needs and preferences.

Both aesthetic preferences and practical aspects should be considered when selecting roofing shingles. Local building codes and regulations may also influence the decision between asphalt and architectural shingles. By carefully evaluating these factors, you can choose the right roofing material for your home.

Durability and Lifespan

Durability and lifespan are critical factors to consider when comparing asphalt shingles and architectural shingles. Architectural shingles typically have an average lifespan ranging from 30 years to over 50 years, far exceeding that of standard asphalt shingles. Their thicker construction contributes to their enhanced durability, making them more robust against the elements.

In contrast, asphalt shingles may incur higher maintenance costs and require replacements sooner, making architectural shingles a better long-term investment. This longevity can translate into significant cost savings over time, despite the higher initial expense.

Aesthetic Appeal

Aesthetic appeal plays a significant role in the decision-making process for many homeowners. Architectural shingles provide a more visually appealing textured surface that can enhance the overall design of a roof. Their three-dimensional look and variety of colors and textures allow for greater customization and complexity in roofing aesthetics.

On the other hand, three-tab shingles have a lightweight, flat, two-dimensional look that lacks depth and dimension. Their limited design options and neutral colors restrict aesthetic choices, making them less ideal for homeowners seeking to enhance their home’s curb appeal.

Choosing architectural shingles can significantly improve the visual impact and curb appeal of a home.

Cost Considerations

Cost is a crucial factor when comparing asphalt shingles and architectural shingles. While architectural shingles are typically more expensive initially, their longer lifespan can offset these costs over time. The estimated cost per square foot for an architectural asphalt shingle roof is $5.86, which is higher than that of three-tab shingles.

Investing in higher-quality roofing materials can lead to greater long-term savings through reduced maintenance and replacement costs. The upfront cost should be evaluated against potential longevity and maintenance costs, ensuring that homeowners get the best value for their investment.

Architectural shingles provide better longevity and aesthetics compared to asphalt shingles, making them a worthwhile investment.

Wind and Weather Resistance

Wind and weather resistance are critical considerations for homeowners, especially in regions prone to severe weather. Architectural shingles can have wind resistance ratings ranging from 80 to 130 MPH, while traditional 3-tab shingles generally range from 60 to 70 MPH. This enhanced wind resistance makes architectural shingles a more durable option in high wind events.

Performance shingles are specifically designed to provide improved wind and hail resistance, making them suitable for severe weather conditions. The construction details of architectural shingles, such as their layered design, contribute to their superior weather resistance, ensuring better protection for your home.

Installation and Maintenance

An illustration of a roofing installation process, focusing on proper techniques.

Proper installation and maintenance are crucial for maximizing the performance and lifespan of both asphalt and architectural shingles. The installation process involves several key steps, including laying down an underlayment, installing shingles from the bottom up, and ensuring proper alignment and nailing. Regular maintenance, including inspections and cleaning, is essential to keep your roof in optimal condition.

Hiring professional roofers is recommended for both installation and maintenance to ensure that the work meets industry standards and prolongs the roof’s lifespan. By following best practices for roof replacement and maintenance, homeowners can ensure the longevity and performance of their roofing system.

Installation Process

Installing architectural shingles requires critical steps to ensure they are properly set. Inspecting the roof for structural integrity and addressing issues like leaks or rot is necessary. Starter shingles provide a solid base and help prevent wind uplift.

During installation, proper ventilation prevents moisture buildup that could damage the roof. Correctly spacing and angling nails ensures the shingles are secure.

Hiring professional roofers ensures that these steps are followed correctly, resulting in a durable and long-lasting roof.

Maintenance Requirements

Maintenance requirements vary between asphalt and architectural shingles. Asphalt shingles may need more frequent repairs and replacements than architectural shingles. Regular maintenance, including inspections and cleaning, is essential to catch future problems and prevent leaks.

Architectural shingles, while requiring maintenance, generally need less frequent upkeep compared to asphalt shingles. Regular upkeep can prevent damage such as sitting debris on architectural shingles, contributing to long-term savings and ensuring the roof’s longevity.

Choosing the Right Roofing Material

A visual guide to choosing the right roofing material based on various factors.

Choosing the right roofing material is a decision that requires careful consideration of various factors. Homeowners need to evaluate the durability, warranty, cost, and aesthetic preferences when selecting their roofing materials. The choice between architectural shingles and 3-tab shingles should be influenced by specific priorities, home characteristics, and climate conditions.

Consulting with roofing professionals can provide tailored recommendations based on individual circumstances. Factors like the home’s climate conditions, roof slope, and overall style should guide these recommendations. By considering these elements, homeowners can find a shingle that suits both their aesthetic needs and functional requirements.

Climate and Weather Conditions

Climate and weather conditions play a significant role in determining the most suitable roofing material. Homeowners should consider how well the roofing material performs in their specific climate to ensure longevity. Asphalt shingles may perform less durably in extreme conditions like high winds and heavy rain, making them less ideal for areas prone to severe weather.

In contrast, architectural shingles are built to withstand harsher weather elements. Keeping the roof surface clean and removing debris is vital for extending the lifespan of architectural shingles, ensuring they maintain their performance and appearance under various weather conditions.

Budget and Long-Term Investment

Budget considerations and long-term investment potential are crucial when choosing roofing materials. Upgrading to a Class 4 roof, for instance, can offer substantial discounts on homeowners insurance premiums, averaging a 28% discount. Architectural shingles generally have a longer lifespan compared to standard shingles, helping reduce waste over time.

Regular inspections of architectural shingles can help identify and address minor issues before they escalate into costly repairs. Homeowners planning to stay in their property for an extended period may find the investment in architectural shingles worthwhile due to their durability and reduced long-term maintenance costs.

Aesthetic Preferences

Aesthetic preferences are a significant factor when selecting roofing materials. The visual appeal of shingles can vary widely, making it essential for homeowners to choose a style that complements their home design. Aesthetic preferences influence the overall look of the home, and choosing the right shingle type can significantly enhance curb appeal.

Architectural shingles offer a range of styles and colors that can match various architectural designs, providing greater flexibility in achieving the desired look. Whether aiming for a classic or modern aesthetic, an architectural shingle can help homeowners achieve their vision for their home’s exterior.

Arocon’s Expertise in Roofing Projects

Arocon specializes in delivering high-quality roofing services, focusing on new roof installations and maintenance to ensure the longevity of roofing systems. Their expertise allows them to handle all aspects of roofing projects with professionalism and skill, making them a trusted choice for homeowners.

Arocon’s comprehensive approach to roofing projects includes not only the installation of new roofs but also the maintenance services necessary to keep them in optimal condition. Arocon’s knowledge and experience guide homeowners in selecting and maintaining the best roofing materials for their needs.

Roof and Gutter Tune Up Service

Arocon offers a comprehensive Roof and Gutter Tune Up service, which includes gutter cleaning, resealing vents, and shingle replacement. This service helps maintain the overall health of the roof and gutters, ensuring they function effectively. The starting cost for this service is $199, making it an affordable option for regular roof maintenance.

Regular tune-ups can prevent minor issues from becoming major problems, saving homeowners money in the long run. A well-maintained roof and gutter system not only protect the home but also enhance its curb appeal, making Arocon’s services a valuable investment for homeowners.

Complimentary Consultation

Arocon provides a free, no-obligation consultation for larger repair and replacement projects. This complimentary service ensures that homeowners receive expert advice tailored to their specific needs without any pressure to commit. By offering this service, Arocon helps homeowners make informed decisions about significant roofing repairs or replacements.

The consultation includes a thorough assessment of the roofing project, providing homeowners with a clear understanding of the scope and cost involved. This transparency and commitment to customer satisfaction make Arocon a reliable choice for extensive exterior repair or replacement projects.

Summary

Choosing between asphalt shingles and architectural shingles depends on various factors, including durability, aesthetics, cost, and climate conditions. Asphalt shingles offer affordability and versatility, while architectural shingles provide enhanced aesthetics and durability. Proper installation and maintenance are crucial for maximizing the lifespan and performance of both shingle types.

Consulting with roofing professionals, such as Arocon , can provide valuable insights and ensure that homeowners choose the right roofing material for their specific needs. By considering all these factors, homeowners can make an informed decision that enhances their home’s value and curb appeal.

Frequently Asked Questions

What are the main differences between asphalt shingles and architectural shingles?

The primary differences between asphalt shingles and architectural shingles are their composition, durability, and visual appeal. Architectural shingles are thicker and more durable, providing a dimensional appearance that standard asphalt shingles lack.

Are architectural shingles worth the extra cost?

Architectural shingles are indeed worth the extra cost due to their superior durability, extended lifespan, and improved aesthetic appeal, ultimately providing greater value over time.

How often should asphalt shingles be replaced?

Asphalt shingles should typically be replaced every 20 to 30 years, contingent upon the climate and maintenance provided. Regular inspections can help determine the optimal time for replacement.

What factors should I consider when choosing roofing materials?

When choosing roofing materials, it is essential to consider durability, warranty, cost, aesthetic preferences, and climate conditions. Engaging with roofing professionals can provide tailored recommendations that suit your specific requirements.

What services does Arocon offer for roofing projects?

Arocon provides a range of roofing services, such as new roof installations, maintenance, and a Roof and Gutter Tune Up service, along with free consultations for major repair and replacement projects.


https://www.aroconllc.com/wp-content/uploads/2024/12/027aee7a-ab12-49fb-b80b-ad868942c2c6.png 1000 1500 Arocon https://www.aroconllc.com/wp-content/uploads/2024/09/arocon-logo.webp Arocon2024-12-24 08:00:492025-09-01 13:51:14Asphalt Shingles vs. Architectural: Which is Best for Your Roof?
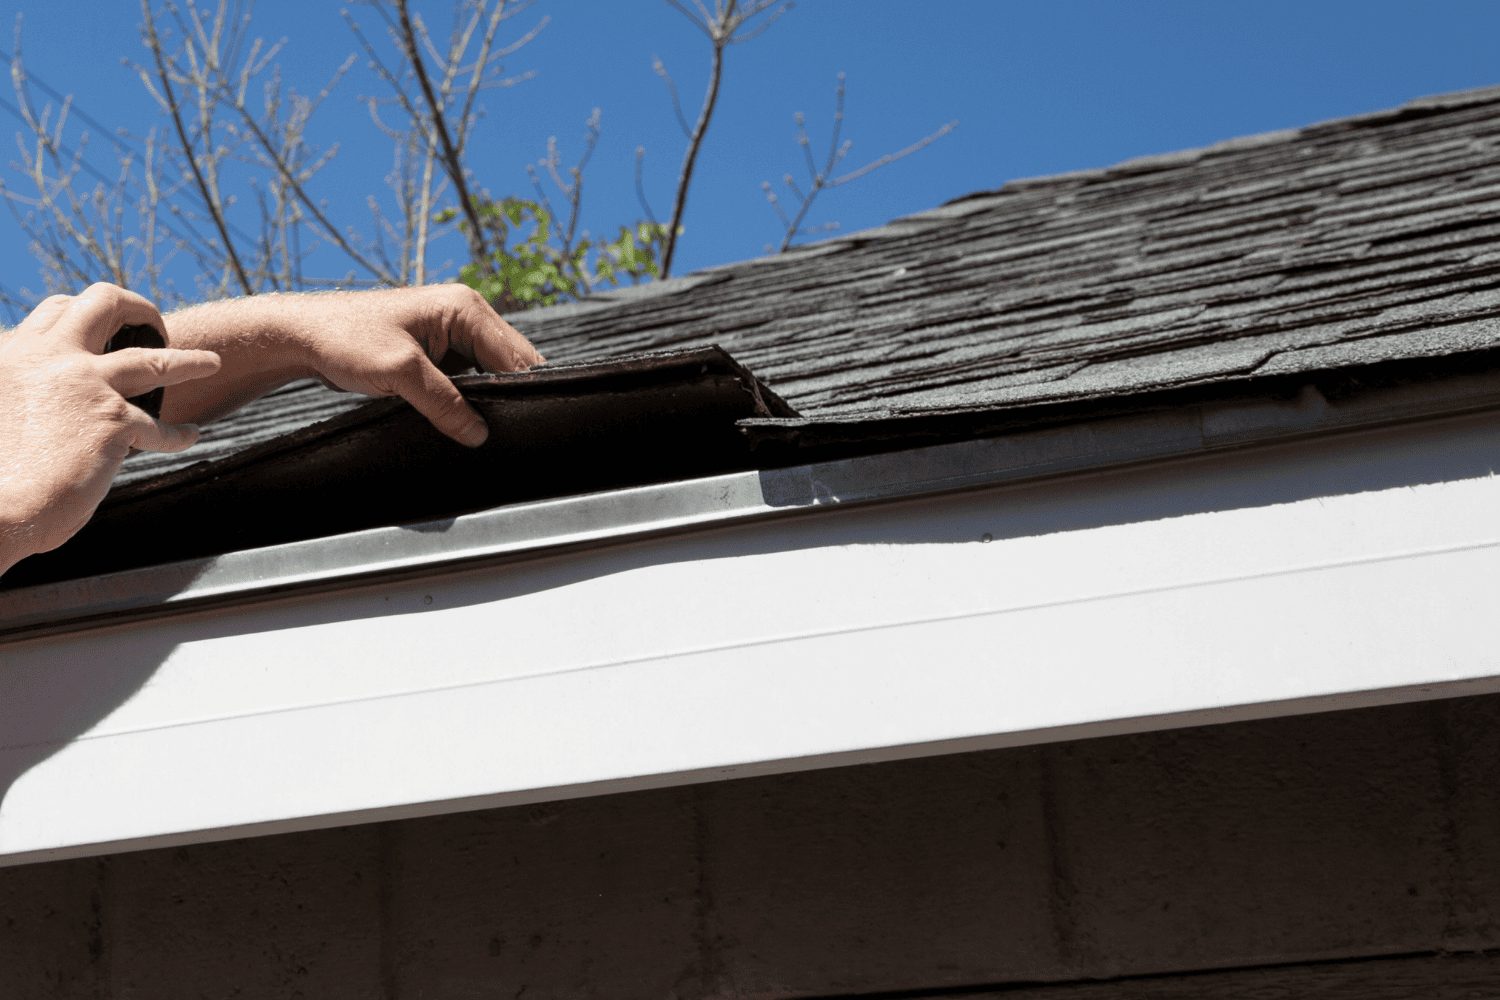
A person inspecting a roof for leaks, looking for signs of roof damage.

How to Quickly Fix Leak on Roof: A Practical Guide

A roof leak can cause significant damage if not addressed promptly. This guide will show you how to identify and fix a roof leak effectively. You’ll learn about quick fixes, inspection tips, and when to call a professional.

Key Takeaways

  • Early detection of roof leaks can save homeowners from expensive repairs; always inspect for signs like water stains and missing shingles.

  • Quick fixes such as roofing cement and caulk can effectively manage minor leaks, but permanent repairs should follow in dry conditions.

  • Regular maintenance and inspections are crucial to extending the lifespan of your roof and avoiding costly damage from leaks.

Identifying Roof Leaks

A person inspecting a roof for leaks, looking for signs of roof damage.

Spotting a roof leak early can save you from extensive damage and costly repairs. Common signs of roof leaks include water stains on ceilings, missing shingles, and damaged flashing. Other indicators might be excessive granules in gutters or a sagging roof. Visible water stains or running water down walls are clear signs of a leak and should be addressed immediately.

Roof leaks often occur around vent pipes, roof vents, chimneys, valleys, skylights, and damaged shingles. Regularly inspecting these weak spots is important as elements degrade the roof over time. Minor signs of damage often indicate the need for a closer examination.

Exterior Inspection

Begin by inspecting the exterior for signs of damage, such as cracked or curled shingles. Damaged flashing around chimneys and vents is also a common source of leaks. Debris accumulation on the roof can prevent proper drainage, leading to leaks. Clear gutters regularly to ensure proper rainwater flow and prevent leaks.

Use a sturdy ladder for safe roof access and ensure stable placement for safety.

Interior Inspection

Check for water stains on ceilings, which are often early signs of a roof leak. Look for other indications of water damage such as mold and dampness. A water spot on the ceiling may indicate a large leak or one that’s been going on for a while.

Inspect the attic for water stains, mold, dark marks, and dampness to locate roof leaks. Look for wet spots in the roof decking and peeling insulation away to identify leaks in the attic. Checking for dampness in insulation can help identify areas affected by roof leaks.

Quick Fixes for Minor Roof Leaks

Applying roofing cement to fix a minor roof leak.

Swift action for minor roof leaks can prevent further damage. Quick fixes include roofing cement, caulk, or temporary patches. These methods can buy you time until you can make more permanent repairs or call a professional roofing contractor.

Perform repairs in warm, dry weather to avoid further damage. Never repair during rain or inclement weather to prevent lasting issues.

For minor damage, DIY repairs are often feasible. Work carefully to avoid long-term issues.

Using Roofing Cement

Using roofing cement is an effective way to fix minor roof leaks. Use a caulking gun to apply roofing cement on roof joints. Clean the area around the leak first to ensure proper adhesion.

Apply a generous amount of roofing cement directly to the leak and spread it evenly using a putty knife. Ensure that the roofing cement covers the entire damaged area and extends slightly beyond it. This provides a watertight seal that can prevent future leaks.

Roofing cement is especially useful for sealing around flashing and other joints where leaks are common.

Applying Caulk

Caulk is effective for sealing gaps around flashing and vents, preventing leaks. For roofing, select high-quality silicone or polyurethane caulk designed to withstand weather elements and temperature changes.

Ensure the area around the flashing and vents is clean and dry before applying caulk for the best adhesion. Apply a continuous bead of caulk around the flashing and vents, making sure to fill all gaps and smooth it out for a neat finish.

Temporary Patches

Temporary repairs keep moisture and debris out until permanent fixes are possible. Roofing tape can offer a temporary solution for leaks. Using roofing tar paired with spare shingles can create a temporary but effective patch to block leaks.

It’s important to monitor the repairs and call a contractor if needed.

Repairing Different Types of Roofs

Different types of roofs being repaired, showcasing various roofing materials.

Different materials require unique repair techniques. Factors like leak size, location, and roof type influence repair methods. Understanding the specific needs of your roofing material ensures a proper and lasting repair.

Arocon specializes in repairing roofs made from asphalt shingles, metal roofing, tile, and slate. Each material has unique characteristics and repair methods, which we will explore in the following subsections.

Asphalt Shingles

Asphalt shingles are one of the most common roofing materials, but they can experience issues such as missing shingles, improperly driven nails, and damage from storms. Repairing missing asphalt shingles usually costs between $200 and $500 if only a few are missing.

Using a roofing nailer can speed up the installation process during repairs. A pry bar is useful for removing damaged roofing materials without causing extra harm. The repair of improperly driven nails typically costs around $325, depending on the number of nails involved.

Metal Roofing

Metal roofs are known for their durability, but they can still develop leaks. Common issues include movement or corrosion in pipe boots and dry rot in rubber gaskets. Replacing the flashing is the first option for repairing leaks; roof sealant is the second option for quick fixes.

Repairing leaking flashing includes ensuring that components work together to prevent water intrusion and applying sealant to exposed nails. Common materials used for flashing repairs include copper, lead, and aluminum.

Tile and Slate Roofs

Tile and slate roofs are beautiful and durable, but they require careful handling during repairs. To replace a broken tile, carefully remove the damaged tile by lifting the surrounding tiles and pulling out any nails or clips holding it in place.

To reseal joints, clean the area thoroughly and apply a suitable roofing sealant, ensuring coverage on all joints and overlaps. Repairs involving slate and tile roofs should ideally be handled by a professional roofing contractor.

Essential Tools and Materials for Roof Repairs

Essential tools and materials needed for roof repairs.

Having the right tools and materials is crucial for successful roof repairs. Basic roofing repair materials are essential for addressing leaks and ensuring quality repairs. Utilizing caulk around exposed nails can effectively seal small leaks.

Essential tools for roof repairs include hammers, roofing nails, putty knives, and caulk guns. Safety gear is also critical to protect individuals from hazards when working on roofs.

Safety Gear

Essential safety gear includes long sleeves, long pants, non-slip shoes, safety goggles, thick gloves, and a safety harness. A safety harness is essential when working at heights to prevent falls. Long sleeves and long pants protect against sun exposure and sharp materials.

Safety gear is crucial for protecting individuals from hazards when working on roofs.

Repair Tools

Using a high-pressure pneumatic nail gun can greatly save time and energy during roof repairs. An air compressor is necessary for operating a pneumatic nail gun, making it a valuable addition to your toolset.

Having the right tools is crucial for efficiently addressing roof leaks and ensuring quality roof leak repair.

Materials

Roofing adhesive and caulk ensure a watertight seal for minor leaks. Caulk prevents water from seeping through areas around flashing and vents.

Most supplies for DIY roof repair can be bought at local hardware stores.

Preventative Maintenance Tips

A professional roofer conducting a regular roof inspection.

Routine inspections identify potential roof issues early, preventing costly repairs. Regular maintenance, like sealing joints and algae treatment, extends roof lifespan.

Being aware of cumulative damage and recognizing signs of an aging roof can help avoid major leaks.

Regular Inspections

Inspect your roof at least annually or after severe weather. Regularly check areas around chimneys, dormers, walls, and plumbing for flashing issues. Inspect roof valleys and areas with debris accumulation to prevent leaks and damage. Sagging is a potential roof issue that may indicate structural shifts or rotting underneath.

Regular inspections can detect missing or damaged roof shingles, contributing to high leak risks. Knowing the age of your roof helps anticipate potential problems and plan necessary maintenance. Addressing minor issues early can extend a roof’s lifespan and prevent costly repairs.

Cleaning Gutters and Downspouts

Clogged gutters cause water overflow, leading to pooling near the foundation and potential leaks. Trimming overhanging branches prevents storm debris damage. Keeping gutters and downspouts clear is crucial to preventing leaks from occurring.

Regular cleaning and maintenance of gutters and downspouts can extend the lifespan of your roof.

When to Call a Professional Roofer

DIY repairs can handle minor issues, but sometimes a professional contractor is needed. If unsure about safety or repair effectiveness, consult a professional. Persistent leaks despite DIY attempts indicate extensive damage needing professional assessment.

Professional roofers handle a range of issues, from small leaks to large installations, ensuring proper fixes. Their expertise provides quick repairs and lasting quality. Attempting to handle jobs beyond your skill level can lead to further issues and void warranties. Hiring a local roofing contractor can help ensure that the job is done correctly.

Extensive Damage

Repeated leaks and deterioration indicate extensive damage, potentially beyond repair. Ignoring these signs can lead to higher costs and safety issues.

Homeowners might need to perform temporary repairs as per their insurance policy to mitigate further issues.

Warranty Considerations

Check your roof warranty status when considering repairs. Many warranties cover professional repair costs if installed by an authorized contractor.

Be aware of common warranty exceptions, like damage from neglect or lack of maintenance. Keep necessary documentation handy for the warranty claim process.

Cost Considerations for Roof Leak Repairs

Budgeting for roof repairs is crucial as it helps homeowners manage financial expectations and prepare for unforeseen expenses. Understanding roof leaks and repair costs helps make informed decisions. Costs vary significantly based on damage extent and roofing material.

Many roofing companies avoid online price discussions due to pricing structure transparency issues. Factors like roof accessibility and job complexity significantly influence repair costs.

DIY Repair Costs

The average cost to repair a nail pop on a roof is around $550. A typical cost for a simple asphalt roof repair is less than $100. Repairing or replacing large sections of old roofing might extend the time needed for a roof repair project. Extensive damage due to many nail pops can increase the cost of nail pop repairs.

Basic roof repairs typically take between 2 to 5 hours to complete. DIY repairs save money but consider complexity and risks. Improper nailing can increase repair costs and scope.

Professional Repair Costs

Hiring a professional to fix a roof leak can cost between $400 and $1,000. The typical cost range for hiring a professional for minor roof leak repairs is $175 to $450. Repairing a chimney leak can cost anywhere from $500 to $4,000, influenced by the extent of the damage.

Costs for repairing slate, tile, or metal roofs can start at $5,000 or more. Repairing a leaking valley typically ranges from $1,550 to $3,200. A detailed inspection by a professional roofer can help determine the overall condition of the roof. This assessment will lead to a more accurate cost estimate for any necessary repairs.

Financing Options

Some roofing companies offer financing plans to help manage the costs of immediate roof repairs. Financing options range from 12 months to 10-year plans, some with 0% interest. This can make it easier to handle large repair costs without a significant financial burden.

Summary

Spotting roof leaks early and addressing them promptly can prevent extensive damage and costly repairs. By conducting regular inspections, both exterior and interior, you can identify potential issues before they escalate. Utilizing quick fixes such as roofing cement and caulk can provide temporary relief until permanent repairs are made.

For more significant issues or when in doubt, hiring a professional roofing contractor ensures the job is done correctly and safely. Understanding the costs and financing options available can help you budget for repairs and maintain the integrity of your roof. Taking these steps will protect your home and give you peace of mind.

Frequently Asked Questions

What types of roofing materials does Arocon specialize in repairing?

Arocon focuses on repairing a variety of roofing materials, including asphalt shingles, metal roofing, tile, and slate. You’ve got options for your roof repair!

What are some common signs that indicate a need for roof repair?

If you notice missing or damaged shingles, water leaks, or a sagging roof, it’s time to consider roof repair. Staying proactive now can save you from bigger problems later!

What is the typical lifespan of asphalt shingle roofs?

Asphalt shingle roofs generally last about 25 to 30 years. With proper maintenance, you can maximize their lifespan and protect your investment!

Does Arocon offer emergency roof repair services?

Absolutely! Arocon provides 24/7 emergency roof repair services to ensure you’re covered whenever you need it. Don’t hesitate to reach out for help!

What financing options are available for roofing services?

You can find financing options for roofing services that include plans from 12 months to 10 years, with some offering 0% interest. Explore these options to make your roofing project more affordable!


https://www.aroconllc.com/wp-content/uploads/2024/12/ef2ede7a-2b9b-4188-99da-c5d24855f119.png 1000 1500 Arocon https://www.aroconllc.com/wp-content/uploads/2024/09/arocon-logo.webp Arocon2024-12-19 08:00:392025-09-01 13:51:34How to Quickly Fix Leak on Roof: A Practical Guide
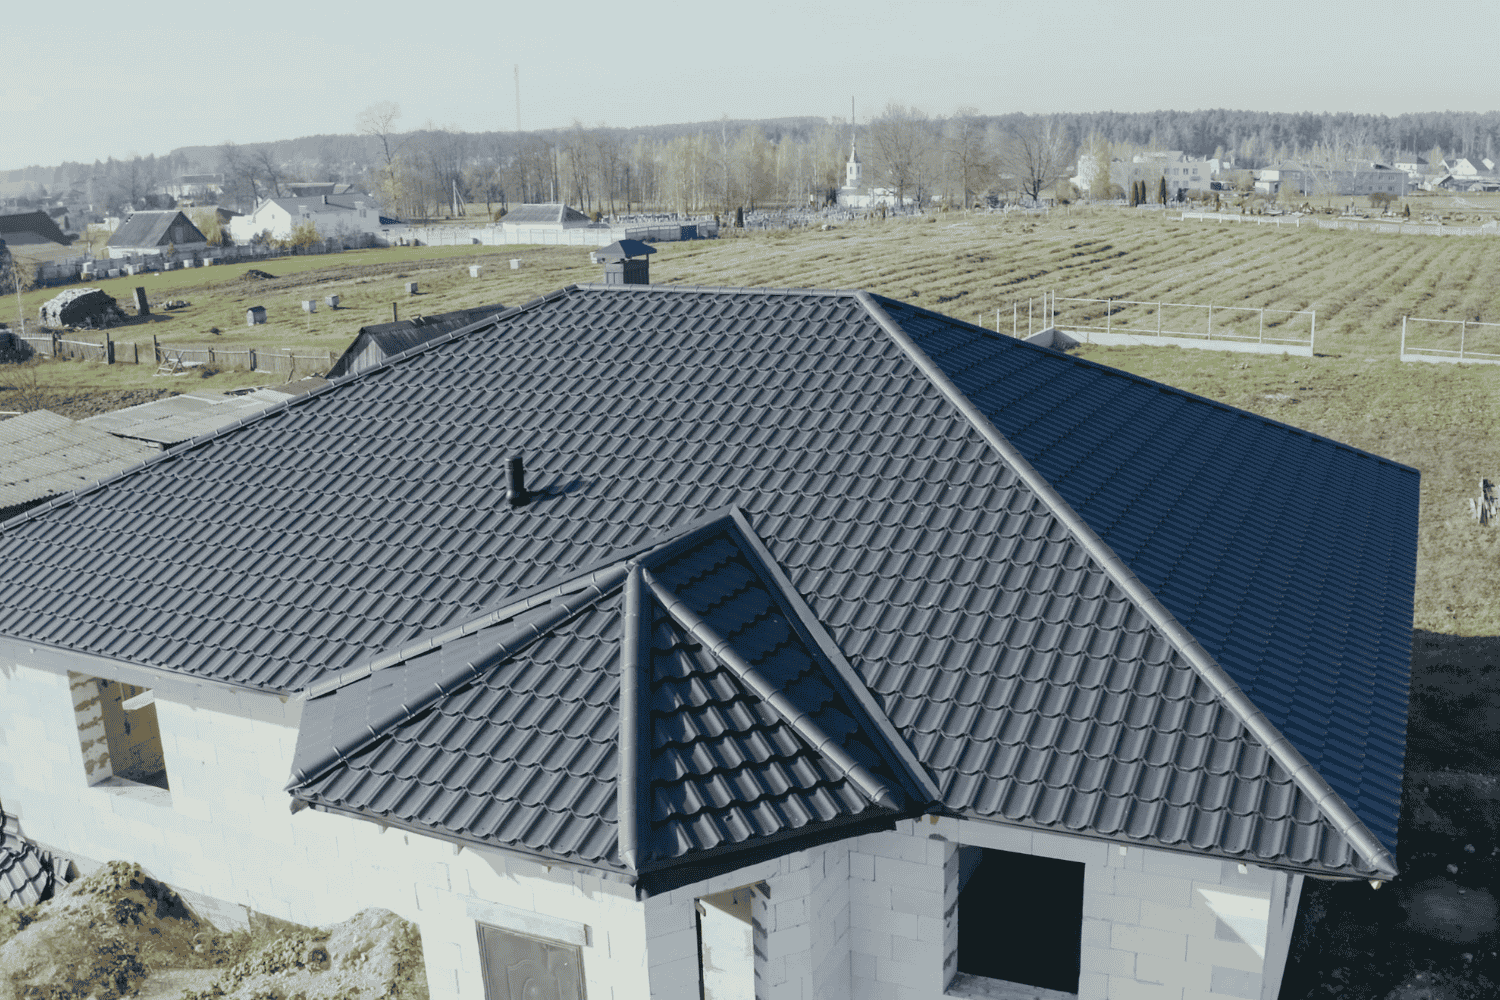
A visual comparison of different roofing materials for homes.

Cost of Metal Roof Versus Shingle: A Detailed Comparison

When choosing between a metal roof and a shingle roof, cost is a critical factor. The cost of a metal roof versus shingle roof can vary significantly, with metal roofs typically having a higher initial price but offering long-term savings. Shingle roofs, on the other hand, are usually cheaper upfront but may require more frequent maintenance and replacements. In this article, we’ll break down these costs to help you decide which roofing option is best for your budget and needs.

Key Takeaways

  • Metal roofs generally have a higher initial cost than asphalt shingles but offer significant long-term savings due to their durability and low maintenance needs.

  • While asphalt shingles are cheaper upfront, their shorter lifespan and higher replacement frequency can lead to increased costs over time.

  • Metal roofs are more environmentally friendly than asphalt shingles, as they are made from recycled materials and are fully recyclable at the end of their lifespan.

Cost of Metal Roof Versus Shingle: A Detailed Comparison

A comparison chart showing the cost of metal roof versus shingle roofs.

When it comes to roofing, the initial cost is often a primary consideration. Metal roofs typically come with a higher price tag upfront compared to shingle roofs. Several factors influence roofing costs, including material prices, installation costs, roof size, pitch, and the removal of old materials.

Homeowners frequently weigh these costs against the benefits, such as lifespan and performance, when deciding between metal and shingle roofing. While metal roofs may require a larger initial investment, they often offer significant long-term savings due to their remarkable durability and lower maintenance costs.

Introduction

In the roofing world, initial costs are just the beginning. A metal roof can range significantly in price, from around $6,000 to over $135,000, depending on various factors. On the other hand, asphalt roofs typically cost less upfront, averaging about $10,500. However, these lower initial costs may come with higher replacement expenses down the line.

In this blog post, we will explore the financial implications of choosing between metal roofs and asphalt shingles, focusing on their cost differences and what they mean for you in the long run.

Cost Breakdown of Metal Roofs vs. Shingles

A breakdown of material costs for metal roofs and shingles.

A clear cost breakdown of metal roofs versus shingles helps in making an informed decision. Metal roofs, despite their higher initial cost, often offer better long-term value due to their durability and lasting performance.

Material costs, installation expenses, roof size and pitch, and the removal of old materials are key factors affecting roofing costs. We will explore these components in more detail.

Material Costs for Metal Roofs

Material costs for metal roofs can vary widely depending on the type of metal used. Standing seam metal roofs, for instance, generally cost between $10 to $16 per square foot. Metal shingles, on the other hand, range from $8 to $14 per square foot. Corrugated metal roofs are typically more affordable, costing between $4 to $7 per square foot. The overall metal roof cost will depend on these factors.

Premium materials like copper can significantly increase costs, ranging from $20 to $50 per square foot. These prices reflect the inherent material costs and the quality and longevity of metal roofing options.

Material Costs for Shingle Roofs

Shingle roofs, particularly asphalt shingles, tend to be more budget-friendly in terms of material costs. Here are some price ranges for different types of shingles:

  • Standard asphalt shingles: $4 to $8 per square foot

  • Composite shingles: $7.50 to $13 per square foot

  • Architectural shingles: $5 to $7.50 per square foot

  • Three-tab asphalt shingles: approximately $4 per square foot

These costs make asphalt shingles a popular choice for homeowners looking for an affordable asphalt shingle roof solution.

Installation Costs

Installation costs can significantly impact the overall expense of a roofing project. Metal roofs often incur higher labor costs due to the specialized skills required and the longer installation time. Labor costs for metal roof installation can range from $300 to $500 per square (100 sq. ft.). In contrast, asphalt shingle installation is typically less complex and cheaper, costing around $2 to $3 per square foot.

The removal of existing roofing materials can further increase costs, particularly with multiple layers to strip off. This also differentiates installation costs between metal and shingle roofs.

Factors Influencing Roofing Costs

Factors influencing roofing costs including roof size and pitch.

Beyond material and installation costs, factors like geographic region, roof complexity, product selection, aesthetics, and specific project details significantly impact the final price.

Larger and steeper roofs require more materials and labor, increasing costs. The removal of old roofing materials, particularly with multiple layers, also adds to the expense.

Let’s explore these factors in more detail in the following subsections.

Roof Size and Square Footage

Roof size significantly affects overall costs, as larger roofs require more materials and labor. Accurate measurement of the home’s footprint helps estimate the necessary materials and labor.

This measurement helps in calculating the amount of materials and labor needed, which in turn affects the final cost of the new roof.

Roof Pitch and Complexity

Roof pitch and complexity also influence installation costs. Steeper pitches need extra safety equipment and careful work, increasing expenses. Complex designs with multiple angles demand more labor and time, further raising costs.

As a result, both the steepness and complexity of a roof are critical factors in determining the overall cost of a roofing project.

Removal of Old Roofing Materials

Removing old roofing materials can significantly raise roof replacement costs. Traditional removal involves labor costs for stripping off existing materials, which can be time-consuming and expensive, especially with multiple layers.

Metal roofs can often be installed over existing roofs, reducing waste and avoiding additional removal costs, making the project more cost-effective by eliminating extensive labor and disposal fees.

Long-Term Value and Savings

An infographic on long-term value and savings of metal roofs.

Metal roofs, though initially more expensive, can offer long-term savings due to their durability and energy efficiency. Investing in a metal roof can recoup 85% to 95% of the installation costs at resale.

Additionally, metal roofs excel in extreme weather conditions, minimizing the need for frequent repairs and replacements. We will explore these long-term benefits further.

Durability and Lifespan

Metal roofs are known for their impressive durability and long lifespan, often lasting between 40 to 70 years, with an average of over 50 years. In comparison, asphalt shingles typically last 20 to 30 years, with higher-quality architectural and luxury shingles reaching up to 50 years with proper maintenance.

The extended lifespan of metal roofs means fewer replacements, enhancing their overall value over time.

Maintenance and Repair Costs

A major advantage of metal roofs is their low maintenance and repair costs. Unlike shingle roofs, which may need frequent repairs, metal roofs can last decades without issues, reducing overall costs. Metal roofs also offer superior protection against hail, wind, and snow, further reducing the need for repairs.

Energy Efficiency and Savings

Metal roofs are energy efficient due to their reflective properties, reducing heat absorption and conserving energy. This leads to significant savings on utility bills. Professional installation ensures these reflective properties are optimized, contributing to lower energy costs and overall savings.

Environmental Impact

For many homeowners, the environmental impact of roofing materials is crucial. Metal roofs are more sustainable than asphalt shingles, being made from recycled materials and fully recyclable at the end of their lifespan.

In contrast, asphalt shingles contribute to air and water pollution during production and disposal. Let’s explore the sustainability of metal roofs and the environmental concerns associated with shingle roofs in more detail.

Sustainability of Metal Roofs

Metal roofs are sustainable as they use recycled materials and are recyclable at the end of their lifespan. This eco-friendly disposal minimizes landfill waste and reduces the environmental impact. Choosing a metal roof allows homeowners to support sustainability while benefiting from durable and energy-efficient roofing.

Environmental Concerns with Shingle Roofs

Asphalt shingles have significant environmental concerns due to their production and disposal. The manufacturing process relies on petroleum, depleting non-renewable resources. Additionally, asphalt shingles cannot be recycled, increasing landfill accumulation and pollution. These factors make asphalt shingles a less sustainable option compared to metal roofs.

Choosing the Right Roofing Material for Your Home

A visual comparison of different roofing materials for homes.

Selecting the right roofing material involves considering climate, aesthetics, and budget. These factors impact decisions by affecting initial costs, long-term maintenance, and property value. Let’s examine these considerations in more detail in the following subsections.

Climate Considerations

Local climate conditions are crucial in selecting the best roofing material. Metal roofs are ideal for cold climates, shedding snow quickly to reduce ice dams and structural damage. A

sphalt shingles may require more maintenance in cold conditions and are prone to ice damming. Assessing your region’s climate is vital for an informed roofing decision.

Aesthetic Preferences

Aesthetic preferences play a key role in choosing the right roofing material. Metal roofing offers various styles and colors, allowing customization while maintaining durability. Options like a standing seam metal roof or metal shingles enhance curb appeal.

This flexibility makes metal roofing appealing to many homeowners.

Budget Constraints

Balancing upfront costs with long-term value is essential when choosing roofing material. Higher quality materials like metal roofing have higher initial costs but offer greater durability and lower maintenance over time.

Although asphalt shingles are more affordable initially, their total cost over 60 years can be substantial. Evaluating both initial and long-term costs helps in making a wise and budget-friendly roofing choice.

Professional Installation and Contractor Selection

Professional installation is key to ensuring roof longevity and performance. Experienced contractors guarantee quality workmanship and adherence to safety standards, essential for both shingle and metal roofs. If you want to enhance your home, consider having them install metal roofing.

Homeowners can save on roofing projects by following specific tips and ensuring professional installation. We will discuss how to find a qualified contractor and the benefits of professional installation next.

Finding a Qualified Roofing Contractor

To find a qualified roofing contractor, verify certifications and insurance to protect against liabilities. Reading reviews and requesting referrals helps assess a contractor’s reputation and the quality of their work. Ensuring your contractor has the necessary experience and credentials is key to a successful roofing project.

Benefits of Professional Installation

Professional roof installers adhere to industry standards, enhancing the overall project quality. Hiring a licensed contractor ensures quality workmanship and compliance with safety standards. Qualified professionals efficiently manage all aspects of roof installation, saving time and avoiding costly mistakes.

Summary

In summary, choosing between metal roofs and shingle roofs involves weighing the initial costs against the long-term benefits. While metal roofs are more expensive upfront, they offer significant savings in terms of durability, maintenance, and energy efficiency. On the other hand, asphalt shingles are more affordable initially but may incur higher costs over time due to frequent replacements and maintenance. Considering factors such as climate, aesthetics, and budget can help you make an informed decision that aligns with your needs and financial goals. By opting for professional installation, you can ensure the longevity and performance of your chosen roofing material.

Frequently Asked Questions

How long do shingle roofs typically last?

Shingle roofs typically last between 20 to 30 years, but with proper maintenance, architectural and luxury shingles can last up to 50 years. So, investing in quality shingles and taking care of them can really pay off!

What are the benefits of choosing a metal roof?

Choosing a metal roof means investing in long-lasting durability and energy efficiency, as they can withstand harsh weather and reflect heat, helping to lower your cooling costs. Plus, with a lifespan of 40-70 years, they need less maintenance, making them a smart choice for any homeowner.

What are the most common problems found in metal roofs?

Metal roofs often face issues like rust, loose panels, leaks, and impact damage. Addressing these concerns promptly can help extend the life of your roof.

How often should I inspect my shingles?

You should inspect your shingles at least once a year and after any major weather events to catch potential damage early. Regular checks can save you from bigger problems down the line!

How do metal roofs handle extreme weather conditions?

Metal roofs are fantastic for handling extreme weather since they can endure heavy snow, powerful winds, and intense sunlight while also being fire-resistant. So, if you’re concerned about severe conditions, metal roofs are a reliable choice!


https://www.aroconllc.com/wp-content/uploads/2024/12/ad80073d-1ac4-4aa8-9192-2aab00d6064d.png 1000 1500 Arocon https://www.aroconllc.com/wp-content/uploads/2024/09/arocon-logo.webp Arocon2024-12-12 08:00:122025-09-01 13:59:04Cost of Metal Roof Versus Shingle: A Detailed Comparison
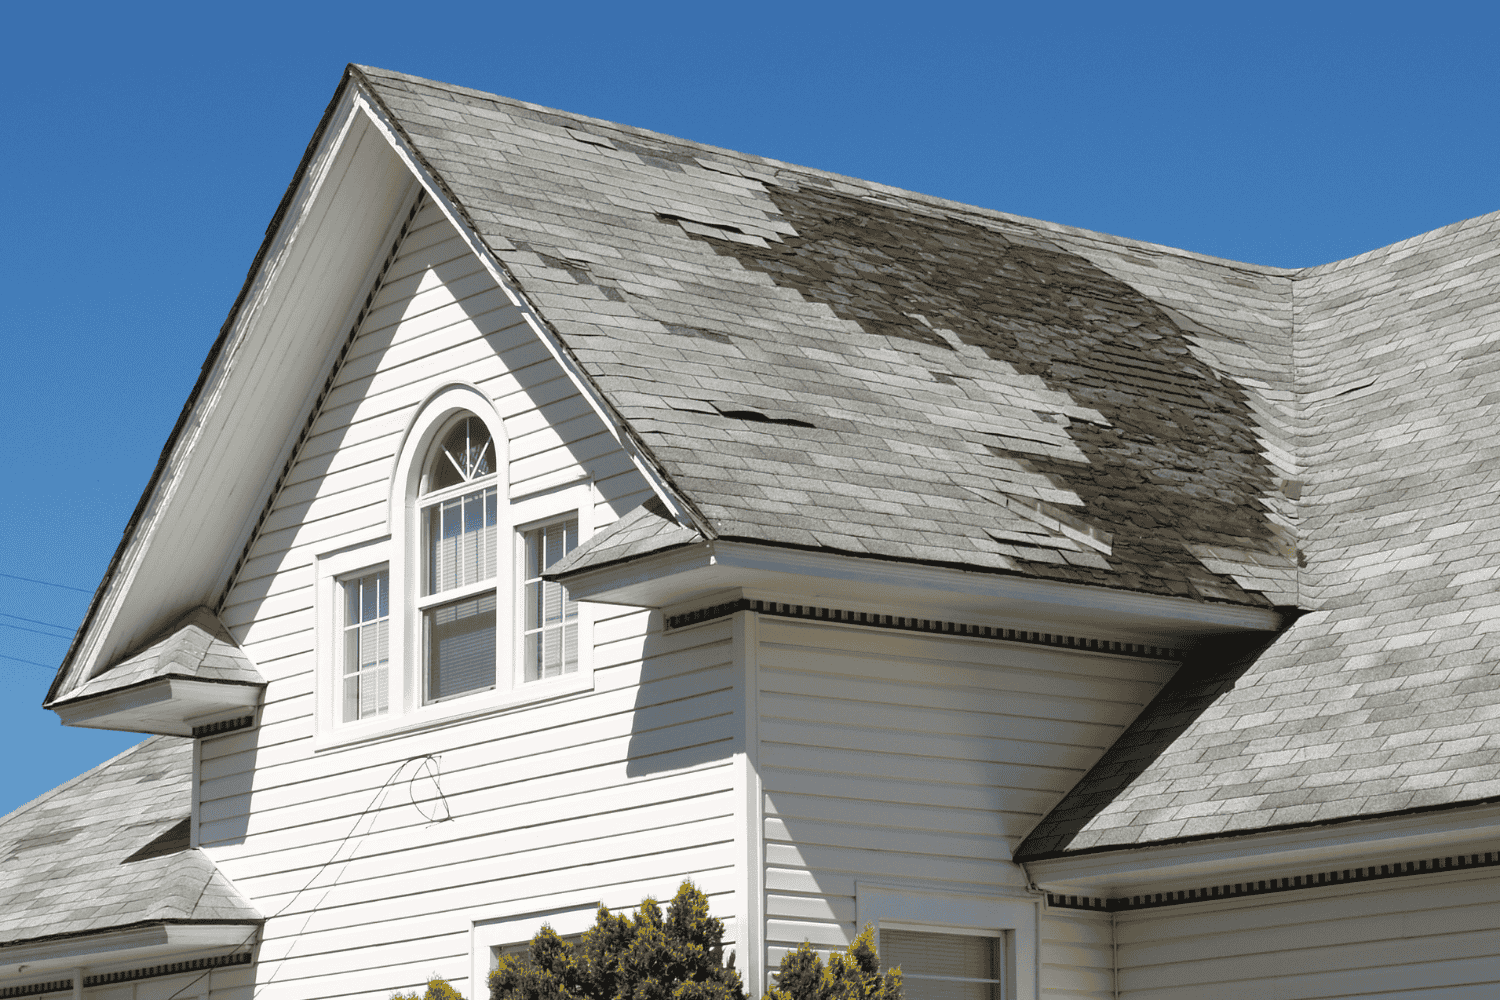
An image depicting common causes of roof flashing leaks, including improper installation and weather damage.

Top Solutions for Flashing on Roof Leaking

A leaking roof is often due to compromised flashing. If this is an issue, you may notice water stains and potential damage inside your home. In this guide, we’ll explore common causes, how to identify the problem, DIY fixes, and when to get professional help.

Key Takeaways

  • Properly installed and maintained roof flashing is essential for preventing leaks and protecting homes from water damage.

  • Common causes of flashing leaks include poor installation, material corrosion, and severe weather, making regular inspections vital.

  • DIY solutions for minor flashing repairs are available, but professional help is recommended for complex issues to ensure effective repairs.

Top Solutions for Flashing on Roof Leaking

An example of roof flashing that is leaking, showing signs of damage and water stains.

Roof flashing serves as a protective barrier that directs water away from areas where the roof meets walls or other vertical structures. This essential component prevents water from seeping into the roof and causing damage.

Common materials used for roof flashing include galvanized steel, aluminum, and copper, with copper being the most durable. However, regardless of the material, proper installation and maintenance are crucial to its effectiveness.

Flashing can be found in various parts of the roof, including chimneys, vents, and roof valleys. Each of these areas requires specific types of flashing, such as step flashing for roof valleys and kickout flashing to direct water into the gutter. Using roofing cement during installation helps create a watertight seal, ensuring that the flashing effectively prevents leaks.

In some instances, a temporary fix like using a tarp can protect your roof until professional help arrives. However, for long-term solutions, understanding the different types of flashing and how they work is essential.

Properly installed flashing accommodates the expansion and contraction of roof materials, preventing leaks and extending the roof’s lifespan.

Introduction

Awareness of roof flashing is crucial for homeowners looking to maintain their roofs and avoid costly repairs. Proper maintenance of roof flashing not only prevents leaks but also protects the interior of the home from water damage. Recognizing signs of flashing damage early can save homeowners from more severe issues and extensive damage.

This guide will explore various methods for repairing flashing, the costs involved, and when to seek professional help. Whether you’re dealing with minor leaks or extensive damage, understanding roof flashing and its maintenance is key to protecting your home.

Understanding Roof Flashing

A diagram illustrating the components of roof flashing, including valleys and shingles.

Roof flashing shields homes from the elements and preserves the roof’s structural integrity by directing water away from where the roof meets vertical structures like walls and chimneys, preventing leaks and water damage.

There are several types of roof flashing, each designed for specific parts of the roof. Step flashing is used in roof valleys, while kickout flashing directs water into gutters. Copper is often considered the best material for roof flashing due to its durability, although it can develop a patina over time.

Effective flashing installation must accommodate the expansion and contraction of roof materials to ensure a watertight seal. Roofing cement is often used to enhance this seal and prevent leaks.

Common Causes of Roof Flashing Leaks

An image depicting common causes of roof flashing leaks, including improper installation and weather damage.

Roof flashing leaks can occur for several reasons, including poor installation practices and material corrosion. Inadequate materials or incorrect nailing can lead to rapid deterioration of flashing seals, making them vulnerable to leaks and roof flashing failure. Sealants can also corrode over time, further compromising the integrity of the flashing.

Severe weather conditions, such as heavy rain and strong winds, can cause flashings to detach or sustain damage. Excessive rain or snow accelerates the erosion of flashing materials, leading to leaks. Common causes also include storm damage and loose flashing due to age or adverse weather conditions.

Knowing these causes enables homeowners to take preventative measures and address issues before they lead to significant damage. Regular inspections and maintenance can catch problems early and prevent costly repairs.

Identifying Roof Flashing Leaks

Early identification of roof flashing leaks can prevent extensive damage. Common signs include water stains on ceilings and walls, visible light through roof openings, and water-damaged decking.

One effective method to identify roof flashing leaks is the garden hose test. With an assistant in the attic, apply water to suspected areas such as chimneys, skylights, and vents, and monitor for interior moisture. This test helps confirm the source of the leak and guides the repair process.

DIY Solutions for Fixing Roof Flashing Leaks

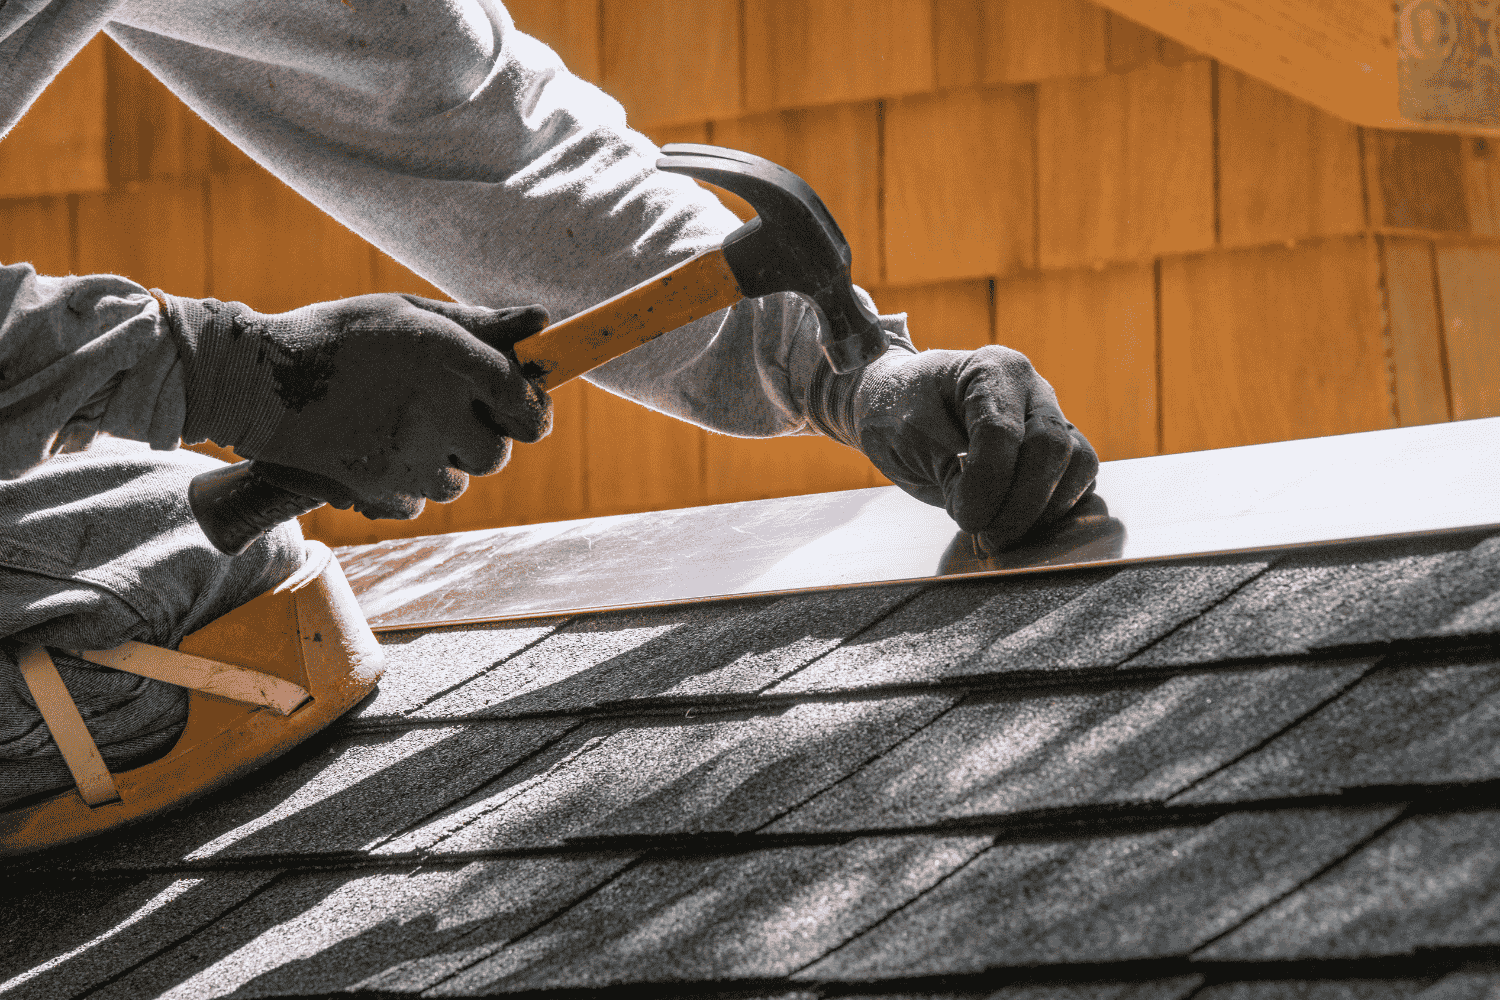
A person performing a DIY repair on roof flashing, demonstrating the use of roofing cement.

For those who prefer a hands-on approach, several DIY solutions can address roof flashing leaks and help prevent flashing leaks. These methods include cleaning and sealing, reattaching loose flashing, and using flashing tape.

Each of these solutions can provide temporary fixes or permanent repairs, depending on the severity of the damage.

Cleaning & Sealing

Cleaning and sealing are essential steps in addressing minor flashing damage. Start by cleaning the area and removing any debris using a wire brush to eliminate rust. This preparation ensures that the sealant adheres properly and creates a watertight seal.

Once the area is clean, apply roofing cement or silicone caulk to seal the edges and seams of the flashing. This method is effective for minor repairs and can temporarily seal leaks until more extensive repairs can be made.

Reattaching Loose Flashing

Reattaching loose flashing involves securing it with nails or screws to ensure it is firmly in place. After reattaching, it’s crucial to seal the edges with a suitable roofing sealant or roofing cement to prevent future leaks.

Check for any gaps or areas where the flashing does not lay flat against the roof surface. Addressing these issues promptly can prevent further damage and ensure the flashing functions correctly.

Using Flashing Tape

Flashing tape is a useful tool for minor repairs and serves as a temporary fix for small cracks or gaps. Thoroughly clean the area before applying the tape. This step is essential for ensuring proper adhesion.

Apply the flashing tape over the clean surface, pressing it firmly to ensure a secure bond. While this method provides a quick solution, it’s important to note that flashing tape is not a permanent fix and should be followed up with more robust repairs.

When to Seek Professional Help

While DIY repairs can be effective for minor issues, there are times when professional help is necessary. Uncertainty about the repair process or severe damage warrants consulting a professional. Complex flashing issues and extensive damage often require the expertise and right tools that only a professional can provide.

Fixing significant roof flashing problems without experience can lead to improper installations and further leaks. Hiring a contractor ensures proper repairs, preventing future issues.

Professional Roof Flashing Repair Process

A professional inspecting roof flashing, ensuring proper installation and repair.

The professional roof flashing repair process begins by identifying damaged roof flashing areas, such as chimneys, skylights, and roof valleys. After removing the damaged flashing, the area is cleaned to repair roof flashing and remove debris and old roofing cement.

Next, replacement flashing is cut to size and secured with roofing nails spaced about six inches apart. The new flashing must extend beyond the damaged area by at least four inches for effective coverage. A watertight seal is achieved by applying roofing cement along the edges of the new flashing.

Professionals conduct inspections to check for gaps or loose components. They also perform a water test to confirm that the repair has been successful.

Preventative Measures to Avoid Future Leaks

Preventing future roof leaks involves regular maintenance and inspections. Regular roof inspections can identify problems early, preventing leaks and extensive damage. Cleaning gutters and ensuring proper attic insulation also help prevent water pooling and moisture accumulation.

Timely repairs extend the lifespan of a roof and minimize significant issues. Regularly checking and repairing flashing ensures watertight seals and prevents leaks. Services like Arocon’s Roof and Gutter Tune Up can provide comprehensive maintenance that includes gutter cleaning, resealing roof vents, and replacing shingles after a storm.

Cost Considerations for Roof Flashing Repairs

Roof flashing repair costs can vary significantly. Factors influencing the price include the extent of the damage, the type of flashing material used, and labor expenses. DIY repairs can save money and prevent extensive damage, but professional repairs typically range from $200 to $600.

The average national cost for roof repairs generally falls between $379 and $1,755, with emergency repairs adding several hundred dollars to the overall bill. Labor expenses typically account for around 60% or more of the total cost.

Factors such as the age of the roof and local weather conditions can significantly influence repair costs. Minor repairs, which may include flashing work, can range from $150 to $1,000.

Additional Services by Arocon

Arocon Roofing and Construction offers a variety of services that enhance both the functionality and aesthetics of home exteriors. These services include:

  • Roofing

  • Gutters

  • Gutter maintenance/cleanings

  • Siding

  • Window replacement

  • Door installation

Arocon also provides complimentary, no-obligation consultations for larger project repairs and replacements to assess the needs and options, ensuring professional service and expertise in managing a range of home exterior projects.

Summary

Maintaining roof flashing is essential for preventing leaks and protecting your home from water damage. By understanding the common causes of roof flashing leaks and how to identify them, homeowners can take proactive steps in maintaining their roofs. DIY solutions can address minor issues, but professional help is necessary for complex or severe problems.

Whether you’re considering DIY repairs or seeking professional assistance, being informed about roof flashing can save you time, money, and stress. Regular maintenance and timely repairs are key to a long-lasting, leak-free roof.

Frequently Asked Questions

What are the common materials used for roof flashing?

Common materials for roof flashing include galvanized steel, aluminum, and copper, with copper offering the greatest durability. Selecting the right material is crucial for effective roof protection.

How can I identify a roof flashing leak?

To identify a roof flashing leak, check for water stains on ceilings and walls, and look for visible light through roof openings. Additionally, conducting a garden hose test can help confirm the source of the leak.

When should I seek professional help for roof flashing repairs?

You should seek professional help for roof flashing repairs if the damage is severe, if you’re unsure about how to proceed, or if the issues are complex. It’s crucial to address these concerns promptly to prevent further damage to your roof.

What is included in Arocon’s Roof and Gutter Tune Up service?

Arocon’s Roof and Gutter Tune Up service includes gutter cleaning, resealing roof vents and piping, and replacing shingles as needed. This comprehensive approach ensures your roof and gutters function optimally.

What is the cost range for professional roof flashing repairs?

The cost for professional roof flashing repairs generally falls between $200 and $600. For broader roof repair needs, you can expect an average expense ranging from $379 to $1,755.


https://www.aroconllc.com/wp-content/uploads/2024/12/db79f875-116c-455d-bd8a-306bec204ef2.png 1000 1500 Arocon https://www.aroconllc.com/wp-content/uploads/2024/09/arocon-logo.webp Arocon2024-12-05 08:00:482025-09-01 13:59:26Top Solutions for Flashing on Roof Leaking
Ridge cap shingles being installed on a roof.

How to Master Shingling with Architectural Shingles: A Step-by-Step Guide

Want to improve your home’s roof with architectural shingles? This guide will show you how to install them correctly. From preparation to final touches, you’ll learn each step to ensure a durable and attractive finish.

Key Takeaways

  • Architectural shingles offer enhanced durability and aesthetic versatility, mimicking more expensive materials while providing superior weather resistance.

  • Proper preparation and safety precautions are crucial for successful installation, including inspecting the roof deck and gathering necessary materials.

  • Regular maintenance and inspections are essential for prolonging the lifespan of architectural shingles, addressing common issues like curling and cracking promptly.

How to Master Shingling with Architectural Shingles: A Step-by-Step Guide

A person installing architectural shingles on a roof.

Architectural shingles, also known as dimensional or laminate shingles, stand out due to their enhanced strength and aesthetic appeal. Unlike traditional shingles, they are designed to mimic the look of more expensive roofing materials like wood shakes or slate tiles, offering a visually appealing alternative without the hefty price tag. Their multi-layered construction provides superior durability, making them an excellent investment for any homeowner looking to enhance their roof’s longevity and appearance.

This guide offers a detailed, step-by-step approach to installing architectural shingles, from preparing the roof deck to the final touches. Following these steps ensures a smooth installation process that maximizes the lifespan and performance of your shingles. Essential tools and materials, safety precautions, and expert tips are covered to help you achieve a professional finish.

One of the key benefits of architectural shingles is their ability to withstand harsh weather conditions, thanks to their robust construction. This guide will also highlight maintenance tips to help you keep your asphalt shingle roof in top condition, ensuring that your investment pays off for many years to come.

By the end of this guide, you’ll understand how to install architectural shingles effectively, whether working on a new roof or replacing old shingles.

Introduction

Architectural shingles have become a popular choice for homeowners due to their enhanced durability and aesthetic appeal. However, ensuring a successful installation requires meticulous planning and adherence to best practices. This guide will take you through each step of the process, from initial preparation to the final inspection, ensuring that you achieve a high-quality finish that stands the test of time.

Safety is paramount in any roofing project. This guide emphasizes the importance of using proper safety equipment, such as harnesses, sturdy ladders, and protective gear, to protect yourself during the shingling process. Additionally, adhering to local building codes is crucial to ensure compliance and safety throughout the installation.

This guide equips you with the knowledge and tools needed to confidently tackle your roofing project and achieve a successful outcome.

Understanding Architectural Shingles

Different types of architectural shingles displayed together.

Architectural shingles, also known as dimensional or laminate shingles, are crafted from multiple layers of architectural asphalt shingles, providing enhanced strength and durability. Their design allows them to resist severe weather conditions, making them a reliable choice for any roof. These shingles also come in a variety of colors, designs, and textures, allowing homeowners to choose an option that complements their home’s aesthetic.

A key advantage of architectural shingles is their enhanced performance against harsh elements. The layered construction boosts wind resistance and prevents rain penetration, keeping your roof intact during storms. Regular maintenance, including protecting shingles from water damage and conducting periodic inspections, can further prolong their lifespan.

Architectural shingles significantly boost a home’s curb appeal while offering practical benefits. Available in various styles, they can mimic expensive materials like wood shakes or slate tiles, providing a luxurious look without the high cost. This versatility makes them a popular choice for enhancing a home’s exterior.

Benefits of Architectural Shingles

Architectural shingles offer numerous benefits, making them a superior choice over traditional three-tab shingles. Their increased durability and longer lifespan make them a cost-effective investment for homeowners. Unlike standard asphalt shingles, architectural shingles can last up to 50 years with proper maintenance, significantly outlasting their counterparts.

These roof shingles are also designed to withstand various elements, including wind uplift, rain penetration, and impact damage. Their multi-layered construction and heavier weight contribute to their greater resistance, ensuring that your roof remains secure and intact even during severe weather conditions. This durability not only protects your home but also reduces the need for frequent repairs or replacements.

In addition to their practical advantages, architectural shingles enhance the overall aesthetic appeal of a home. They can mimic the look of more expensive materials, such as slate or wood shakes, without the associated high costs. This versatility allows homeowners to achieve their desired look while staying within budget. Moreover, homes with architectural shingles often have a higher resale value, making them an appealing option for those looking to increase their property’s worth.

Types of Architectural Shingles

Architectural shingles come in various types, each offering unique aesthetic and functional benefits. Also known as laminated or dimensional shingles, architectural roof shingles are available in a wide array of styles, including classic slate and modern dimensional looks. This variety allows homeowners to choose a design that best suits their home’s architectural style and personal preferences.

Choosing the right type of shingles depends on several factors, including your budget, climate, and aesthetic preferences. While some shingles are designed to mimic the appearance of more expensive materials, others focus on providing enhanced durability and weather resistance. Understanding these differences can help you make an informed decision that meets your specific needs and enhances the overall look of your home.

Preparing for Installation

Proper preparation is crucial for a successful installation of architectural shingles. Before beginning, gather all necessary materials and tools to avoid interruptions. This includes quality roofing underlayment, felt or synthetic, and appropriate cutting tools like tin snips. Also, verify local building codes to ensure compliance and avoid potential issues.

Inspect the roof deck thoroughly to identify any damage or weaknesses that could affect the installation. Look for signs of warping, wood rot, or water infiltration, and address these issues before proceeding. This ensures the roof deck can support the new shingles and provides a solid foundation.

Safety should never be overlooked during a roofing project. Use protective gear, secure ladders properly, and wear non-slip footwear to prevent accidents while working at heights. If unsure about any aspect of the installation or uncomfortable working on the roof, consider hiring a professional roofing contractor.

Inspect the Roof Deck

Before installing architectural shingles, thoroughly inspect the roof deck. Remove old roofing materials and repair any damage to ensure a clean and stable surface. Look for signs of rot or warping, and make necessary repairs to maintain the roof’s structural integrity.

Ensure the roof deck is clean and dry before installing new shingles. Any remaining moisture or debris can compromise the shingles’ adhesion and lead to future issues.

Gathering Roofing Materials

Gathering all necessary roofing materials before starting the installation ensures a smooth and efficient process. Essential materials include starter shingles, underlayment, roofing nails, and safety gear. Starter shingles establish a stable base for the following rows and help prevent wind uplift.

Carefully calculate the quantity of materials needed to avoid shortages mid-project. Purchase a bit more shingles than required to account for mistakes or damage during installation. Having all materials ready ensures a smooth installation without unnecessary delays.

Safety Precautions

Safety should be a top priority during any roofing project. Wear protective gear, such as gloves and safety glasses, to protect yourself from potential hazards. Secure ladders properly and wear non-slip footwear to avoid accidents while working at heights. These precautions can prevent injuries and ensure a safe working environment.

If hesitant or uncomfortable about climbing on the roof, consult a professional roofing contractor. Professionals have the experience and equipment necessary to handle the installation safely and efficiently, providing peace of mind.

Installing the Underlayment and Starter Shingles

Underlayment and starter shingles being laid on a roof.

The first steps in installing architectural shingles involve laying the underlayment and applying starter shingles. These initial layers create a waterproof barrier and provide a solid foundation for the subsequent shingles. Proper installation of these components is crucial for the project’s overall success.

Laying the Underlayment

Inspect the roof deck for any damage and make necessary repairs to ensure a clean and stable surface. Lay the underlayment in overlapping courses to ensure maximum water protection. Start from the bottom of the roof and work your way up, securing the underlayment with nails spaced about 12-18 inches apart along the edges. This creates a continuous barrier that prevents water infiltration and protects the roof deck.

Applying Starter Shingles

Starter shingles form the first layer at the roof edges, providing a solid foundation and preventing wind uplift. Position them with the adhesive side facing up for proper adhesion. Secure the starter shingles with nails spaced about 6 inches apart for maximum stability. Using starter shingles reduces the risk of leaks, increases overall roof longevity, and enhances the roof’s integrity against elements.

Step-by-Step Shingle Installation

A step-by-step shingle installation process in action.

Installing the main shingles involves a step-by-step approach to ensure proper alignment and secure fastening to install roof shingles. Begin at the bottom of the roof and work your way up, overlapping the rows according to the manufacturer’s instructions. Proper alignment and nailing techniques are crucial to prevent leaks and ensure a durable roof.

The first course of shingles should overhang the eaves to guide water into the gutters and ensure proper drainage. Stagger the rows of shingles to avoid vertical alignment, which can allow water to penetrate and cause leaks. This is vital for maintaining the roof’s integrity and preventing future issues.

Positioning the First Course

Start the installation at the bottom edge of the roof to ensure proper water drainage and create a solid foundation for the subsequent rows. The initial row of shingles should overhang the eaves by about 1/2 to 3/4 inch to guide water into the gutters and prevent damage.

Secure the first course of shingles by placing a full shingle at one end of the roof and fastening it securely. This establishes a strong base for the rest of the shingles.

Nailing Techniques

Proper nailing techniques are essential for a successful architectural shingle installation. Place nails in the adhesive strip below the sealant strip to ensure the shingles are securely fastened. This placement helps prevent shingles from lifting during strong winds and ensures a tight seal against water infiltration.

Using a chalk line to mark guidelines helps maintain straight rows and consistent spacing between shingles. This attention to detail is crucial for achieving a professional finish and ensuring long-term roof durability.

Aligning and Overlapping Shingles

Aligning and overlapping shingles correctly prevents leaks and ensures a durable roof. Each row should be staggered to avoid vertical alignment, which could allow water to penetrate. This pattern enhances the roof’s aesthetic appeal and overall strength.

Follow the manufacturer’s instructions for overlapping the shingles to ensure a consistent and watertight installation. Proper alignment and overlapping protect the roof from the elements and contribute to a polished, professional appearance.

Trimming and Fitting Shingles

Trimming and fitting shingles around roof features like vents and chimneys require precision and care. Properly cutting and fitting these shingles ensures a professional finish and prevents potential leaks. Use a sharp utility knife or roofing shears for clean cuts and a precise fit.

Cutting Shingles to Size

Use a utility knife or roofing shears to cut architectural shingles accurately. A sharp utility knife is recommended for clean cuts and ensuring the shingles fit properly around the edges and corners of the roof.

Navigating Roof Features

Navigating roof features such as vents, chimneys, and skylights requires careful trimming and sealing of shingles. Cut the shingles to fit snugly around these features, ensuring no gaps are left unsealed. Use a trowel to smooth the roofing cement and ensure a secure seal around these features.

Allow for expansion and contraction by maintaining a small gap between the shingles and features like chimneys. This prevents shingle damage and ensures a longer-lasting roof.

Installing Ridge Caps and Final Touches

Ridge cap shingles being installed on a roof.

The final steps in the installation process involve installing ridge cap shingles and conducting a thorough inspection. Ridge cap shingles cover the roof’s ridge, providing a polished finish and additional protection against the elements. These shingles should match the architectural shingles for a cohesive look and effective performance.

Follow the manufacturer’s guidelines for installing ridge cap shingles, starting from the end opposite the prevailing winds for optimal wind resistance. After installing the ridge cap shingles, perform a final inspection to check for proper alignment and fastening of all shingles. This step ensures that any areas requiring adjustments or corrections are addressed before finalizing the roofing project.

Installing Ridge Cap Shingles

Ridge cap shingles are essential for covering the roof’s ridge and providing a polished finish. If not already pre-cut, cut the shingles into ridge cap units and align them with the thicker edge facing outward. Start from the bottom for hip shingles and overlap each shingle to install ridge cap shingles for a secure fit.

Nail each ridge cap shingle down with two nails, one on each side, using nails that are at least two inches long to ensure a secure fit. Seal the last shingle with roofing cement to prevent water infiltration and enhance the roof’s durability.

Final Inspection and Clean-Up

After completing the installation, conduct a thorough inspection to ensure proper alignment and fastening of all shingles. Check for any areas that may require adjustments or corrections before finalizing the project.

Remove any debris from the roof to maintain its aesthetic appeal and prevent potential damage. A clean and finished appearance is crucial for showcasing the quality of the installation and ensuring the roof’s longevity.

Maintenance Tips for Longevity

Proper maintenance is essential for prolonging the lifespan of architectural shingles. Regular inspections and cleaning of gutters help prevent water damage and ensure the integrity of the shingles. After severe weather events, inspect the roof for any damage or loose shingles and address any issues promptly.

Ensuring shingles are securely fastened and properly aligned is vital for roof maintenance. Regular maintenance not only extends the lifespan of the shingles but also enhances the overall appearance of the roof.

Repairs may be necessary to address common issues such as curling, cracking, or granule loss. By performing timely repairs, you can maintain the roof’s integrity and prevent more significant problems from developing.

Regular Inspections

Regular inspections are crucial for identifying potential issues early. It’s recommended to inspect the roof at least twice a year or after major weather events to ensure proper water drainage and prevent moisture buildup. Look for signs of damage, such as loose or missing shingles, and address any issues promptly to maintain the roof’s integrity.

If you’re unsure about any aspect of the inspection, consider consulting a professional roofing contractor. Their expertise can help identify potential problems and provide recommendations for repairs or maintenance.

Common Issues and Repairs

Common issues with shingles include:

  • curling

  • cracking

  • granule loss

  • missing shingles

These problems can compromise the roof’s integrity and lead to more significant issues if not addressed promptly. Regular inspections and timely repairs are essential for maintaining the roof’s condition and preventing further damage.

If shingles need repair or replacement, a detailed report with recommendations can help guide the necessary actions. This ensures that the roof remains secure and in good condition, extending its lifespan and protecting your home.

Summary

Mastering the installation of architectural shingles involves careful preparation, precise execution, and regular maintenance. From inspecting the roof deck and gathering materials to laying the underlayment and installing the main shingles, each step is crucial for achieving a high-quality finish. Proper nailing techniques, alignment, and overlapping ensure the shingles are securely fastened and protected against the elements.

Regular inspections and timely repairs help maintain the roof’s integrity and extend its lifespan. By following this comprehensive guide, you can confidently tackle your roofing project and enjoy the benefits of a durable, aesthetically pleasing roof that enhances your home’s value and appearance.

Frequently Asked Questions

What factors determine the best type of shingles for a roof?

The best type of shingles for your roof is determined by your budget, climate, and personal aesthetic preferences. These factors ensure that you select shingles that offer both durability and appeal for your specific situation.

What are common issues with shingles?

Common issues with shingles include curling, cracking, granule loss, and missing shingles, all of which can compromise roof integrity. Addressing these problems promptly is essential to maintain the roof’s effectiveness.

How often should shingles be inspected?

It is recommended to inspect shingles at least once a year or after significant weather events to ensure their condition and longevity. Regular inspections help identify potential issues early.

What is the typical lifespan of shingle roofs?

The typical lifespan of asphalt shingles is 20-30 years, while architectural and luxury shingles can last up to 50 years with proper maintenance. Investing in quality materials and regular upkeep can significantly enhance longevity.

What happens if shingles need repair or replacement?

If shingles require repair or replacement, a detailed report recommending the necessary actions will be provided to ensure the roof’s integrity is maintained. It’s crucial to address these issues promptly to avoid further damage.


https://www.aroconllc.com/wp-content/uploads/2024/12/09e706c7-216b-4351-88cb-055fbbeff860.jpeg 1000 1500 Arocon https://www.aroconllc.com/wp-content/uploads/2024/09/arocon-logo.webp Arocon2024-12-03 08:00:412025-09-01 14:41:57How to Master Shingling with Architectural Shingles: A Step-by-Step Guide
A professional roofer providing consultation services

Shingle Fell Off Roof? Here’s How to Fix It

If a shingle fell off your roof, the immediate question is: what to do next? This article will guide you through why shingles fall off, immediate steps to take, how to identify further damage, and whether to DIY or call a pro for repairs. Addressing these issues promptly, especially if a shingle fell off the roof, can save you from costly repairs later.

Key Takeaways

  • Roof shingles can fall off due to wind damage, aging, or improper installation; regular inspections can help prevent these issues.

  • Immediate action is essential when shingles fall off; assessing damage and covering the area with a tarp can prevent water intrusion.

  • Regular maintenance, proper installation techniques, and understanding homeowners insurance coverage are critical to ensuring roof longevity and addressing potential damage.

Why Do Roof Shingles Fall Off?

A roof with several missing shingles, indicating potential wind damage

Roof shingles can fall off for a variety of reasons, with wind damage being one of the most common culprits. High winds during storms can cause shingles to blow off, especially if they are already loose or improperly installed. Aging is another significant factor; as shingles age, they lose their resilience and become more brittle, making them more prone to falling off. Improper installation also plays a crucial role. Shingles that are not installed correctly are more likely to be dislodged, even if they are less than ten years old. Signs that your shingles are at risk include curling or peeling shingles and loose or missing tiles.

Knowing these causes allows you to take proactive measures to maintain your roof. Frequent inspections and timely maintenance can avert many of these problems.

For instance, ensuring that shingles are properly installed and replacing aging shingles before they become too brittle can significantly reduce the risk of shingles falling off. Addressing these potential issues early can prevent more extensive and costly repairs in the future.

Immediate Steps to Take When a Shingle Falls Off

A person assessing a roof after a shingle fell off

When you first notice that shingles blew off your roof, the primary step is to assess the extent of the damage. Count the missing shingles and look for any other signs of damage, such as exposed nail heads or curling shingles. This will help you determine whether you need a full roof repair or just a few shingles replaced. If the damage is extensive or you’re unsure about the severity, it’s crucial to call a qualified roofing professional immediately. They can provide a thorough inspection and recommend the best course of action.

If immediate repair isn’t feasible, cover the affected area with a heavy tarp to shield your home from rain and other elements. Acting quickly is essential to avoid water damage, which can lead to mold growth, structural issues, and costly repairs.

Even a single missing shingle can compromise your roof’s integrity, so address the issue promptly.

How to Identify Shingle Damage

Early identification of shingle damage is crucial for maintaining your roof’s integrity. Signs of damage include loose or missing shingles, exposed nail heads, curling or cracking shingles, and dark patches on the roof. You might also find granules in your gutters or on the ground, indicating that your shingles are deteriorating.

Additionally, new leaks inside your home or higher energy costs could signal shingle damage. Regularly checking for these signs helps catch problems before they escalate.

Missing Shingles

When shingles blow off the roof, it leaves your home vulnerable to a host of issues. Water can enter the attic, leading to leaks that may cause interior water damage, dry rot, and failed weatherproofing. A missing shingle can also result in leaks, particularly if it exposes an open seam underneath. This can lead to rotten sheathing, structural damage, and mold growth, which can spread under other roof shingle and throughout your home. Immediate attention is required if the seam underneath the missing shingle is exposed, as the risk of leaks increases significantly.

The consequences of missing shingles are severe and can escalate quickly. From rotten plywood and compromised electrical systems to decreased home aesthetics, the impact is far-reaching.

Missing shingles pose the biggest risk at critical parts of the roof, like valleys and low points. Hence, it’s crucial to address missing shingles promptly to prevent further damage and maintain the integrity of your roof.

Curling Shingles

Curling shingles are a clear sign that your asphalt shingles are reaching the end of their lifespan. When shingles become brittle and curl, they lose their ability to prevent water intrusion, leading to potential leaks. These active leaks can cause wood rot and mold growth in your insulation, which can be costly to repair and detrimental to your home’s overall health. Address curling shingles as soon as you notice them to prevent these issues from escalating.

In addition to leaks, curling shingles can detract from your home’s aesthetic appeal. They create an uneven appearance and can make your roof look aged and poorly maintained. Regular inspections and timely replacement of aging shingles can help you avoid these problems and maintain your roof’s functionality and appearance.

Granule Loss

Granule loss is another indicator of shingle damage that shouldn’t be ignored. Finding granules in your gutters or around your property suggests that your shingles are deteriorating. These granules protect the shingles from harsh weather conditions, and their loss makes the shingles more susceptible to damage. Dark patches on your roof can also indicate granule loss or the presence of moss or algae, both of which can compromise the shingles’ effectiveness.

Regularly inspect your roof for signs of granule loss. If you notice granules accumulating in your gutters or on the ground, it’s time to have your roof inspected by a professional. Dealing with granule loss early can prevent significant issues and extend your roof’s lifespan.

DIY vs. Professional Shingle Repair

Photo depicting DIY and professional roof repair methods

Deciding whether to tackle shingle repairs yourself or hire a professional depends on several factors. Replacing just a few shingles can be a straightforward DIY task if you have the right tools and skills. However, discoloration may occur after patching, which is something to consider.

On the other hand, hiring a professional roofer ensures that the job is done correctly and safely, with the added benefit of their expertise in identifying additional issues.

Tools and Materials Needed for DIY Repairs

If you’re considering a DIY roof repair, you’ll need some essential tools and materials. A replacement shingle, a hammer, roofing nails, a pry bar, and a utility knife are necessary to complete the job. Slide the new shingle into place from the top down, overlap it with the existing shingles, and nail it back into place. Ensure you know where to nail the shingles to keep them securely attached.

Using the correct technique is vital for a successful DIY repair. Incorrect installation can lead to future problems, including shingle blow-offs and leaks. If confident in your skills and equipped with the right tools, DIY shingle replacement can save money. However, always prioritize safety and follow the correct procedures to avoid any mishaps.

When to Call a Professional Roofer

There are times when calling a professional roofer is the best course of action. If you’re unsure about repairing the roof yourself, it’s wise to seek professional help. Professionals have specialized training and can recognize additional issues while repairing shingles. They also have the necessary safety equipment to work on roofs, which is crucial to avoid fall hazards and potential injury.

If uncomfortable with the nailing process or lacking confidence, hiring a professional is advisable. The risks of DIY repairs include fall hazards, potential for more damage, and underlying issues that you might not recognize. Utilizing a professional ensures the job is done correctly and safely, providing peace of mind and protecting your home from further damage.

Preventative Measures to Avoid Future Shingle Loss

Preventative measures to avoid future shingle loss

Routine maintenance and inspections are key to preventing future shingle loss. Routine maintenance can significantly reduce the likelihood of shingle issues caused by environmental factors.

Regular inspections and early problem-solving can prolong the life of your roof shingles and avoid costly repairs.

Regular Roof Inspections

Frequent roof inspections help identify wear and tear before it leads to significant issues. Proper attic ventilation is also crucial for extending the life of your roof shingles by regulating the temperature and preventing moisture buildup. Inspections should be conducted at least twice a year and after severe weather events to catch any damage early.

During these inspections, look for loose or missing shingles, exposed nail heads, and any other signs of damage. Addressing these issues promptly can prevent more extensive damage and ensure your roof remains in good condition.

Routine inspections and maintenance are crucial for safeguarding your home and extending your roof’s lifespan.

Proper Installation Techniques

Proper installation techniques are essential for preventing premature shingle failure. Flawed installation practices can make shingles more susceptible to damage and lead to leaks and further issues. Ensuring that shingles are installed correctly, according to manufacturer guidelines and local building codes, minimizes the risk of future problems.

Correct placement of shingles, including using starter shingles along the eaves, helps minimize the risk of wind damage. Additionally, adequate attic ventilation is crucial to prevent shingles from losing their adhesion and to maintain the overall health of your roofing system.

Proper installation techniques ensure the longevity and durability of your roof.

Maintenance Tips

Regular maintenance is key to keeping your roof in top condition. Inspecting and repairing damaged shingles promptly can prevent larger issues down the road. Clearing debris from the roof reduces the risk of shingle damage and leaks, while keeping gutters clean helps prevent water buildup that can affect shingles.

Trimming overhanging tree branches is another important maintenance tip. Falling debris from trees can damage shingles and lead to leaks. Regularly cleaning gutters and removing debris from your roof will protect your shingles from unnecessary wear and extend their lifespan.

Following these maintenance tips helps keep your roof in good condition and avoids costly repairs.

Understanding Your Homeowners Insurance Coverage

Understanding your homeowners insurance coverage for roof damage is crucial. Typically, homeowners insurance covers damages from specific perils such as windstorms and hail.

Review your policy for any exclusions that might limit coverage and be aware of your deductible and coverage limits before filing a claim.

What is Typically Covered

Roof damage caused by wind is generally covered by homeowners insurance. However, coverage for roof leaks usually applies only if the leak results from a covered peril. Insurance providers have different policies regarding shingle damage, so it’s essential to check your specific policy details. If your warranty has expired, your homeowners insurance might still provide coverage options.

Professional roofers often carry insurance that protects against potential damage they might cause during repairs. This provides an added layer of security when hiring professionals to work on your roof. Knowing what is typically covered helps you make informed decisions about repairs and maintenance.

How to File a Claim

To initiate a claim for roof damage, contact your insurance company and provide documentation of the damage. This documentation should include photos, notes on the condition of the roof, and details of the storm that caused the damage. Prompt and thorough documentation can help expedite the claims process and ensure you receive the coverage you’re entitled to.

Working closely with your insurance provider and following their procedures can make the claims process smoother. Be prepared to answer any questions they may have and provide additional documentation if needed.

By understanding how to file a claim, you can navigate the process more effectively and ensure your roof is repaired or replaced promptly.

Arocon’s Roofing Services and Solutions

A professional roofer providing consultation services

At Arocon, we offer a comprehensive range of roofing services designed to meet all your needs. From professional inspections and repairs to complete roof replacements, our skilled professionals at our roofing company are committed to delivering quality workmanship and timely service.

Whether you need a few shingles replaced or a new roof installed, Arocon ensures that every job meets the highest standards of excellence. We also provide extended warranty options for added peace of mind.

Complimentary Consultation

We understand that larger exterior repairs and roof replacement can be daunting, which is why Arocon offers a no-cost, no-obligation consultation for homeowners. During this consultation, our experts will assess your roof’s condition, discuss your options, and provide a detailed estimate.

This service aims to provide confidence and clarity about the necessary steps to protect your home.

Roof and Gutter Tune Up

Regular maintenance is crucial for the longevity of your roofing system, and Arocon’s Roof and Gutter Tune Up service is an excellent way to ensure your roof remains in top condition. Starting at just $199, this service includes a thorough inspection and maintenance of your roof and gutters, helping to prevent future damage and reduce the risk of costly repairs. Our technicians will clean gutters, check for loose shingles, and address any minor issues before they become major problems.

Investing in regular tune ups extends the life of your roofing materials and maintains the overall performance of your roof. This proactive approach can save you money in the long run and give you peace of mind knowing that your home is well-protected against high winds, rain, and other elements.

Summary

Maintaining your roof is essential for protecting your home. Understanding why shingles fall off, recognizing the signs of shingle damage, and knowing when to call a professional can help you prevent costly repairs and extend the life of your roof. Regular inspections, proper installation techniques, and routine maintenance are key to avoiding future shingle loss. Arocon is here to provide expert guidance and quality services, from complimentary consultations to comprehensive roof and gutter tune ups. Take proactive steps today to ensure your roof remains strong and resilient for years to come.

Frequently Asked Questions

Why do roof shingles fall off?

Roof shingles typically fall off due to wind damage, aging, and improper installation. Ensuring proper installation and maintaining your roof can help prevent this issue.

What should I do if a shingle falls off my roof?

If a shingle falls off your roof, first assess the damage and check for other issues. If extensive damage is present or if you’re uncertain, it’s best to contact a qualified roofing professional for repairs.

How can I identify shingle damage?

To identify shingle damage, check for loose or missing shingles, curling or cracking, dark patches, and granules in gutters. Additionally, new leaks and increased energy costs may signal underlying issues.

Should I repair the shingles myself or hire a professional?

It’s advisable to hire a professional if you’re unsure about the repair process or lack the necessary safety equipment. Professionals not only ensure correct and safe repairs but can also identify any additional issues that may arise.

What services does Arocon offer for roof maintenance?

Arocon offers comprehensive roof maintenance services, including professional inspections, repairs, and replacements, as well as a Roof and Gutter Tune Up service starting at $199 that focuses on cleaning gutters, inspecting shingles, and addressing minor issues to prevent future damage.


https://www.aroconllc.com/wp-content/uploads/2024/11/A-professional-roofer-providing-consultation-services.png 1000 1500 Arocon https://www.aroconllc.com/wp-content/uploads/2024/09/arocon-logo.webp Arocon2024-11-28 08:00:202025-09-01 14:39:38Shingle Fell Off Roof? Here’s How to Fix It
An image depicting the impact of roof performance and longevity

Adding a Second Layer of Shingles on Roof: Pros and Cons

Adding a second layer of shingles on roof is a cost-effective and time-saving option, but is it the right choice for you? This article breaks down the pros and cons, discusses potential issues with roof performance and durability, and explores alternative solutions.

Key Takeaways

  • Adding a second layer of shingles can provide immediate cost and time savings but may increase long-term expenses and structural risks.

  • Multiple layers of shingles can complicate leak detection, reduce roof lifespan, and void warranties, ultimately leading to costly repairs.

  • Homeowners should consider professional consultations and alternative options, like full roof replacement or maintenance services, to ensure effective and safe roofing solutions.

Why Homeowners Consider Adding a Second Layer of Shingles

An image showing a house with multiple layers of shingles on the roof

Many homeowners consider adding a second layer of shingles as a solution to avoid the daunting process of a full roof replacement. This approach offers significant cost savings and is less time-consuming. Skipping the labor-intensive process of removing old shingles allows homeowners to save money and expedite the roofing process.

However, this method’s immediate benefits should be weighed against potential long-term drawbacks.

Cost Savings

Adding a second layer of shingles reduces costs by eliminating the need for removing old shingles. This approach eliminates the need for an extra expense and saves time, making it a tempting option for those looking for quick, temporary savings.

However, long-term cost implications should also be considered. Removing two layers of shingles during the next replacement will be twice the expense, making the initial savings a short-term win but a potential future burden.

Time Efficiency

Time efficiency is another important factor when deciding to add a second layer of shingles. This process is generally quicker than a full roof replacement since it avoids the labor-intensive task of removing old shingles. However, the pitch, complexity, and care in installation can significantly influence the time it takes to install a layover of shingles.

Steeper roofs, for instance, take longer to install due to increased safety concerns. While this method saves time initially, the potential near-future issues should be considered to determine if these savings are worthwhile.

Potential Problems with Multiple Layers of Shingles

An image of potential problems with multiple layers of shingles on a roof

Despite the initial appeal, adding a second layer of shingles can lead to several potential problems. The increased weight from multiple roof layers can stress the roof’s structural components, possibly leading to damage. Additionally, the presence of multiple layers can significantly shorten the roof’s lifespan due to compounded weight and inadequate ventilation.

Professional advice is crucial to avoid costly mistakes, as this section explores the potential issues in detail.

Increased Weight

Adding a second layer of shingles significantly increases the overall weight that the roof structure has to support. This added weight can create additional stress on the roof trusses and decking, leading to structural issues over time. Potential consequences include sagging of the roof, accelerated wear of roofing materials, and an increased risk of roof collapse in extreme cases.

The additional weight can turn a seemingly cost-effective solution into a significant structural concern.

Difficulty in Detecting Leaks

Having multiple layers impedes thorough visual inspections, leaving hidden issues unchecked. Water can migrate between layers, making leak detection and assessment more complicated. Hidden damage under multiple layers can lead to roof leaks, cave-ins, or mold.

Locating leaks can become difficult, leading to unpaid repairs and warranty issues, making it a challenging and costly problem.

Voided Warranties

Installing a new roof often comes with a warranty, which can cover future repairs and maintenance costs. However, adding a second layer of shingles can lead to the voiding of manufacturer warranties, which may leave homeowners responsible for future roofing issues. When warranties are voided, homeowners may be faced with unexpected repair costs and diminished protection against manufacturing defects.

Homeowners should weigh the risks of voided warranties against the benefits of adding a second layer of shingles and consider the implications for their shingle warranty.

Impact on Roof Performance and Longevity

An image depicting the impact of roof performance and longevity

Adding a second layer of shingles can decrease the overall lifespan of the roof. Existing problems from the original roof can be concealed when a second layer is added, making future leaks harder to detect and repair. A full roof replacement provides superior structural integrity, longevity, and incorporates advanced roofing technologies compared to merely layering shingles.

This section examines the specific impacts on roof performance and longevity.

Reduced Lifespan of Shingles

Adding a second layer of shingles can accelerate the aging of the first layer due to increased heat and moisture. The extra moisture and heat from the second layer can significantly degrade the first layer of shingles, leading to a reduced lifespan.

Adding a second layer of shingles at least doubles the weight on the roof structure, which can lead to potential damage. The increased weight from a second layer can stress the roof structure significantly, potentially leading to structural damage over time.

Moisture and Ventilation Issues

Excessive moisture buildup between shingles can create an environment prone to mold and algae, exacerbating roof degradation. Multiple shingle layers can trap moisture, fostering mold and algae growth.

Double layers of shingles can obstruct proper ventilation, worsening moisture issues and promoting mold growth. Poor ventilation caused by added layers can lead to significant moisture buildup, affecting both the roof’s integrity and energy efficiency.

The upper layer of shingles may curl and crack due to higher temperatures from trapped heat between layers.

Building Codes and Regulations

Local building codes typically restrict roofing to a maximum of two layers of shingles. Understanding local building codes is essential before adding a second layer of shingles, as these codes govern roofing practices.

This section will discuss the importance of compliance with local codes and the inspection requirements to ensure safety and regulatory adherence.

Compliance with Local Codes

Homeowners must verify their local codes to ensure compliance before adding a second layer of shingles. Non-compliance can lead to penalties, making it essential to consult local building departments to confirm if adding a second layer of shingles is permitted.

Experienced roofing contractor provide essential knowledge of structural integrity and local building codes, ensuring the project meets all necessary regulations.

Inspection Requirements

Roof inspections confirm adherence to building standards and prevent potential regulatory fines. Multiple layers of shingles prevent a thorough inspection of roof decking and hidden issues, making it crucial to have professional inspections to ensure that any added shingle layers meet the necessary safety and regulatory standards.

Aesthetic and Resale Value Concerns

An image representing aesthetic and resale value concerns for a house with shingles

A new roof can significantly improve a home’s curb appeal, making it more attractive to potential buyers. However, multiple layers of shingles can lead to an inconsistent roof surface, detracting from the overall visual attractiveness and potentially affecting the home’s resale value.

This section explores aesthetic and resale value concerns in detail.

Visual Appeal

Multiple layers of asphalt shingles can lead to an inconsistent roof surface, detracting from the overall visual attractiveness of roof shingles. Imperfections in old shingles can transfer to newer layers, reducing the roof’s aesthetic value.

A roof with two layers often presents an uneven surface that can detract from the overall look of the home, impacting its curb appeal significantly, especially when considering the entire roof.

Effect on Home Resale Value

Buyers may skip the home or demand a lower price. Potential buyers may be deterred and demand price reductions, viewing a double-layer roof as a sign of poor maintenance.

Homes with two layers of shingles may be perceived as less desirable, causing potential buyers to either overlook them or negotiate for lower prices.

Alternatives to Adding a Second Layer of Shingles

An image showing alternatives to adding a second layer of shingles

While adding a second layer of shingles might offer temporary benefits, there are better alternatives to consider. Full roof replacement and roof maintenance services provide more durable and long-lasting solutions.

This section discusses these alternatives in detail, aiding homeowners in making informed decisions.

Full Roof Replacement

Full roof replacement is often recommended as it provides a more durable solution compared to simply adding a second layer of shingles. This approach offers long-lasting durability, ensuring that homeowners do not face the same wear and tear associated with older shingles.

Consulting experienced roofing contractors helps homeowners choose the right materials for their specific needs, resulting in a more resilient and reliable roofing solution.

Roof Maintenance Services

Applying a coating to shingles can enhance their lifespan and appearance, reducing the necessity for replacement. Arocon offers a Roof and Gutter Tune Up service designed to maintain roof health without the need for adding another layer of shingles.

Preventive maintenance helps avoid more costly repairs and extends the lifespan of the roof, making it a reliable option for homeowners.

Importance of Professional Consultation

Regular maintenance services prevent minor issues from escalating into costly repairs. Professional roof maintenance can enhance the safety of your roof by identifying and addressing hazards. Regular roof maintenance can identify and address issues before they require a full replacement.

This section emphasizes the importance of consulting professionals for informed roofing decisions.

Consulting Roofing Contractors

Experienced roofing contractors provide tailored recommendations based on specific roofing needs. Consulting experienced roofing contractors is crucial for making informed decisions about your roofing project. They bring essential knowledge of structural integrity and compliance with local building codes, ensuring that the project meets all necessary regulations and standards.

Free Consultations

Arocon offers complimentary consultations to help homeowners understand the scope of larger roofing projects.

Complimentary consultations enable homeowners to:

  • Assess project requirements without an initial financial commitment

  • Explore their roofing needs comfortably

  • Make informed decisions about their roofing options and associated costs

Summary

In conclusion, while adding a second layer of shingles might seem like a cost-effective and time-saving solution, it comes with significant potential problems. The increased weight, difficulty in detecting leaks, and risk of voided warranties can lead to long-term issues. Moreover, the impact on roof performance and longevity, coupled with compliance with building codes and aesthetic concerns, makes it essential to consider alternatives like full roof replacement and roof maintenance services. Consulting with professional roofing contractors and taking advantage of free consultations can help homeowners make informed decisions, ensuring the safety and longevity of their roofs.

Frequently Asked Questions

What are the main benefits of adding a second layer of shingles?

Adding a second layer of shingles can lead to cost savings on labor and a quicker installation process, making it a more efficient option than a full roof replacement.

What are the potential problems with adding a second layer of shingles?

Adding a second layer of shingles can lead to increased weight on the roof, making it more prone to structural issues, and can complicate leak detection and repairs. Additionally, it may void warranties and reduce the overall lifespan of the roof.

How does adding a second layer of shingles affect the roof’s performance and longevity?

Adding a second layer of shingles can decrease the roof’s longevity due to increased heat and moisture retention, as well as added stress on the roof structure, which may lead to moisture and ventilation issues. It’s crucial to consider these factors before deciding to double-layer shingles.

Are there any legal considerations when adding a second layer of shingles?

Yes, there are legal considerations, as local building codes often limit the number of shingle layers to a maximum of two. Always verify regulations to ensure compliance before proceeding.

What are some alternatives to adding a second layer of shingles?

Consider a full roof replacement for better durability and longevity, or explore roof maintenance services to extend your roof’s lifespan and avoid future expenses.


https://www.aroconllc.com/wp-content/uploads/2024/11/An-image-depicting-the-impact-of-roof-performance-and-longevity-1.png 1000 1500 Arocon https://www.aroconllc.com/wp-content/uploads/2024/09/arocon-logo.webp Arocon2024-11-26 08:00:202025-09-02 15:11:02Adding a Second Layer of Shingles on Roof: Pros and Cons
An image depicting the expected lifetime of an asphalt shingle roof

Understanding the Lifetime of Asphalt Shingle Roof: What to Expect

Asphalt shingle roofs typically last between 25 and 30 years, contributing to the overall lifetime of asphalt shingle roof. In this article, we’ll cover what affects this lifespan, from material quality to maintenance. You’ll get practical tips to maximize your roof’s longevity.

Key Takeaways

  • The average lifespan of asphalt shingle roofs ranges from 25 to 30 years, with factors like material quality, installation, and maintenance affecting longevity.

  • Three types of asphalt shingles—3-tab, architectural, and luxury—offer varying lifespans and durability, with luxury shingles potentially lasting over 30 years.

  • Regular inspections, proper ventilation, and prompt repairs are essential for extending the life of an asphalt shingle roof and preventing costly damage.

Understanding the Lifetime of Asphalt Shingle Roof: What to Expect

An image depicting the expected lifetime of an asphalt shingle roof

Asphalt shingle roofs are a popular choice among homeowners due to their affordability and ease of installation. Generally, the average roof’s lifespan of an asphalt shingle roof ranges from 25 to 30 years, with some lasting even longer with proper care and maintenance. However, several factors can influence how long a roof lasts, including the quality of the roofing materials used, the installation quality, and the local weather conditions.

Imagine the peace of mind knowing your roof will protect your home through decades of storms, sun, and seasons changing. But what should you realistically expect from your asphalt shingle roof? Understanding these expectations helps you plan for maintenance and eventual replacement, ensuring your home remains secure and beautiful for years to come.

Introduction

Homeowners must understand the lifespan of asphalt shingle roofs. This significant investment requires knowledge about the roof’s age, condition, and maintenance needs, especially when buying a home.

Being informed aids in decision-making and ensures the roof’s longevity, thereby protecting the home’s value and safety.

Average Lifespan of Asphalt Shingle Roofs

An image representation of the average lifespan of asphalt shingle roofs

The average lifespan of asphalt shingles is generally between 25 to 30 years, though some can last over half a century with proper installation and maintenance. Asphalt shingles are favored for their economic pricing and ease of installation, but their durability depends significantly on factors such as installation quality and ongoing maintenance. Manufacturers typically provide warranties ranging from 15 to 30 years, but these warranties often require registration to be valid.

Understanding the longevity of asphalt shingles requires looking at the different types: 3-tab shingles, architectural shingles, and luxury shingles. Each offers varying benefits and lifespans.

Lifespan of 3-Tab Shingles

3-tab shingles are known for their affordability and are commonly used in many homes. These shingles generally last between 15 and 20 years, providing a balance of cost and durability. While they are less expensive, their simpler design and thinner profile make them less durable than other types of asphalt shingles.

Lifespan of Architectural Shingles

Architectural shingles, also known as dimensional shingles, have an expected lifespan ranging from 25 to 30 years. They are built thicker than 3-tab shingles, which contributes to their enhanced durability and longer lifespan. This added thickness and design complexity make architectural shingles a preferred choice for homeowners looking for longevity and aesthetic appeal.

Opting for architectural shingles is an investment in your home’s future. Their durability enhances peace of mind and adds to the property’s value and curb appeal.

Lifespan of Luxury Shingles

Luxury shingles, often referred to as premium shingles, can last more than 30 years, with proper care extending their lifespan up to 50 years. These shingles are designed to withstand extreme weather conditions, with wind uplift resistance of around 110 MPH to 130 MPH. Additionally, luxury shingles are crafted to mimic the appearance of more expensive materials like cedar shake or slate, adding significant aesthetic value to high-end homes.

Luxury shingles offer a combination of longevity, resilience, and superior aesthetics, making them ideal for homeowners seeking a durable and visually appealing roof.

Key Factors Affecting Asphalt Shingle Roof Longevity

An image highlighting key factors affecting asphalt shingle roof longevity

The longevity of an asphalt shingle roof depends on several key factors: the quality of materials, proper installation, weather conditions, and regular maintenance. High-quality materials and proper installation significantly extend the roof’s lifespan, while extreme weather and poor maintenance can reduce it.

By understanding these factors, homeowners can take proactive steps to maximize their roof’s life expectancy.

Quality of Roofing Materials

Material quality greatly influences an asphalt shingle roof’s durability and lifespan. High-quality materials enhance longevity, while low-quality ones reduce it. Underlayment adds extra protection and positively impacts the roof’s lifespan.

Consulting a roofing professional ensures you choose the right quality and type of materials, leading to a longer-lasting roof.

Installation Quality

A reputable roofing contractor’s proper installation ensures a durable asphalt shingle roof. Poor installation can cause leaks and shingle loss, reducing the roof’s lifespan. Workmanship warranties, typically lasting 5 to 10 years, offer some quality assurance.

Correct installation by professionals prevents many future problems, ensuring your investment in an asphalt shingle roof pays off long term.

Weather Conditions

Weather conditions significantly impact asphalt shingles’ lifespan. Abrupt temperature changes can damage shingles, while extreme weather events like high winds and heavy storms can cause cracks or tear-offs, accelerating roof degradation.

Proper ventilation mitigates weather-related issues like ice dams, which can cause water damage. Awareness of weather impacts helps in taking preventive measures to protect your roof.

Maintenance and Repairs

Regular maintenance and prompt repairs are crucial for extending an asphalt shingle roof’s lifespan. Maintenance identifies minor issues before they escalate, potentially avoiding a complete roof replacement. For instance, granules in the gutter indicate shingle degradation and should be promptly addressed.

Neglecting roof damage can lead to significant, costly issues. Regular inspections and timely repairs are essential for maintaining the roof’s condition and extending its lifespan.

Signs Your Asphalt Shingle Roof Needs Attention

An image showing signs that an asphalt shingle roof needs attention

Recognizing signs that your asphalt shingle roof needs attention is crucial. Common signs include cracked or missing shingles and disarray in the asphalt coating. These indicators suggest the roof may need repair or replacement to prevent further damage.

Ignoring these signs can lead to severe problems like increased energy bills, water damage, mold growth, pest infestations, and decreased property value.

Here are some specific signs that your asphalt shingle roof needs attention.

Cracked or Missing Shingles

Cracked or missing shingles significantly compromise your asphalt shingle roof’s integrity. Hairline fractures can cause leaks and further damage. Shingles are critical for protection, and their damage or absence can compromise the entire roofing system.

Granules in Gutters

Granules in gutters can be an early warning sign of asphalt shingles deteriorating. Shingles lose granules with age due to sun exposure and weather conditions, indicating possible material failure and need for replacement.

Monitoring gutters for granules helps detect potential roofing issues early.

Sagging Roof Deck

A sagging roof deck is a severe issue requiring immediate attention. Lightly push at the spot with a broom; if it feels wet or moves, a new roof is needed immediately.

Damaged flashing can also cause water seepage, further compromising the home’s infrastructure.

How to Extend the Life of Your Asphalt Shingle Roof

An image demonstrating how to extend the life of your asphalt shingle roof

Extending the life of your asphalt shingle roof involves regular maintenance and taking proactive measures. Regular inspections help identify minor issues early, preventing costly repairs later. Additionally, dark-colored roofs absorb more heat, which can lead to faster deterioration over time. Foot traffic on a roof can also contribute to physical wear, reducing its lifespan.

Arocon Roofing and Construction offers services to maintain and enhance asphalt shingles’ lifespan. Their Roof and Gutter Tune-Up includes inspections and maintenance tasks to prolong roof life.

Here are some specific practices to extend your roof’s life.

Regular Roof Inspections

Annual professional inspections identify potential issues before they become serious problems. Regular roof inspections can significantly increase asphalt shingles’ longevity by addressing minor repairs promptly and preventing extensive damage.

Proper Ventilation and Insulation

Proper ventilation and insulation are critical for maintaining the health and longevity of your asphalt shingle roof. Proper insulation prevents shingle overheating, which can shorten lifespan. Attic insulation regulates temperatures, reducing damage from contraction and expansion due to extreme weather.

Adequate attic ventilation ensures an even temperature year-round, minimizing damage from extreme heat or cold. Inadequate ventilation can cause cracked shingles, adhesive deterioration, swollen trusses, and mold, significantly reducing the roof’s lifespan.

Proper ventilation and insulation are proactive steps in maintaining your roof’s durability.

Prompt Repairs

Promptly addressing minor repairs prevents them from escalating into larger, more expensive issues. Immediate repair or replacement of damaged shingles prevents leaks and further roof damage, protecting the entire roofing system.

Quickly addressing roof repairs not only extends the roof’s life but also saves on potential high repair costs in the future.

Professional Services from Arocon Roofing and Construction

Since 2008, Arocon Roofing and Construction has provided top-notch roofing company services, focusing on quality materials and excellent customer service. They offer various services to maintain and extend the life of your asphalt shingle roof, ensuring your home remains protected and aesthetically pleasing.

Their services include the Roof and Gutter Tune-Up, involving essential maintenance tasks to keep your roof in optimal condition, and complimentary consultations for larger roofing projects to provide homeowners with expert advice tailored to their specific needs.

Roof and Gutter Tune-Up

Arocon’s Roof and Gutter Tune-Up service starts at $199 and includes essential minor maintenance tasks. This service involves repairs such as replacing up to five blown shingles, fixing deteriorated pipe gaskets, and sealing vents and flashings.

Customers receive before and after photos of the roof’s condition, ensuring transparency and peace of mind about the maintenance performed.

Complimentary Consultations

Arocon Roofing offers complimentary consultations for larger roofing projects, ensuring homeowners receive expert advice tailored to their specific needs. These consultations evaluate larger repair and replacement projects for asphalt shingle roofs, providing comprehensive insights and solutions.

Summary

In summary, understanding the lifespan of an asphalt shingle roof and the factors that affect it is crucial for homeowners. The type of shingles, quality of materials, installation quality, weather conditions, and regular maintenance all play significant roles in determining how long a roof lasts. Recognizing signs of wear and addressing them promptly can prevent costly repairs and extend the roof’s life.

By investing in regular inspections, proper ventilation and insulation, and prompt repairs, homeowners can ensure their asphalt shingle roof remains in excellent condition for many years. Professional services from companies like Arocon Roofing and Construction can provide the expertise and support needed to maintain and enhance the durability of your roof. Protect your investment and enjoy the peace of mind that comes with a well-maintained roof.

Frequently Asked Questions

What is the average lifespan of an asphalt shingle roof?

The average lifespan of an asphalt shingle roof is typically between 25 to 30 years. However, with proper installation and maintenance, some roofs can last over 50 years.

What factors affect the lifespan of an asphalt shingle roof?

The lifespan of an asphalt shingle roof is primarily influenced by the quality of materials used, the quality of the installation, prevailing weather conditions, and the frequency of maintenance and repairs. Ensuring high standards in these areas can significantly extend the roof’s longevity.

What are the signs that my asphalt shingle roof needs attention?

Your asphalt shingle roof needs attention if you notice cracked or missing shingles, granules accumulating in your gutters, or a sagging roof deck. Addressing these issues promptly can prevent further damage.

How can I extend the life of my asphalt shingle roof?

To extend the life of your asphalt shingle roof, conduct regular inspections, maintain proper ventilation and insulation, and address repairs promptly. Taking these steps will help ensure your roof remains in good condition for years to come.

What services does Arocon Roofing and Construction offer for roof maintenance?

Arocon Roofing and Construction provides roof maintenance services such as the Roof and Gutter Tune-Up and complimentary consultations for larger roofing projects. These services ensure the longevity and effectiveness of your roofing system.


https://www.aroconllc.com/wp-content/uploads/2024/11/An-image-depicting-the-expected-lifetime-of-an-asphalt-shingle-roof.png 1000 1500 Arocon https://www.aroconllc.com/wp-content/uploads/2024/09/arocon-logo.webp Arocon2024-11-21 08:00:092025-09-02 15:16:51Understanding the Lifetime of Asphalt Shingle Roof: What to Expect
A professional roofer assessing a roof for potential shingle replacement

Best Shingle Removal Techniques for Homeowners

Looking to remove shingles from your roof? In this guide, you’ll learn when to replace your shingles, what tools you’ll need, and the exact steps to take for a safe and efficient shingle removal.

Key Takeaways

  • Replace roof shingles if you see signs like curling edges, bald spots, or cracks.

  • Gather essential tools like a roofing shovel and safety gear for a smooth removal process.

  • Proper disposal and cleanup of old shingles are crucial for safety and environmental reasons.

When to Replace Your Roof Shingles

A roof showing signs of wear and old shingles indicating the need for replacement

Recognizing the right time to replace your roof shingles is key to keeping your home in good condition. One of the first signs to look out for is curling edges or cupping tabs on your existing shingles. These signs indicate that the shingles are no longer providing adequate protection and need to be replaced. Bald spots caused by missing granules are another telltale sign that your shingles have seen better days and are due for a replacement.

Cracked shingles are also a clear indicator that it’s time to take action. If your roof is at least 20 years old, it might be nearing the end of its lifespan, especially if it appears worn or damaged. Observing neighbors replacing their roofs might indicate that your roof is also due for replacement.

Water damage, missing shingles, and granule loss are serious issues that should not be ignored. Additionally, moss growth, particularly in shady areas, can trap moisture against the shingles underneath, leading to long-term damage. Monitoring these indicators will guide you on when to begin removing your shingles.

Essential Tools and Materials for Shingle Removal

Essential tools for the shingle removal process including a roofing shovel and safety gear

Gathering the proper tools and materials is a must before starting the shingle removal process. Key tools include a roofing shovel, pry bar, and specialized modified shovel-type tools. Power saws with demolition blades and lightweight tear-off spades can also make the job easier and more efficient.

Safety is paramount when working on a roof. Wear thick-soled shoes or boots with good grip, work gloves, and safety goggles for protection during removal. Long pants and a safety harness are also recommended to enhance safety while on the roof.

Additionally, tarps and sheets of plywood can help protect your property from falling debris. Having these shingle removal tools on hand will ensure a smoother and safer project.

Preparing Your Property for Shingle Removal

Preparation is key to a successful shingle removal project. Start by laying tarps over shrubs and other landscaping elements to protect them from falling debris. Removing outdoor furniture and decorations will also prevent any accidental damage during the removal process.

It’s also crucial to check for any overhead power lines that could pose hazards during the project. Securing ladders and tools properly minimizes the risk of accidents.

Using roof jacks can help catch falling shingles and enhance safety. Notify neighbors about your roofing project to reduce disruptions and keep them informed. With these preparations, you’ll be ready to tackle the shingle removal process effectively.

The Step-by-Step Shingle Removal Process

A roofer demonstrating the step-by-step shingle removal process on a sloped roof

Embarking on the shingle removal process can be daunting, but breaking it down into manageable steps makes it more approachable. This section will guide you through starting at the ridge caps, removing shingles in sections, and inspecting and removing flashing.

Adhering to these detailed steps ensures an efficient and safe removal process.

Start at the Ridge Caps

Begin the shingle removal process at the ridge caps to set the stage for a systematic approach. Using a roofing tear-off shovel, begin prying the ridge caps loose. This tool is specifically designed to make the task easier and more efficient.

Once you’ve pried the ridge caps loose, allow them to slide down towards the roof jacks. This method helps manage the shingles and prevents them from causing damage or creating a mess. Starting at the top and working downwards helps you maintain better control.

Remove Shingles in Sections

After dealing with the ridge caps, the next step is to remove shingles in sections. Start with the shingles adjacent to the ridge caps to keep the process organized. Shingles should be removed in manageable 2 to 3-foot sections to maintain safety and order.

Begin at the top of the roof and proceed downwards, removing each shingle with care. Repeat this process until all the shingles are detached. Removing shingles from the area farthest from the garbage bin facilitates easier and more efficient disposal. This method ensures a systematic approach, reducing the risk of accidents and debris buildup.

Inspect and Remove Flashing

Inspecting and removing flashing is a crucial part of the shingle removal process. Check the condition of the roof flashing for any signs of wear, such as rust, cracks, or corrosion. If the flashing is damaged, use a pry bar to remove it carefully.

For valley and vent flashing, start at the top and pry it loose, moving downward. If the flashing is free of cracks and rust, it can be reused with new shingles. However, if it’s heavily corroded, it’s best to replace it to ensure a better seal.

Inspecting and removing flashing correctly prevents future leaks and extends your new roof’s lifespan.

Cleaning Up After Shingle Removal

Cleaning up roofing debris after shingle removal, showcasing a clean work area

Post-removal cleanup is just as critical as the shingle removal process itself. Start by sweeping the roof clean with a push broom or blower to clear debris before it rains. This step will prevent any leftover material from causing issues once the new shingles are installed.

Use a magnetic wand or broom to effectively collect stray nails from both the roof and the ground. Cutting the grass shorter before beginning the project can also make it easier to spot fallen nails. Cleaning up all nails and debris ensures your yard remains safe for children and pets.

A thorough cleanup will set the stage for a smooth installation of new roofing materials.

Disposal of Old Shingles

Disposing of old shingles properly is essential for both environmental and safety reasons. Renting a dumpster is a convenient option that provides an organized and efficient disposal process. Alternatively, recycling centers offer an environmentally friendly way to dispose of old asphalt shingles.

It’s also possible to donate usable shingles if they are clean and properly bagged to meet specific organization requirements. Before disposing of old shingles, check for asbestos, especially in older asphalt shingles, to ensure compliance with safety regulations.

Adhering to local regulations and guidelines is essential for proper disposal. Some landfills have designated areas for construction debris like shingles.

Installing Ice and Water Barriers

Installing ice and water barriers is vital to protect your roof from leaks and water damage. Barriers should be installed in valleys and around chimneys. They should also be placed near skylights and other protruding roof features. Unroll the barrier in sections, extending it beyond the existing barrier by a few inches to ensure an effective seal.

If removing an old barrier is difficult, a new layer of leak barrier can be installed over the existing one. Inspect flashing for wear during this process, as damaged flashing can lead to leaks if not replaced.

Using compatible materials avoids potential staining and compatibility issues. Proper installation of ice and water barriers will enhance your roof’s durability.

When to Consider Hiring a Professional Roofer

A professional roofer assessing a roof for potential shingle replacement

While removing old roof shingles is a task that many homeowners can handle themselves, there are times when hiring a professional roofer might be the best choice. If you have safety concerns or are not confident about working on your roof, it’s advisable to seek professional help. A professional roofer can ensure the job is done correctly and safely.

Factors that influence the cost of professional shingle removal include the size of the roof, type of shingles, local labor rates, and the roof’s style. By considering these factors, homeowners can make an informed decision about whether to tackle the project themselves or hire a roofing contractor.

Sometimes, professional help is worth the investment for peace of mind and quality work.

Summary

To sum up, knowing the best shingle removal techniques can empower homeowners to take control of their roofing projects. From identifying when to replace your roof shingles to gathering essential tools, preparing your property, and following a step-by-step removal process, each step is crucial for a successful project.

Whether you decide to tackle the project yourself or hire a professional roofer, the knowledge gained from this guide will serve you well. Remember, a well-maintained roof not only protects your home but also enhances its value. Take the first step towards a better roof today!

Frequently Asked Questions

What are the signs that it’s time to replace my roof shingles?

If you see curling edges, bald spots, or cracked shingles, it’s probably time to replace your roof shingles. Also, if your roof is over 20 years old, don’t wait too long, especially if others in your neighborhood are doing the same!

What tools do I need for shingle removal?

You’ll need a roofing shovel, pry bar, power saws with demolition blades, thick-soled shoes, work gloves, safety goggles, and tarps for shingle removal. Make sure you’ve got all these tools handy for a smooth job!

How should I prepare my property for shingle removal?

To get your property ready for shingle removal, lay tarps over shrubs, clear away outdoor furniture, and make sure to board up any windows. Don’t forget to check for overhead power lines and secure all your ladders and tools!

How do I dispose of old shingles?

You can get rid of old shingles by renting a dumpster, recycling them at designated centers, or donating usable ones. Just remember to check for asbestos in older shingles to stay safe!

When should I hire a professional roofer?

You should hire a professional roofer if you’re feeling unsure about the project, have safety concerns, or if it’s just a big job that’s way over your head. It’s better to get the pros in and ensure it’s done right!


https://www.aroconllc.com/wp-content/uploads/2024/11/A-professional-roofer-assessing-a-roof-for-potential-shingle-replacement.png 1000 1500 Arocon https://www.aroconllc.com/wp-content/uploads/2024/09/arocon-logo.webp Arocon2024-11-19 08:00:042025-09-02 15:22:27Best Shingle Removal Techniques for Homeowners
Page 5 of 8«‹34567›»

Pages

  • Aberdeen, MD Metal Roofing Services
  • About Us
  • Alexandria, VA Roof Inspection Services
  • Annapolis, MD Metal Roofing Services
  • Arocon Roofing Landing
  • Bel Air, MD Metal Roofing Services
  • Blog
  • Bowie, MD Metal Roofing Services
  • Brand Gallery template
  • Cambridge, MD Roof Inspection Services
  • Cambridge, MD Slate Roofing Services
  • Careers
  • Cedar Roofing Service
  • Claims
  • Columbia, MD Metal Roofing Services
  • Commercial Roofing Services
  • Commercial Roofing Services Alexandria, VA
  • Commercial Roofing Services In Cambridge, MD
  • Commercial Roofing Services In Rehoboth Beach, DE
  • Commercial Roofing Services In Westminster, MD
  • Composite Siding Services
  • Composite-tile Roofing Services
  • Contact
  • Door Installation
  • Ellicott City, MD Metal Roofing Services
  • Expert Slate Roofing Services in Alexandria, VA
  • FAQS
  • Feedback
  • Financing
  • Frederick, MD Metal Roofing Services
  • Gutter Guard Services
  • Gutter Installation Services
  • Gutter Services
  • Hampstead, MD Metal Roofing Services
  • Home
  • Home Confidence Plan
  • Home Insulation
  • Laurel, MD Metal Roofing Services
  • Lower Delaware
  • Manchester, MD Metal Roofing Services
  • Metal Roofing Alexandria, VA
  • Metal Roofing Services
  • Metal Roofing Services Cambridge, MD
  • Mount Airy, MD Metal Roofing Services
  • Northern Virginia Service area
  • Opt-out preferences
  • Our Team
  • Potomac, MD Metal Roofing Services
  • Privacy Policy
  • Professional Gutter Cleaning Services
  • Qualify
  • Rate Us
  • Rehoboth Beach, DE Metal Roofing Services
  • Rehoboth Beach, DE Roof Inspection Services
  • Rehoboth Beach, DE Roof Repair Services
  • Rehoboth Beach, DE Roofing Services
  • Rehoboth Beach, DE Shingle Roofing Services
  • Rehoboth Beach, DE Slate Roofing Services
  • Review Feedback Form
  • Reviews
  • Rockville, MD Metal Roofing Services
  • ROOF & GUTTER TUNE-UP
  • Roof Inspection
  • Roof Maintenance Services Cambridge, MD
  • Roof Maintenance Services in Alexandria, VA
  • Roof Maintenance Services in Rehoboth Beach, DE
  • Roof Maintenance Services in Westminster, MD
  • Roof Repair
  • Roof Repair Cambridge, MD
  • Roof Repair Lower Delaware
  • Roof Repair Services Alexandria, VA
  • Roof Replacement Cambridge, MD
  • Roof Replacement Lower Delaware
  • Roof Replacement Services
  • Roof Replacement Services in Alexandria, VA
  • Roof Replacement Services in Rehoboth Beach, DE
  • Roof Replacement Services in Westminster, MD
  • Roofing
  • Roofing Company in Alexandria VA
  • Roofing Company in Cambridge MD
  • Roofing Company in Rehoboth Beach, DE
  • Roofing Company in Westminster, MD
  • Roofing Lower Delaware
  • Roofing Services Alexandria, VA
  • Service area
  • Services
  • Shingle Roofing Alexandria, VA
  • Shingle Roofing in Maryland and Virgina
  • Shingle Roofing Services In Cambridge, MD
  • Siding
  • Siding Replacement
  • Silver Spring, MD Metal Roofing Services
  • Skylight Installation
  • Slate Roofing Services
  • SMS Terms and Conditions
  • Storm Damage
  • Template – Door Brands
  • Template – Gutters Brands
  • Template – Labor Day Banner
  • Template – Roofing Brands
  • Template – Siding Brands
  • Template – Skylight Brands
  • Template – Window Brands
  • Template_Alexandria_Service_Block
  • Template_Cambridge_Service_Block
  • Template_Certification
  • Template_Finance_Banner
  • Template_Our_Process
  • Template_Our_Work
  • Template_Overall_Service_Block
  • Template_Rehoboth Beach, DE_Service_Block
  • Template_Review_Section
  • Template_Westminster_Service_Block
  • Terms and Conditions
  • Towson, MD Metal Roofing Services
  • Trusted Roofing Services in Cambridge, MD
  • Westminster, MD Metal Roofing Services
  • Westminster, MD Roof Inspection Services
  • Westminster, MD Roof Repair Services
  • Westminster, MD Roofing Services
  • Westminster, MD Shingle Roofing Services
  • Westminster, MD Slate Roofing Services
  • Window Installation

Categories

  • Design & Inspiration
  • Energy Efficiency & Sustainability
  • Gutters
  • Home Improvement
  • Maintenance & Repairs
  • Roofing
  • Siding
  • Skylight
  • Windows & Door

Archive

  • July 2026
  • June 2026
  • May 2026
  • April 2026
  • March 2026
  • February 2026
  • January 2026
  • December 2025
  • November 2025
  • October 2025
  • September 2025
  • August 2025
  • July 2025
  • June 2025
  • May 2025
  • April 2025
  • March 2025
  • February 2025
  • January 2025
  • December 2024
  • November 2024
  • October 2023
  • August 2022
  • June 2022
  • April 2022
  • February 2022
  • August 2021
  • June 2021
  • April 2020
  • March 2020
  • January 2020
  • December 2019
  • November 2019
  • November 2018
  • September 2018
  • June 2018
  • May 2018
  • February 2018
  • December 2017
  • September 2017
  • August 2017
  • September 2016
  • August 2016
  • August 2015
  • August 2014
  • October 2013
  • August 2013
  • August 2012
  • August 2011
  • August 2010
  • August 2009
  • August 2008

Service Areas


Westminster, MD


Cambridge, MD


Alexandria, VA


Rehoboth Beach, DE

arocon logo

Licenses

  • MHIC: 161926
  • VA: 2705193848
  • DC: 170957900
  • PA: 196386
  • NJ: 13VH13509200
  • DE: 2024713003

Services

  • Roofing
  • Maintenance Plans
  • Gutters
  • Siding
  • Windows
  • Skylights

Company

  • Team
  • Reviews
  • Financing
  • Blog
  • Careers
  • Contact
Make A Payment

101 R John Street
Westminster, MD 21157
(410) 861-6767

109 Brohawn Ave, #111
Cambridge, MD 21613
(443) 487-6455

950 N Washington St
Alexandria, VA 22314
(571) 349-9111

AROCON Roofing & Construction LLC © 2026 All Rights Reserved. Proudly serving the Mid Atlantic Region | Privacy Policy

  • Link to Facebook
  • Link to Instagram
  • Link to Youtube

© Copyright - Arocon Roofing and Construction - Enfold WordPress Theme by Kriesi
Scroll to top